Camera Control Operation
Last update: July, 2024
- Scenario: i-PRO Maximizer enables the following operations to control the camera on the XProtect Smart Client. Additionally, it is possible to select commands to display on the XProtect Smart Client.
- Manual/Auto focus
- Auto pan (start/stop)
- Auto tracking (start/stop/lock on target and start)
- Change image scene file
- Enable/Disable AI Privacy Guard
- User-defined (custom) CGI events
1. Setup using "i-PRO Settings Plug-in for Milestone XProtect": Set up AI Application
2. Setup in XProtect Management Client: Enabling Commands to Display in XProtect Smart Client
3. Control Camera Operation in XProtect Smart Client: Operate the target cameras on XProtect Smart Client
Note: refer to the following page for User-defined (custom) CGI events.
Camera control User Defined CGI | i-PRO Products
- i-PRO Maximizer: Please see the following page for an overview of i-PRO Maximizer.The installer and installation manual can be downloaded from [HOW TO INSTALL] on the following page.
i-PRO Maximizer (milestonesys.com)
The following describes how to enable and disable Privacy Guard as examples.
1. Setup using "i-PRO Settings Plug-in for Milestone XProtect"
Configure the settings for AI Privacy Guard using i-PRO Settings Plug-in for Milestone XProtect.
Please download and install i-PRO Settings Plug-in for Milestone XProtect from the link below.
The initial startup procedure for i-PRO Settings Plug-in for Milestone XProtect should be consulted by referring to steps 1 to 6 of the <Setup using "i-PRO Settings Plug-n for Milestone XProtect"> in AI VMD.
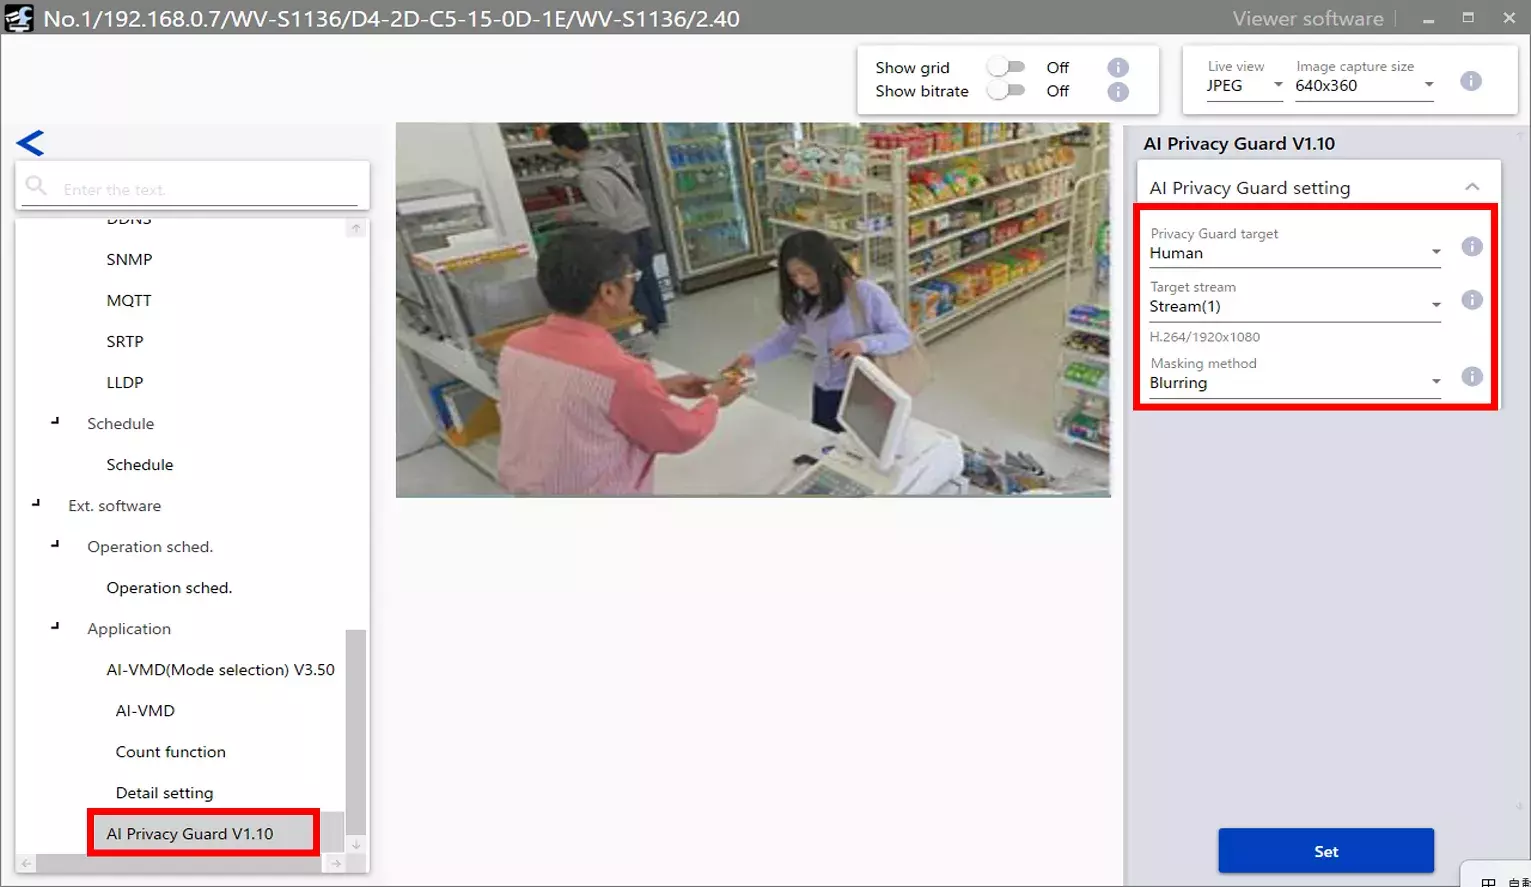
1-1. Click on Application - AI Privacy Guard.
Set up the AI Privacy Guard.
Target (Face or Human),Target Stream, Masking method (Blurring or Block)
2. Setup in XProtect Management Client
Enabling Commands to Display in XProtect Smart Client
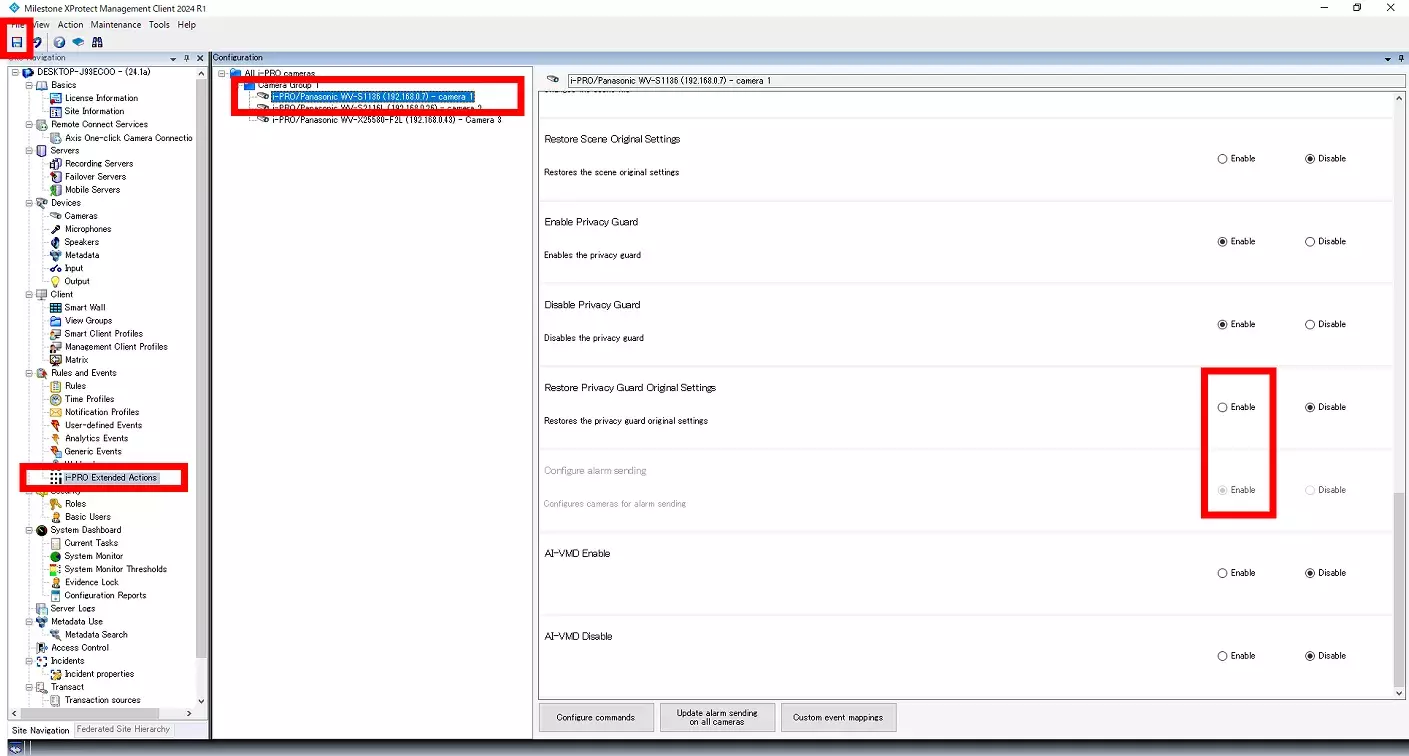
2-1. "Open the [Rules & Events] - [i-PRO Extended Actions].
Select the target camera. "
Select Enable for "Enable Privacy Guard" and "Disable Privacy Guard".
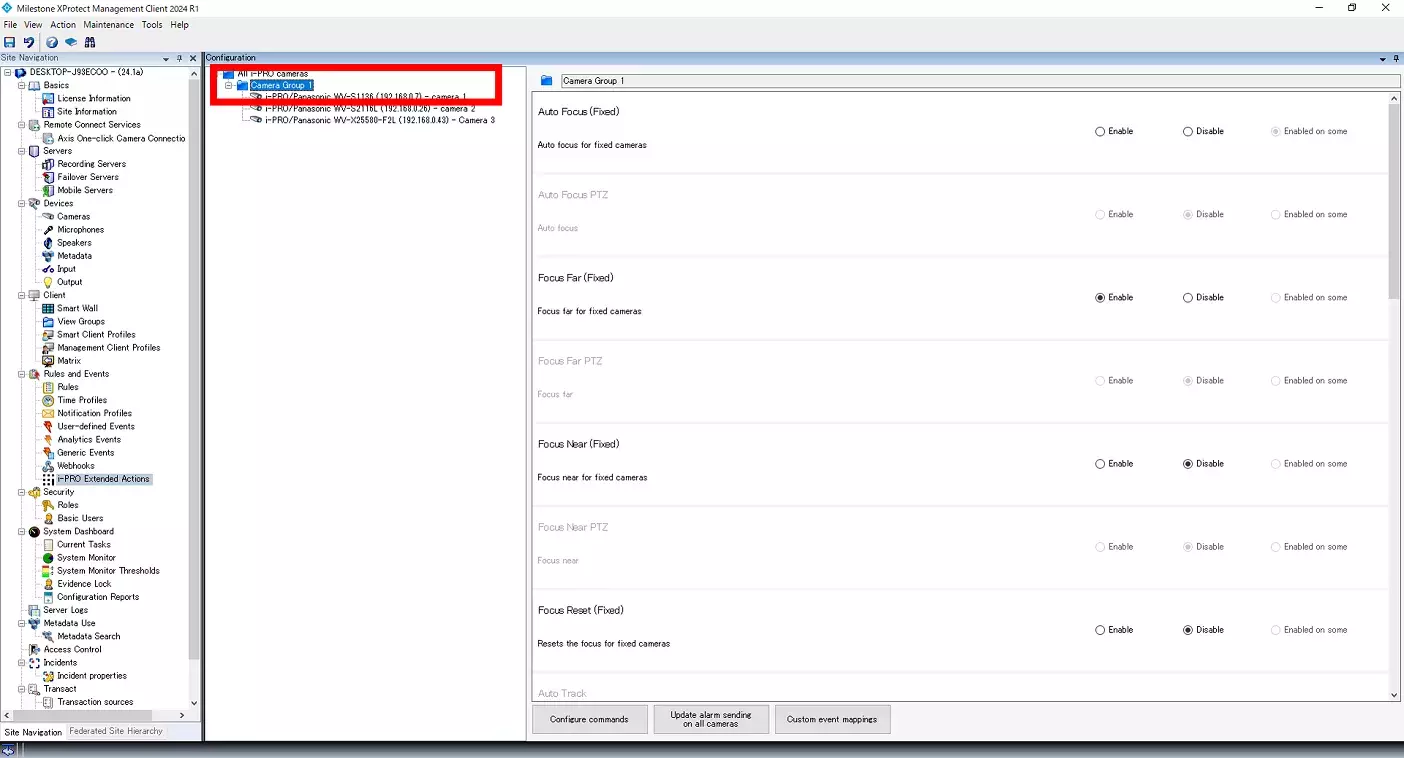
By selecting a group, you can enable multiple cameras at once.
Finally, click the save button.
3. Control Camera Operation in XProtect Smart Client
Restart the XProtect Smart Client.
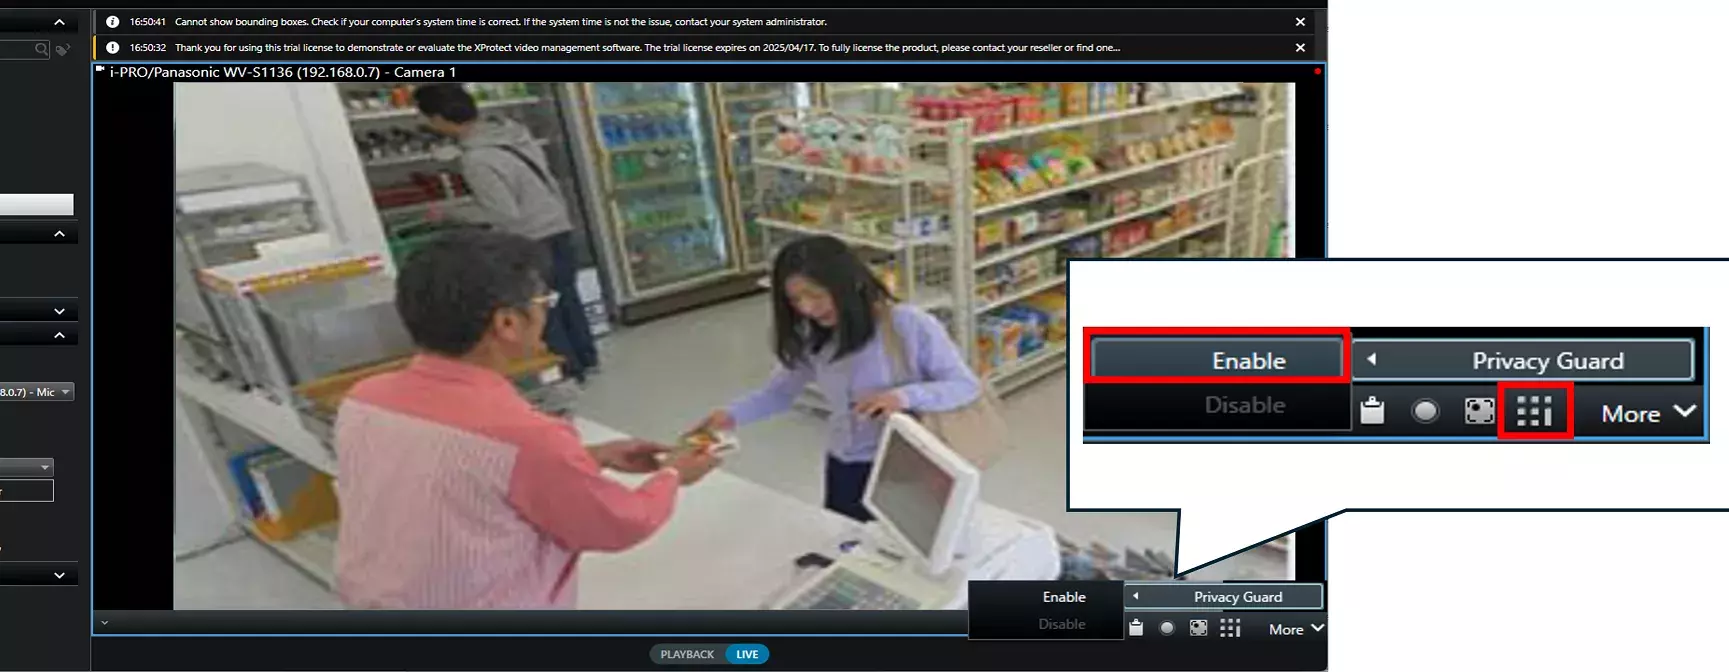
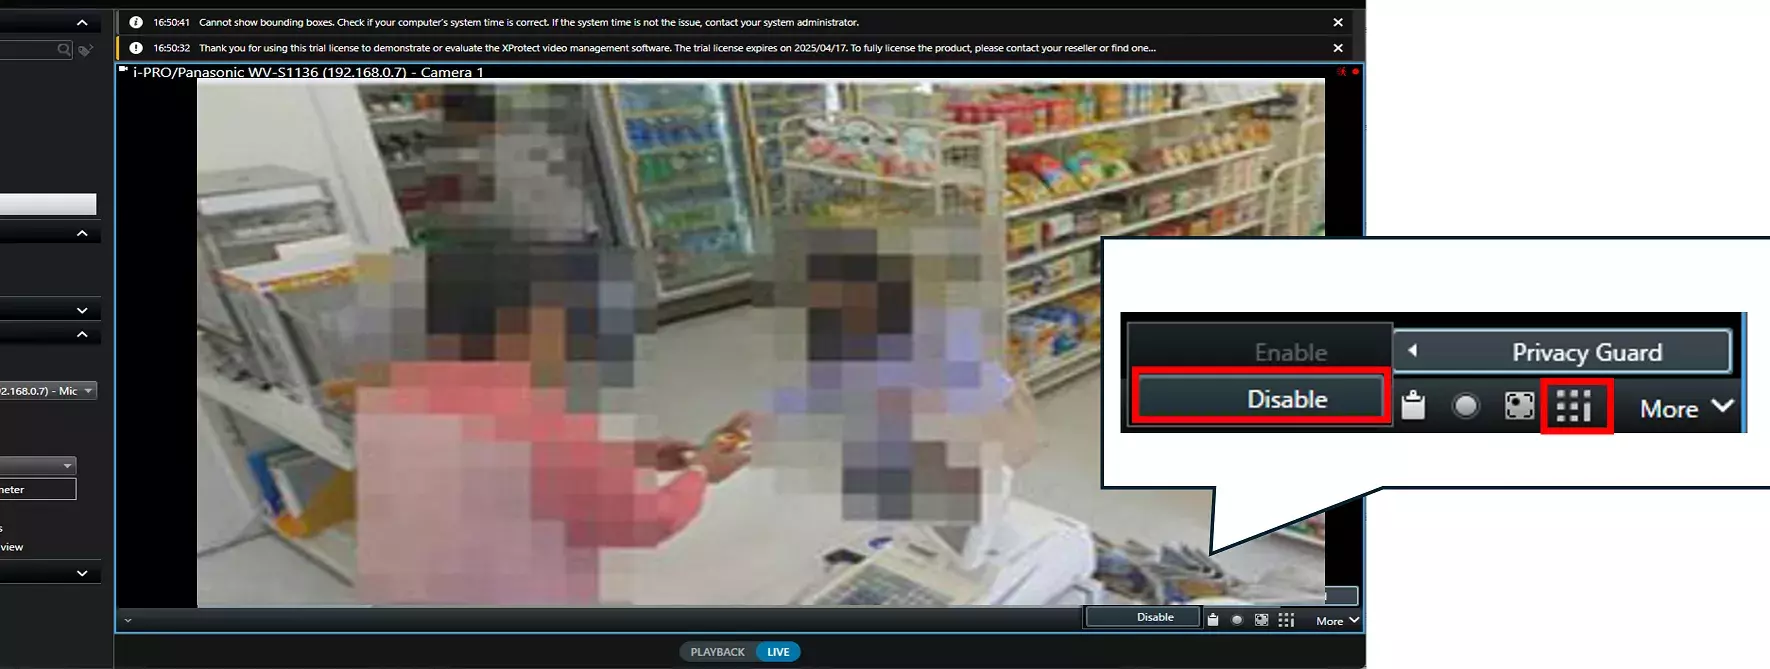
Click on the i-PRO Maximizer icon at the bottom right of the live screen of the target camera.
If PrivacyGuard is disabled, "Enable" will be selectable.
If PrivacyGuard is enabled, "Disable" will be selectable.
You can switch PrivacyGuard on or off while viewing the current live screen.
Milestone XProtect Management Client 2023 R3 /DP 13.0a
i-PRO Maximizer 1.0.1