How to Upgrade the recorder
Index
WJ-NV200 update Procedure
1, From SD Memory Card
2, From Browser "Setup-menu" Screen
3, From Browser "CGI" Screen
WJ-ND400 update Procedure
1, From Browser "CGI" Screen
WJ-HD616/716 update Procedure
1, Insert SD Memory Card
2, Update firmware from "Maintenance" Menu
3, End of procedure
4, Confirm the upgrade result
WJ-NV200 update Procedure
1, From SD Memory Card
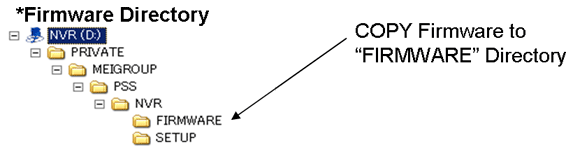
1-1 Copy Firmware to "FIRMWARE" Directory in SD Memory
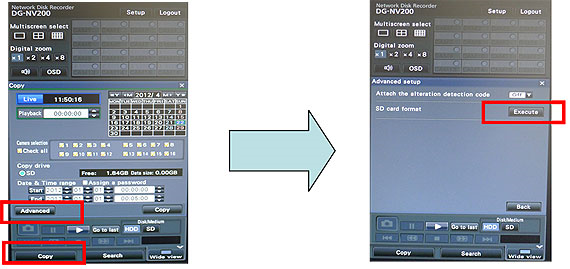
(Before use SD Memory, Need to Format by NV200
*SD Memory Format [ Main Menu ] - [ COPY ] - [ Advance Setup ] - [ SD Memory Format ]
1-2 Select "Firmware update " in [ Main Menu ] - [ Setup ] - [ Maintenance ] - [ System Management ]
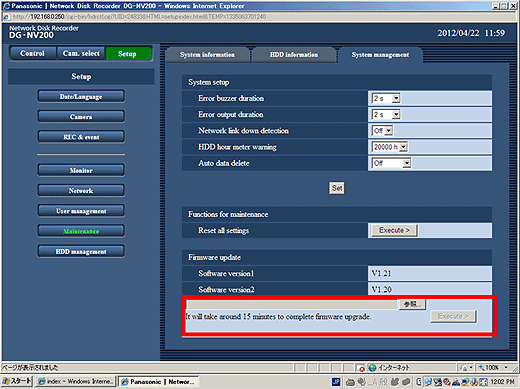
2, From Browser "Setup-menu" Screen
2-1 Access to WJ-NV200 using PC Browser
2-2 Move to Firmware update menu [ Main Menu ] - [ Setup ] - [ Maintenance ] - [ System Management ]
2-3 Select Firmware and Execute
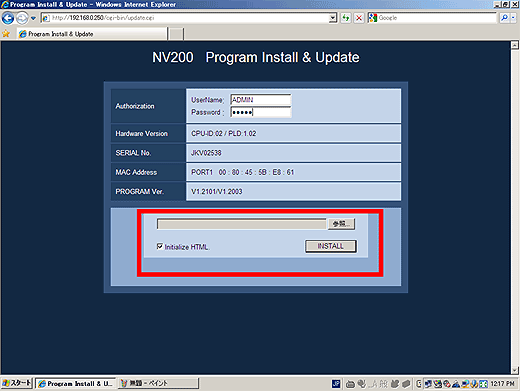
3, From Browser "CGI" Screen
3-1 Enter "http://IP Address /cgi-bin/update.cgi"
3-2 Select Firmware and Execute
WJ-ND400 update Procedure
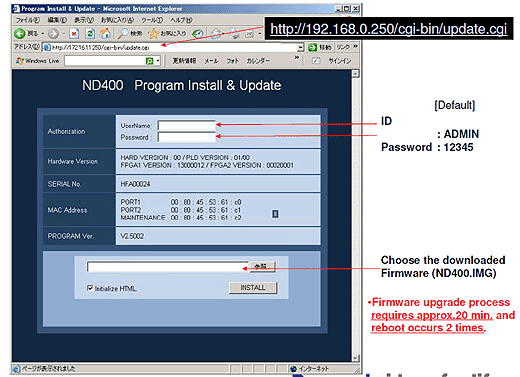
1, From Browser "CGI" Screen
1-1 Enter "http://IP Address /cgi-bin/update.cgi"
1-2 Enter ID/PW of recorder
1-3 Select Firmware and Execute
WJ-HD616/716 update Procedure
1, Insert SD Memory Card
Insert SD Memory Card into the SD Memory Card slot on front panel.
2. Update firmware from "Maintenance" Menu
2-1 Press [SETUP/ESC] button for 2 seconds or more to open Setup Menu
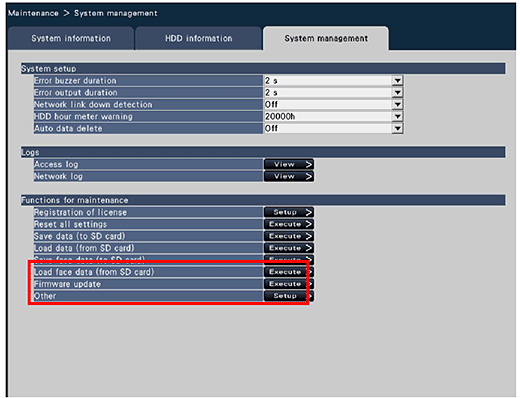
2-2 Open the following [ Maintenance ] and [ Settings Management ] window by using cursor operation buttons such as[ ![]() ] , [ SET ] and [ ESC ] button.
] , [ SET ] and [ ESC ] button.
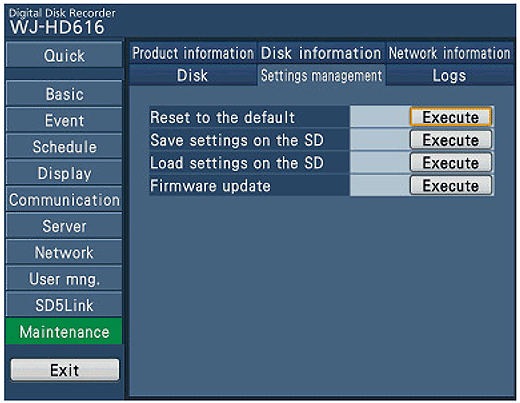
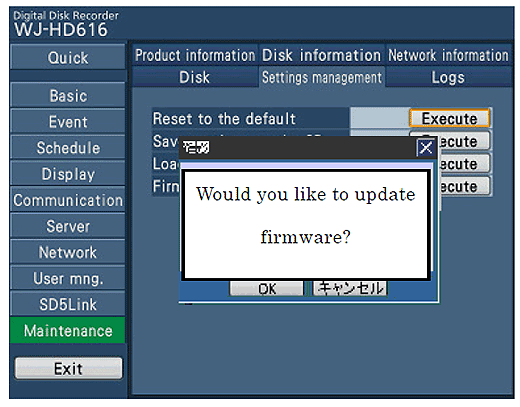
2-3 Move the cursor to [ Execute ] of [ Firmware Update ] and press the [ SET ]button.
2-4 Move the cursor to [ OK ] and press [ SET ] button on the "Confirmation" window as below image.
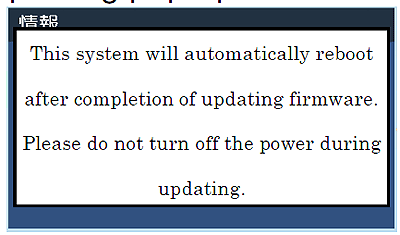
2-5 Setup Menu closes automatically and "Upgrading" is displayed on pop-up window like below image. At the same time, both green and orange color LED of CH1 - 16 buttons starts blinking.
3. End of procedure
After LED stops blinking, HD616/HD716 will reboot automatically. The "SplashScreen" will appear and operating window follows.

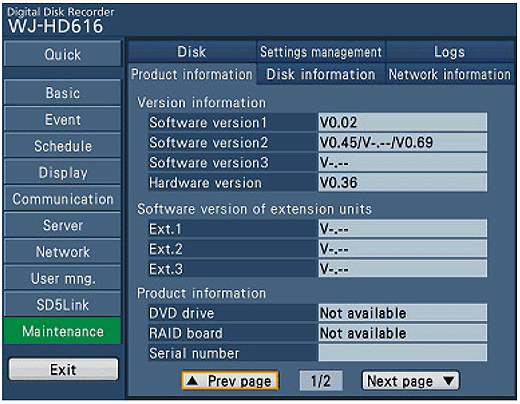
4. Confirm the upgrade result
4-1 Click "Setup" tab, then [Maintenance] menu will appear, and select [Product Information].