VMS Frequently Asked
Questions

Product Questions
Describe how “fail over” architecture could be implemented and resulting equipment requirements in a data center. In this case if a local VMS server failed how would that be sensed, and the recording
The Video Insight Server supports automated Failover at no additional software cost. A standalone server or a virtual OS can be configured at one or multiple of the locations running Video Insight Server in a Failover Mode. This Failover monitors the other servers via the SQL Server Database. Within one minute of an outage, the Failover Server will inherit all the cameras and configuration settings of a failed server. Recordings can be saved to a shared storage of failover storage and can be easily merged back into the production server upon repair. Client applications will see the Failover server as dormant until activation.
XML Backup
When exiting the application, each server executes a backup routine that creates XML file with a complete set of all information required for restoring a server. This file is used in the event a Server tries to restart and is unable to read the SQL database. This failover can prove very useful in the event of database corruption to ensure the system is recording and providing client’s access. When the system is unable to read the database and uses the XML file, the system is in a degraded mode and no changes can be made to the system until the database connection is restored.
It is anticipated that ONVIF Profile S compliant cameras will be selected for use with this platform. Describe your compatibility with such cameras
Video Insight offers complete ONVIF Profile S support. We also provide direct camera support in case the cameras offer functionality not supported via Profile S. The current release provides direct support for 3,200 cameras from 120 manufacturers including H.264, MPEG-4, MJPEG, Wavelet, MxPEG and JPEG2000. As a Video Management System, new cameras are added to the application on a weekly basis and support can be requested for base level or advanced features at no charge. For cameras not specifically listed in our supported cameras or supported by ONVIF and PSIA, Video Insight supports generic drivers for both RTSP and HTTP streams that work with most cameras.
Describe how using appropriate security, video images can be made available to iPads, smart phones and similar devices
Video Insight provides an app, at no additional cost for both the Android and iOS platforms. The app is an easy to use, native app for both Apple iOS and Android, providing users access to all cameras and servers for a single IP address with pre-defined layouts. Following each device’s standard menu, users of phones and tablets find the design intuitive, requiring little training while providing easy access to full resolution live and recorded video, facility maps, layouts, and alarms. Available free of charge on iTunes and Google Play, all types of authorized users can benefit from the mobile app’s easy access to live and recorded video.
Notable Features:
- Digital PTZ of live and recorded
- Live and Recorded video from any server
- View cameras in layouts
- Facility Maps with image thumbnails
- Very high frame rates with H.264 streaming
- Dynamic image sizing for bandwidth and device capabilities
- Active Directory authentication
- View Alarm log
- View Motion alarm and associated video
- Cache server and camera settings on device for faster performance
- Support for public and private IP addresses for each server
- Control PTZ cameras
- Keep aspect ratio of high resolution images
- Automatically import all servers and cameras
- Email or Save Snapshots
System Specifications:
Apple iOS 5, 6 and Support for 7 at launch of iOS7 tablets and phones
Android v4 or higher for best performance
Describe video evidence may be exported in a manner satisfactory to local law enforcement, e.g watermarking, hashing etc.
Images received are stored with a date/time stamp and an index. This information is saved to the SQL database and into a file saved in the storage system. When users export a clip, the request is logged in the database. Each clip includes a visible watermark, a date/time stamp from the Servers’ time and industry standard MD5 Hash embedded in the clip. The clip can be exported in the cameras native compression or can be converted to MJPEG to ensure easy playback with any media player. For advanced functionality like frame by frame advancement, thumbnail viewing, the Video Insight Standalone Player can be included with the clip.
To verify the authenticity of the clip, the Standalone Player has an option to validate the embedded watermark.
For concerns relating to possible file tampering or deletion on the Server, Video Insight offers an extra layer of protection, with the option to stamp all video when received from a camera with a MD5 Hash. This process ensures that no video is tampered on the storage system however this process does require 10% increase in CPU utilization.
Describe the method and pricing structure for the addition of individual users. i.e. Add a workstation, install client software on a user's existing PC, web browser based etc.
Video Insight does not require a client license, so users using the Monitor Station, Web Client, or the mobile clients for Android and iPhone do not generate any additional costs. An unlimited number of users are allowed to connect to any server.
Integration Questions
General SQL Information
Solution:
- During every Video Insight installation a unique Server ID is created in the registry and Database. Changing the server name will not affect the SQL database connection.
- It is always good practice to back up your SQL database when making major changes to ensure Video Insight information is not lost. This backup can also be used if the Server ever needs to be replaced or reformatted. Backup and Restore procedures can be found on our public facing KB site www.video-insight.com/kb along with many other topics.
- Video Insight uses SQL Express. The max file size of the SQL database is 10GB. For licensed versions of SQL there is no inherent limit to the DB size. Keep in mind that your database should never grow to 10GB.
- Video is never stored within a SQL database.
- All Video Insight passwords are encrypted inside the SQL database.
- If the SQL Service that a Video Insight server is connected to happens to stop running, the Video Insight Monitor station will not be able to authenticate users as it will still try to check the SQL database for VI permissions.
- If the SQL Service that a Video Insight server is connected to happens to stop running, web client will not work and typically an SQL error will be presented in the browser when trying to connect.
- The default instance that Video Insight uses to connect to the SQL database is MSSQLSERVER set with mixed mode with an SA account and password.
- SQL Express and SQL Management Studio downloads can be found at www.downloadvi.com under Tools/Utilities.
Why Do I Have Corrupt Files and/or Directories or Large Files?
Solution:
If this question applies then this could mean that there are issues with the storage drives that are being written to. In order to test if the number of videos that are written to a hard drive or RAID array will exceed the limitations of the hard drive or RAID array itself, see below on running Hard Drive Speed Test.
- The Hard Drive test tool can be found here: https://downloadvi.com/downloads/Utilities/HDSpeedTest.zip
-
Verify that IP Server service is OFF during the test so that the results can be reflected accurately.
- Right click on the IP Server icon in the lower right hand corner of the system tray
- Select “Stop IP Server”
- Remember to start the IP Server once done running tests
- Place the Hard Drive Speed test tool ON THE DRIVE or RAID ARRAY that is to be tested.
- Verify that the Administrator account is the account being used.
- Double click the Hard Drive speed test to run the application or Right click and run as administrator
- When the application runs enter the number of cameras that you have recording to the storage drives
- Enter the Frame rate at which the video is being recorded
- Choose the image size
- Choose the image format
- Browse to the storage directory
- Click Start
The application will simulate writing the same amount and size of data that is currently being written by the IP Server Manager.
Reading the Results
The goal is to have the Target values (Data Rate and Frame Rate) to be as close as possible to the Actual Values.
- If the Target Values are slightly higher than the Actual values, The hard drive could possibly be having issues handling the amount of data being written.
- If the Target Values are roughly 50% higher than the actual values then this could be an issue with network storage and bottlenecking.
- If the Target Values are roughly 75% higher than the actual values then the storage is possibly failing or could fail soon. Files or folders could be corrupt or no longer readable.
Web Client Connection Issues
Solution:
-
Internet Information Services not supported
In order to host Web Client, Internet Information Services must be added as a Windows Feature or Role. Professional or Enterprise versions of Microsoft OS are a required, as Home Premium versions do not come with IIS as a selectable component to install. -
Page Cannot Be Displayed – Internet Information Services Misconfigured
Default installations of IIS do not install all required components. With Windows Server 2008, Server 2008 R2, Windows 8, Server 2012, you must check the following under Application Development Features
.NET Extensibility
ASP
ASP.NET
ISAPI Extensions
ISAP Filters -
Page Cannot Be Displayed – Blank Screen – Web Client or IIS Not Installed
The default install for VI Enterprise will select Web Client as a component to install, if “Customize Install” has been selected and Web Client has been deselected it will not install the necessary components to access the Web Client login. Consequently, if IIS has not been installed as a feature, the same error message will be received. -
Page Cannot Be Displayed – 500.19 Error – Physical Path of Web Client incorrect
Check the physical path of the Default Website within IIS Manager. If the path points to a non-existing folder, try re-installing or correct the path name. This commonly happens when both 32- and 64-bit versions of Video Insight have been configured on the same machine. Note: This is not a recommended configuration. -
Page Cannot Be Displayed – 500.19 Error – Wrong .NET Framework Selected
VI Web Client 5.x currently uses .NET Framework 4, if the installation of Web Client did not update IIS to use the new .NET, manually assign this from a command prompt using the C:\Windows\Microsoft.NET\Framework64\aspnet_regiis.exe -i -c -
Page Cannot Be Displayed – 500.19 Error – Handler Mappings Locked at Parent Level
This can be caused by a settings conflict between IIS and an incorrect installation of Web Client, please uninstall VI Enterprise and reinstall. -
Windows Firewall is enabled
Windows Firewall may need to be disabled in order to get the camera stream. Please attempt to disable the firewall. -
Network Binding order incorrect
In setups with dual network cards, the user may have bound the Network Options in IP Server Manager to the wrong card. Please correct the selection. -
Port Issues
When accessing the Video Insight Mobile Client, 3 ports need to be forwarded from the external IP inside the router. These ports include 80, 4010, 4011 and should be forwarded to the internal IP address of the Video Insight Server. In rare cases, these ports are blocked by the Internet Service Provider and must be resolved before proceeding. To confirm the proper ports are open browse to canyouseeme.org and check the 3 ports listed above. -
Unable to Use High Speed Mode in IE
The user does not have the proper ActiveX permissions to install the High Speed Mode plug-in correctly. In the properties of Internet Options, navigate to the Security Tab. With Internet selected, choose Custom Level… and scroll down to the section which contains ActiveX Settings. Select Enable for all choices and click Ok. Restart Internet Explorer and attempt to use High Speed Mode.
Video Wall Issues
Solution:
-
Added layout to a screen but Video Wall is not working
Sometimes when changes are made, the Video Insight software may require for the services to be restarted. It’s good practice to restart the IP Service and Monitor station after making major changes like adding new monitors, changing layouts, etc. -
No Ability to Configure Video Wall
The registry key to enable Video Wall Support within a Monitor Station has not been added. This is a key which has to be manually entered into the Registry.
HKEY_LOCAL_MACHINE\SOFTWARE\Wow6432Node\Video Insight\Monitor Station\ Create a new Value underneath this registry key: SupportVideoWall = 1 -
Video Wall Monitor Objects not appearing in Monitor Station
Video Wall’s initial setup executable requires the ability to modify the registry, otherwise the settings will not hold when you are doing Configuration from Monitor Station. -
Video Wall’s Connection to DB Invalid
The credentials or IP address of the SQL Server housing the InsightEnt Database that the Video Wall needs to connect to is invalid.
How do I update or modify my serial number?
Solution:
Open the Server Manager. If already running, it can be found in the System Tray located in the lower right-hand corner of your display.
Right-Click on the Server Manager icon in the System Tray and select “Server Configuration.”
In the IP Server Manager window click “Update Activation.”
This will open the Update Activation Code window. From here you can update the Serial Number. Choose to update through the internet or activate by phone. Click “OK” to complete the activation and exit out of the window. Or Close to not save any changes and exit out of the window.
How do I designate a network card to listen for connections from the Monitor Station?
Solution:
If you have more than one Network Card (NIC) installed in your computer, you can use the Network Options to designate which one will listen for connections from the Monitor Station.

- Open the IP Server Manager and click Network Options.
- From the “Select Network Card” dropdown, pick the IP Address you want to listen for Monitor Station connections.
- Click OK when finished.
Troubleshooting No Live Video In Monitor Station
Solution:
If there is no live video when using version 5.5.x then it could be one of several things:
-
Password is not correct in our software
When unable to authenticate to get video, check the credentials for the camera and re-verify the username and password for the camera make / model. -
The wrong ports are being used to access the camera
Some cameras use alternate ports, or the user has configured traffic on their setup to only allow access for HTTP and RTSP on specific ports. Make sure these are the correct ports which have been set. Set this up in the camera properties under Alternate Ports. -
Trying to acquire the wrong stream
The stream is set to MJPEG, H.264, or MPEG and the profile is set to acquire a different stream by default than what the camera is putting out. Make sure that these match up in both the camera and inside of the camera properties of Monitor Station for Video Insight. -
Auto detected camera model is wrong
Auto Discovery was used to add the camera and it was set to ONVIF. Change the camera to the correct camera make and model within Monitor Station. -
Windows Firewall
Windows Firewall may be required to be disabled in order to get the camera stream. Please attempt to disable the firewall. -
Network Binding order incorrect
In setups with dual network cards, the user may have bound the Network Options in IP Server Manager to the wrong card. Please correct the selection and make sure the correct IP has been added in Monitor Station. -
Panamorph support is enabled when the camera does not have a panamorph lens
This option is located in optional controls within the camera properties. -
Advidia and Bridge Cameras, auto detect with the wrong credentials
Be sure when auto-detecting to change the username to admin from Admin. At times the auto detection will still detect using the improper credentials and they get saved that way if the cameras are added without changing the username. -
Advidia and Bridge Cameras have the wrong Server Port
The Port settings for Advidia / Bridge inside the camera’s network configuration should be. HTTP: 80, RTSP: 554, Server: 8000. Any changes to these could impede the connection to the camera and result in Live Video not showing in the Monitor Station.
Troubleshooting No Live Video in Web Client
Solution:
If there is no live video when using version 5.5.x Web Client then it could be one of several things. Prior to trying any of the below solutions make sure that live video is displaying on the Monitor Station from the Server if possible. If there are issues with Monitor Station at the Server, the Web client issue may not be specific to the Web Client. See other FAQ articles for those solutions.
-
Password is not correct
If security is enabled within Monitor station, then the Web client also requires a Password. Confirm the password and try connecting again. -
Trying to acquire the wrong stream
The stream is set to MJPEG, H.264, or MPEG and the profile is set to acquire a different stream by default than what the camera is putting out. Make sure that these match up in both the camera and inside of the camera properties of Monitor Station for Video Insight. -
Windows Firewall is enabled
Windows Firewall may be required to be disabled in order to get the camera stream. Please attempt to disable the firewall. -
Network Binding order incorrect
In setups with dual network cards, the user may have bound the Network Options in IP Server Manager to the wrong card. Please correct the selection. -
Port Issues
When accessing the Video Insight Web Client, 3 ports need to be forwarded from the external IP inside the router. These ports include 80, 4010, 4011 and should be forwarded to the internal IP address of the Video Insight Server. In rare cases, these ports are blocked by the Internet Service Provider and must be resolved before proceeding. To confirm the proper ports are open browse to canyouseeme.org and check the 3 ports listed above. -
Network Profile Not Set or Selected
Network profiles are necessary in order to help with external IP to internal IP translation of Web Client and Mobile client. Add a Connection Profile within Monitor Station by clicking Administration/Set up and configuration, click on Connection Profiles. Or set this in the Web Client under an Administrator login and set a specific Network Location for external users, specify the external IP to associate with the IP Enterprise Server. Once set, a user outside of the network should select this profile when logging in. Port forwarding is a prerequisite for this. -
Normal Speed and High Speed Mode
High Speed mode is often the preferred method of choice and only available at this time in Internet Explorer. It contains an ActiveX component which provides higher speed decoding, more effective use of bandwidth, and better quality images. If using a camera which is MJPEG only or incapable of dual streams, the camera may not be able to display in high speed mode. -
Advidia and Bridge Cameras have the wrong Server Port
The Port settings for Advidia / Bridge inside the camera’s network configuration should be. HTTP: 80, RTSP: 554, Server: 8000 any changes to these could impede the connection to the camera and result in Live Video not showing in the Monitor Station and Web client. -
Duplicate Server exists in the Database
Sometimes a duplicate or ghosted instance of a server with the same name can appear in the database. This may be caused by running initialization a second time by accident creating a twin copy of the server with the same name. Deleting this ghosted instance will correct the problem.
SQL install upgrade connection related issues
Solution:
-
Administrator Permissions to Install SQL
It is advised to be logged in with an administrator account while installing SQL and VI software. -
SQL Prerequisites vary with OS Version
Various OS versions have different prerequisites for installing SQL. For example, in Server 2003, Power Shell needs to be installed manually before SQL can be installed otherwise the setup will fail. Confirm all prerequisites prior to installation. -
Installing VI with an existing non-VI instance name or shared SQL instance
VI’s default SQL instance choice is MSSQLSERVER, however other instance names can be used. In order to load the VI database into the instance, vi.sql query will need to be run through SQL Management Studio against the SQL instance. This file can be located in C:\Program Files\VI Enterprise\SQL Files\. VI’s database can also be shared with a database instance that is running other apps using SQL, however the username and password must be correct and/or changed when prompted to connect to SQL in VI Initialization. -
Failover Configuration
VI’s failover component shares the InsightENT database which gets installed by VI.sql. The best practice is share the database on any machine running SQL Server which is also not running VI Enterprise in a non-failover capacity. -
Database Connect Error: SQL not in mixed mode authentication
While the VI batch file for SQL installation has all the switches necessary for basic settings that are needed, a manual install of SQL Server not using the batch file often has the user misconfiguring the type of authentication being used by the SQL instance. Mixed Mode Authentication is required for VI to work with SQL Server. -
Database Connect Error: Windows Firewall is On / SQL Port Blocked
SQL by default uses 1433, if this is being blocked or the port has been changed by the user to an alternate port, that port has to either be enabled, or the data connection string to account for the alternate port needs to be changed. IPADDRESS,PORT\INSTANCENAME -
Database Connect Error: Database is wrong version
When updating VI Enterprise, if the DB is not updated, manually run the VI.SQL file against the DB instance. This can often happen when the DB is installed on another machine other than the VI Server. -
Database Connect Error: SQL SA type account is locked
Ensure that the SA account or similar account of the same admin level is not locked. -
Database Connect Error: SQL Server Instance has a space in it
Try to avoid using or connecting to SQL instances which have special characters or spaces in the instance name. -
Database Connect Error: SQL Server Protocols must be enabled
SQL Server needs to have Named Pipes and TCP/IP as enabled protocols in SQL Configuration Manager.
Recording or Playback Issues
Solution:
-
Why do people suddenly appear or disappearing within the recorded video?
Within Monitor Station, the camera properties description contains two fields called “Pre-Motion” and “Post-Motion” buffer. Pre-motion and post-motion buffer settings will help capture the segment before and after a motion event ends. This could help mitigate the appearing / disappearing behavior. A second common problem is recording on “Motion Only” where the motion detection settings have not been properly configured. Verify that the camera motion settings are configured properly. -
I don’t think my motion settings are working
Camera motion detection hardware built into the camera is effective to about 30′ – 35′ on average. If the camera’s field of view is capturing motion events past this distance, adjustments to camera sensitivity will be required. Alternatively, adding an additional camera to cover this distance is recommended. -
No Recording – File Write Error
The destination where video files are being stored has become invalid. This can be due to improper file share permissions, a network connection which has been disconnected, not having write permissions to a Network Attached Storage device, or a failed Hard Drive. -
Recorded File Sizes too Large
The default for recorded files is 800 MBs, if the file size limit is surpassed it could indicate issues with the storage volume’s ability to handle the amount of data being sent to it. Another cause of this symptom is the write caching on a RAID volume being turned off; enabling write caching has been known to help with disk performance. -
Recorded Files Corrupted
The service has unexpectedly terminated and did not close the recorded footage gracefully. Using the file fixer to recover the video may resolve the issue; however, the root cause of the service termination will need to be troubleshot independently. -
Storage Volume Completely Full
In certain circumstances it is possible to completely fill up the hard drive before the VI Service can issue its deletion of oldest video command. Adjust the Reserve Disk Space for other Applications from the default value of 5 GB to something higher.
What if there’s no live video in the camera interface?
Solution:
-
The wrong ports are being used to access the camera
Some cameras use alternate ports, or the user has configured traffic on their setup to only allow access for HTTP and RTSP on specific ports. Make sure these are the correct ports which have been set. Set this up in the camera properties under Alternate Ports. -
Windows Firewall
Windows Firewall may be required to be disabled in order to get the camera stream. Please attempt to disable the firewall and try accessing the camera interface again. -
Firmware Upgrade Needed
Camera manufacturers will update their firmware from time to time and this could be causing issues with the camera. The camera may need to be upgraded to the latest firmware revision to restore camera functionality. Check the manufacturer’s website for new firmware releases. -
Not Enough Bandwidth
Megapixel cameras will consume bandwidth more than a 10/100 Mbps switch can handle. Please have these network considerations in mind when designing or upgrading the camera system. Cameras will cut in and out and may not ping correctly in this situation. -
Insufficient PoE Power
If the PoE switch is overloaded, this may result in cameras being unresponsive to pings or cutting in and out with live video. Check the power load of the PoE switch, otherwise try to alleviate the stress of power being consumed. -
VLAN Configuration
The inability to connect to a camera could be impeded by an improper VLAN setup which is filtering out Video traffic from reaching the VI Enterprise Server. -
Internet Explorer settings need to be changed
Try adding the camera to Trusted Sites, Compatibility View Settings, and enabling ActiveX to download unsigned controls. It may be best to reset all IE settings and even delete temp files first, then proceed with the above mentioned.
What do I do if no live video is being displayed in the Mobile Client?
Solution:
If there is no live video and using version 5.5.x Mobile Client then it could be one of several issues. Prior to trying any of the below solutions make sure that live video is displaying on the Monitor Station from the Server if possible. If there are issues with Monitor Station at the Server, the Mobile issue may not be specific to the Mobile device or App. See other FAQ articles for those solutions.
-
Password is not correct
If security is enabled within Monitor station, then the Mobile app also requires a Password. Confirm the password and try connecting again. -
Upgrade VI Mobile App
If an iPhone is being used and the IP Server is running 5.5.22 or higher try installing VI Mobile 2 as this is a requirement. The standard VI Mobile app will experience issues with 5.5.22 or higher versions of Video Insight software. Also, there will be periodic updates for both Android and Apple IOS platforms for the VI Mobile Client. Check to ensure all apps are up to date. -
Windows Firewall is enabled
Windows Firewall may be required to be disabled in order to get the camera stream. Please attempt to disable the firewall on the server or create exceptions for the default Ports; 4010/4011/80. -
Port Issues
When accessing the Video Insight Mobile Client, 3 ports need to be forwarded from the external IP inside the router. These ports include 80, 4010, 4011 and should be forwarded to the internal IP address of the Video Insight Server. In rare cases, these ports are blocked by the Internet Service Provider and must be resolved before proceeding. To confirm the proper ports are open browse to canyouseeme.org and check the 3 ports listed above. -
Network Profile Not Set or Selected
Network profiles are necessary in order to help with external IP to internal IP translation of Web Client and Mobile client. Add a Connection Profile within Monitor Station by clicking Administration/Set up and configuration, click on Connection Profiles. Or set this in the Web Client under an Administrator login and set a specific Network Location for external users, specify the external IP to associate with the IP Enterprise Server. Once set, a user outside of the network should select this profile when logging in. Port forwarding is a prerequisite for this. -
Duplicate Server exists in the Database
Sometimes a duplicate or ghosted instance of a server with the same name can appear in the database. This may be caused by running initialization a second time by accident creating a twin copy of the server with the same name. Deleting this ghosted instance will correct the problem.
How do I install the Video Insight IP Server?
Solution:
If you have a CD, it will normally auto start the installation for you. Or, you can Browse the CD and run the Setup.exe.
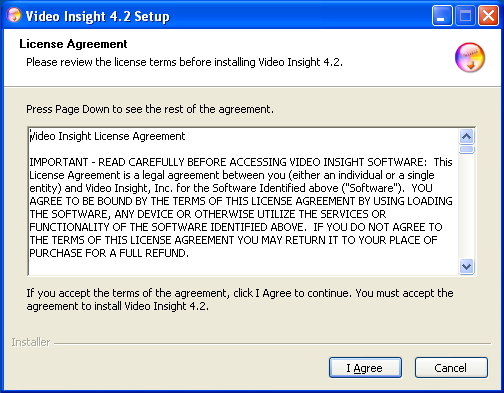
On the License Agreement screen click “I Agree” or “Cancel”
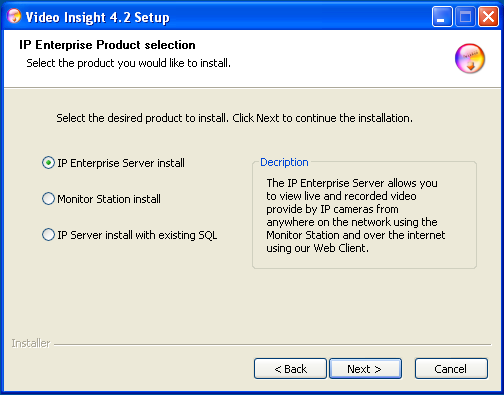
In the IP Enterprise Product Selection screen you can choose the type of install you want to perform. If you are installing the IP software for the first time on a clean system you will want to choose “IP Enterprise Server install.” This will also install the Microsoft SQL database engine. If you already have Microsoft SQL installed you will want to choose “IP Server install with existing SQL” and will also need to know the SA user’s password for your installation. If you already have IP Server installed and only want the Monitor Station then choose “Monitor Station Install.”
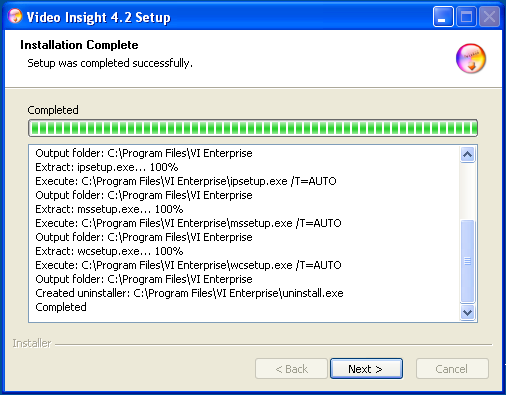
Once you have made your selection the software will start installing. You may see multiple windows popping up installing the different components. You will not have to do anything with these.
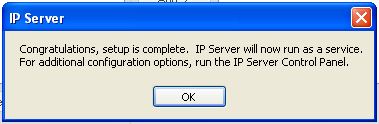
After all of the components are installed, you will come to the last screen stating that the IP Software has been installed.
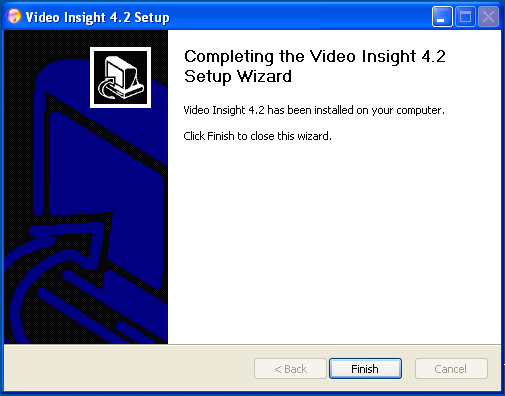
Click Finish.
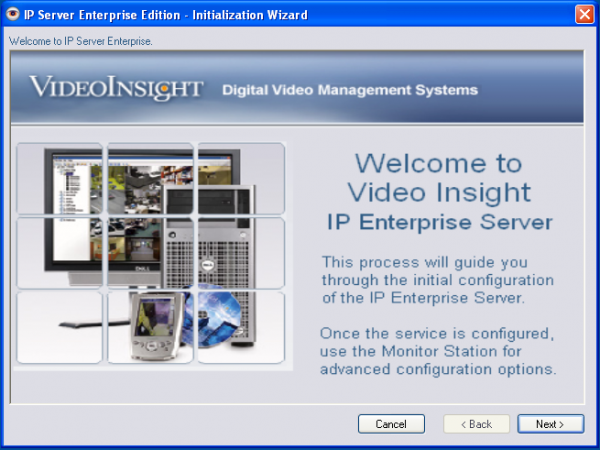
The Setup Wizard will walk you through the initial configuration of your IP Server.
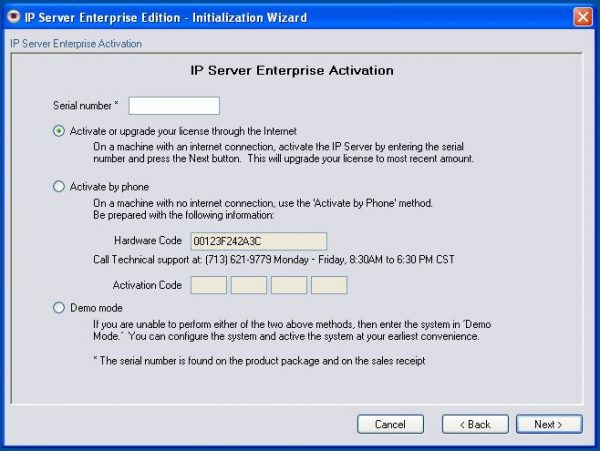
The serial number is located on the CD sleeve or on your invoice. It is a 5 character (alpha and/or numeric) value. You can activate over the Internet for your convenience or you can call our Technical Support and activate over the phone.
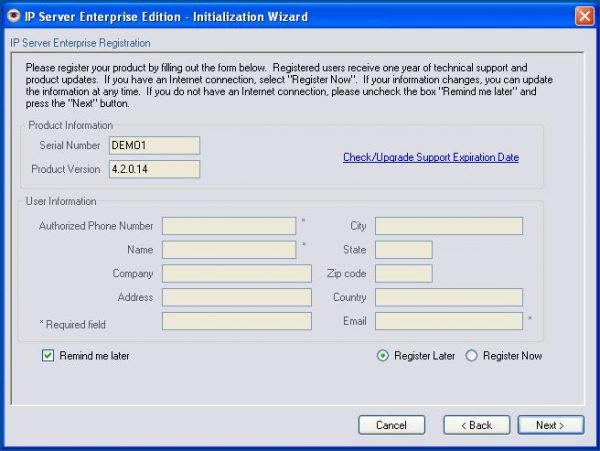
The next screen will prompt you for your Registration information. You will want to fill this out in order to receive Technical Support on your product.
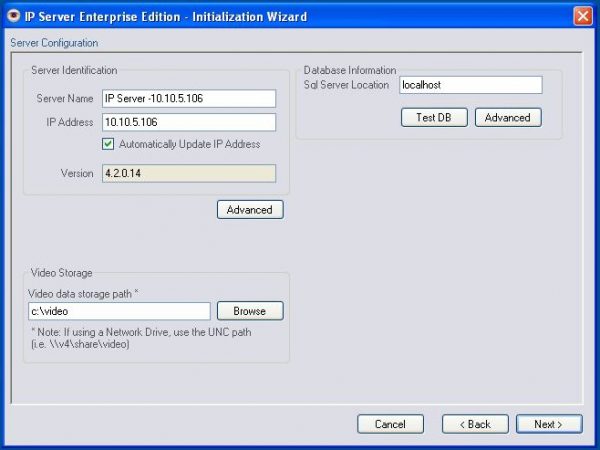
For the Server Configuration screen there are a few things you will want to look at.
- Verify the location of your Video Storage. By default this is set to C:\Video. Typically you will want to store this on a separate drive from your operating system.
- Be sure to test the database by clicking the Test DB button. This will confirm the software can communicate with the database properly. If you are using an existing database you may need to click on the Advanced button to enter your information.
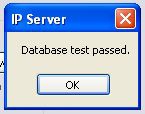
Once the database test has passed, you will see the above window pop up. Proceed by clicking Next.
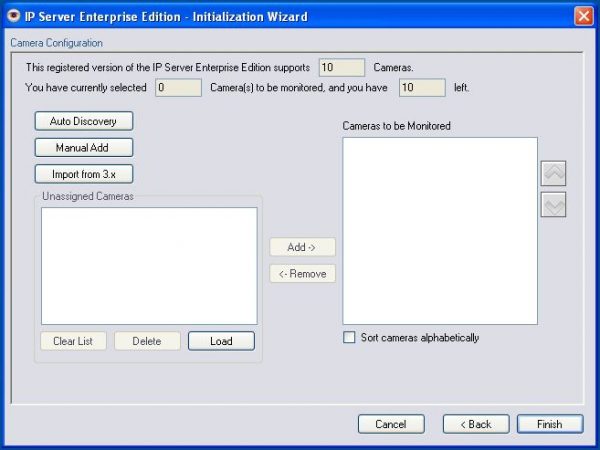
You will now see the Camera Configuration screen. Here you can add your cameras by manually adding them or using the Auto Discovery feature.
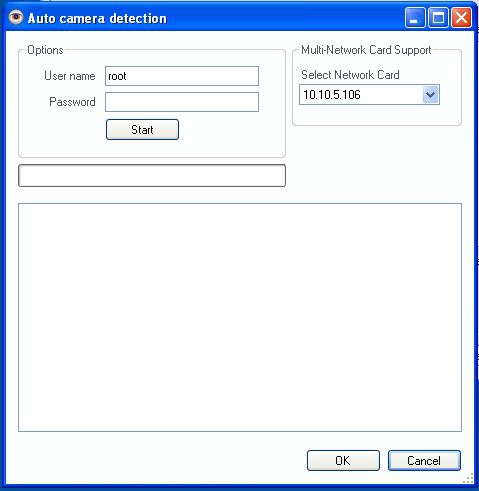
If you clicked on the Auto Discovery button you will get the above screen. Enter the User name and Password to your cameras and click Start. This will scan the immediate network for any cameras using that User name or password.
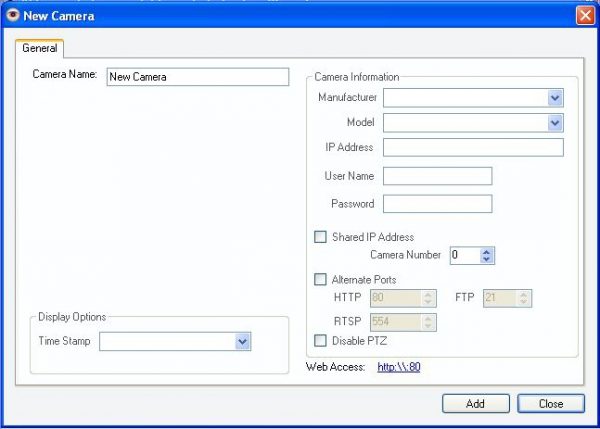
You can also choose to Manually Add your cameras. Here you will want to provide all of the information for our software to be able to connect to the cameras. If you are using an encoder you will want to check the box for “Shared IP Address” and supply the port number your camera is on. If you are not using an encoder then you can skip this.

Once you have found or added your cameras you will notice them listed as “Unassigned Cameras.” Highlight each one and click on Add to have them added to your IP Server for viewing and recording purposes.
When this is complete, click Finish.
Click OK to close out of the installation/setup of the IP Server.
You will now notice the IP Server running in your system tray. Here you can right click to see more options or you can double-click on the Monitor Station icon on your desktop to view your cameras.
What do I do if no live video is being displayed in the Web Client?
Solution:
-
Verify that all of the ports required are open.
- The ports that are required are ports 80, 4010 and 4011.
- If any of these ports are closed, contact the network administrator and have them forward these ports to the IP server machine.
- Create a location in the Web Client.
- Open the Web Client and click on the Help tab at the top. This will bring up a dropdown menu.
- Select “Location Setup.”
- Give your location a name and then click “Add Location.” You will need to be logged in to the Web Client as a Video Insight Administrator to create a location.
-
The next screen allows you to pick the Server that you are accessing with this location and then the basic port and IP address information for the server.
Make sure of the following:
- The “Use Following IP and Ports” box is checked.
- The same external IP address you use is entered for the IP Address.
How do I configure Active Directory for Video Insight IP Server?
Solution:
This document will take you through the steps to get Video Insight IP Server communicating with Active Directory for the purpose of importing user/groups. This will allow you to assign permissions through our software using Active Directory users or groups.
Prerequisites:
- Video Insight IP Server 4.2.0.14 or above installed.
- System running Video Insight IP Server service must be joined to the Active Directory Domain.
- System should be able to communicate with all domain controllers via port 389 (cannot be changed) or 636 (LDAP).
- Valid Domain Account (with minimal privileges recommended).
- Domain Account should be a stand-alone account (do not use your account).
- When configuring IP Server you must be logged into the domain with a valid domain account.
It is recommended when importing users you actually import a Group versus individual users. The Group will need to be created in Active Directory before you can import them. You can import as many groups as necessary. For example, one to assign administrator rights and one to assign view only rights to in Video Insight IP Server.
Procedure for Configuration:
- Configure the IP Video Enterprise service to run under an Active Directory account.
- Go to Start > Run and type: services.msc
- Locate the IP Video Enterprise service.
- Right-click and choose Stop.
- Right-click and choose Properties.
- Select the Log On tab.
- Select the second option for This Account.
- Provide an Active Directory account with minimal rights. A basic domain user account works great.
- Go to the General tab and choose Start.
- Click OK when complete.
- Restart the IIS Admin service if using Web Client
In the Server Manger, configure Active Directory.
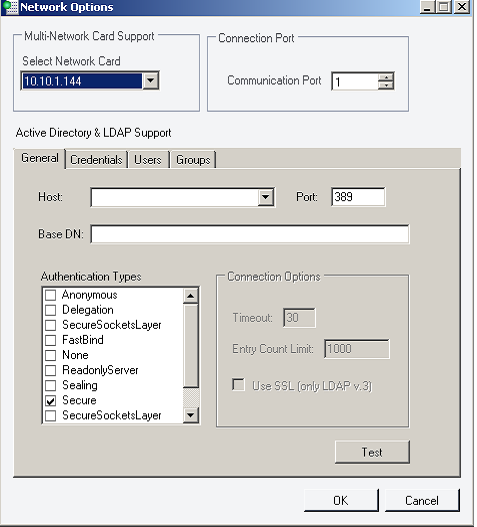
- Open the IP Server Manager and select Network Options.
-
On the General tab review the Authentication Types. Typically all you need is “Secure” checked. Below is a brief overview of the common ones used:
- None: Broad support for generic LDAP options. This is NOT a secure option to use. It is not supported in Active Directory.
- Secure: Minimal Option needed for Active Directory.
- Sealing: Provides extra layer of encryption (optional).
- Signing: Signs all communication between Active Directory and Video Insight. Like a watermark. This is for Active Directory only.
- SecureSocketsLayer: SSL encryption for LDAP only.
- Go to the Credentials tab in Network Options.
- Enter your Domain User Name and Password.
- Click the “Refresh” button to see the rest auto populate.
- Go to the Groups tab. Here you will see the fully-qualified Domain Name of the Users container in Active Directory.
- Remove the user (CN=John Doe,) information to be able to search for users in Active Directory. (You can go to the Users tab and import individual users, however it is recommended to import groups instead of users.)
- Select the Groups (or users) you would like to import into Video Insight.
- Click OK.
- Back at the Server Manager, Restart the service.
When you go into Monitor Station you will see your Groups (or users) that you imported. You can assign permissions from here.
Be sure to turn on Security in Monitor Station to start using your Active Directory Logins.
- In Monitor Station go to Administration > Setup and Configuration.
- Under All Servers in the left hand tree, select your server name.
- Click the Advanced tab on the right.
- Select Enable Security.
(The default password for the built-in Administrator account is blank.)
Service not starting, connecting or crashing
Solution:
-
Prerequisites Not Installed
Please check that all the prerequisites have been installed including .NET 4 Framework and a compatible SQL Server version. Check if updates are available for .NET Framework and try re-installing Microsoft .NET if not. -
Demo Period Expired
After the 60 day demo period has lapsed, the Service will not start until a VI Serial Number has been activated with IP Enterprise. -
Database Connectivity / Out of Date Issues
If the SQL Server is prohibiting connections from the IP Enterprise Service, the Service will not start correctly. For VI to use SQL it must be in Mixed Mode Authentication and allow for TCP/IP and Named Pipes connections. -
Incomplete Installation
Not all components, specifically the IP Service, were installed completely. Try uninstalling and re installing. -
Incomplete Upgrade
There have been instances with early 5.5 installers where choosing the Upgrade option does not upgrade all components that were installed by the previous version. This causes a mismatch in files which are being called when the service attempts to start. -
Windows Updates
Some Windows Updates still cause problems for VI even though it’s recommended. -
Changes to AD/LDAP or Password Changes to Service Accounts
If a configuration change or account change in regards to Active Directory, namely the account which was used to integrate AD is made, there could be some issues where the account fails to log into AD when the Service is started. -
No Drive Space on C: Drive
If there is no available disk space on Drive C this can interrupt the ability for the Service to start correctly as a local SQL installation has no space to add entries to the log portion of the database. -
Using Cameras across the Internet
Note that it is likely that the lag time caused by connecting to a camera across the internet has been known to cause longer than usual start up times for the Service as it hits its timeout period to receive a response back from the external camera. -
Faulty Camera Signals
Faulty camera images have been known to cause problems with the IP Enterprise service and cause a service crash. Check cabling especially with Analog Cameras connected to Digital Encoders for Interference, Scrolling, or Video Blinking in and out.
How do I backup and restore settings for my IP Server?
Solution:
Backup & Remove Current VI Installation:
- Completely stop IP Service & Exit IP Server manager in task tray.
- Stop SQL Service in ‘Services’
- Copy both ‘InsighEnt.mdf’ & ‘InsightEnt_log.ldf’ files from path: C:\Program Files\Microsoft SQL Server\MSSQL11.MSSQLSERVER\MSSQL\DATA
- Start SQL Service again (In ‘Services’)
- Open Regedit. Export key ‘Video Insight’ from: HKEY_LOCAL_MACHINE\SOFTWARE\WOW6432Node
- Open ‘Add/remove programs’ from start or control panel. Remove all ‘VI’ related entries.
- Delete ‘Video Insight’ key from: HKEY_LOCAL_MACHINE\SOFTWARE\WOW6432Node
- Delete ‘Video Insight’ key from: HKEY_CURRENT_USER\SOFTWARE
- Run install package as admin.
- Confirm SQL Credentials. (If credentials are unknown it would be advised to contact Technical Support)
- After install, IPS will run. You will need to stop the IP Service and exit server manager in task tray.
- Right-click backed up registry file and ‘edit’. Find ‘ServerID’. Paste this number within the value of ‘ServerID’ key in the following path: ‘HKEY_LOCAL_MACHINE\SOFTWARE\WOW6432Node\Video Insight\IP Server Ent’. Edit Regedit.
- Start IP Server Manager. Start Service.
**Highly recommended to run windows updates prior to installing**
(Do not merge the .reg file from backup folder. It should be used for reference only, opened within notepad to retrieve the ServerID / Serial)
What do I do if I see this error message when activating my software? “No network connection or cannot reach the registration server”
Solution:
There are two possible reasons for the error message below.
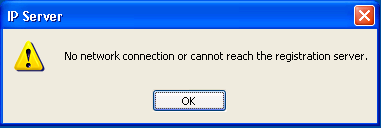
Your local computer is not able to connect to the network
Solution:
- Verify your network cable is connected to your computer
- Verify your network settings are correct for your network card
- Verify that you can browse to www.video-insight.com
Your Router/Firewall is blocking our Registration Server from communicating back to your server
Solution:
- Open port 30000 on your Router/Firewall
- Contact Video Insight Technical Support for manual activation: 713-621-9779, option 3
How do I add cameras to the IP Server software?
Solution:
- Log into Monitor Station.
- Go to Administration — Setup and Configuration.
- Select the Server to which you want to add cameras. Go to the Cameras tab. Verify that the Server has enough available licenses to add a camera.
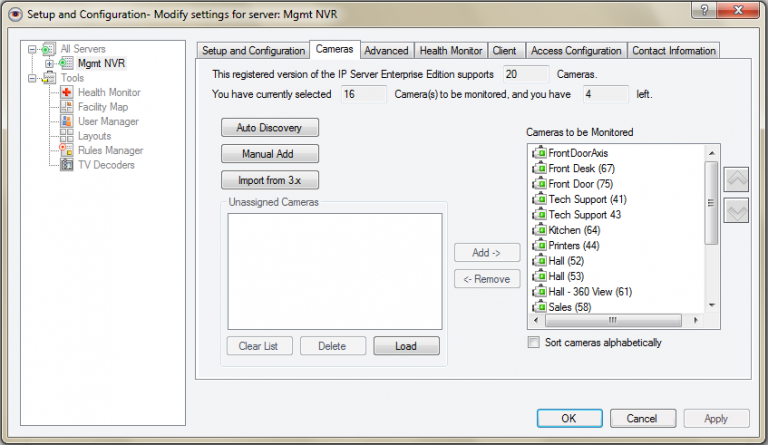
- Click on Manual Add.
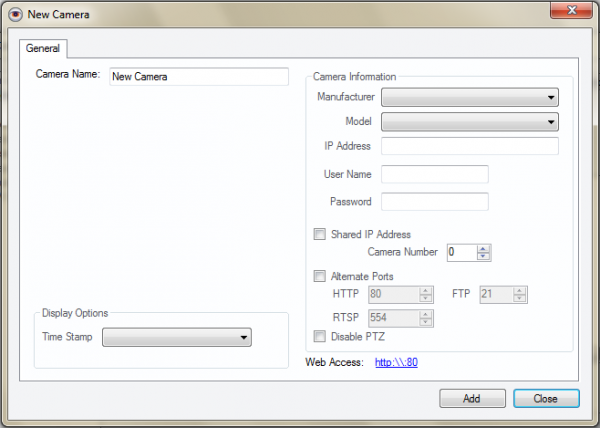
- Enter the camera name as you want it to appear on the Monitor Station.
- Select the Manufacturer, then the camera model. Enter the IP address.
- Put in the camera’s username and password.
- Shared IP address is for encoders. Change this to the port number on the encoder.
- If needed, select the alternate ports.
- Click Close
What do I do if I see this warning when I start the Monitor Station: “Warning the IP Server is not connected”?
Solution:
-
The command and data ports must be open between the Monitor Station and the IP Server machine. By default these are set to ports 4010 and 4011.
Verify that the Windows Firewall on the server has had an exception made for 4010 and 4011 or has been turned off completely. You can find the Windows Firewall settings in the Windows Control Panel.
If connecting to the server from an external location, ports 4010 and 4011 must be forwarded in the router or firewall at the server location. If you are unsure how to do this, consult your IT or Network Administrator. -
Verify that the service is started on the IP Server machine.
On the Server, locate the Server Manager icon on the task bar in the lower right corner near your Windows clock.
Right click the Server Manager and choose “Start Service.” -
The IP address used to connect to the service must be the same one that the service is being told to use in the Network Options of the server.
On the Server, locate the Server Manager icon on the task bar in the lower right corner near your Windows clock.
Right click the Server Manager and choose “Server Configuration.”
User Account Control (UAC), Digital Signing and Video Insight.
What Is User Account Control (UAC) in Windows?
UAC is a security feature of Windows Vista, Windows 7 and Windows 8 which helps prevent unauthorized changes to your computer. These changes can be initiated by applications, viruses or other users. User Account Control makes sure these changes are made only with approval from the administrator. If the changes are not approved by the administrator, they are not executed and Windows remains unchanged.
How Does User Account Control (UAC) Work?
In modern editions of Windows, applications run by default without any administrative permissions. They have the same permissions a normal user account has: they cannot make any changes to the operating system, its system files or the machine’s registry settings. Also, they cannot change anything that’s owned by other user accounts. Applications can change only their own files and registry settings. When an application wants to make a system change like: modifications which affect other users, modifications of system files and folders, installation of new software, a UAC prompt is shown, asking for permission.
Which Changes Require Administrative Privileges in Windows?
There are many changes which require administrative privileges and, depending on how UAC is configured, they can cause a UAC prompt to show up and ask for permission.
These are the following:
- Running an application as administrator
- Changes to system-wide settings or to files in the Windows or Program Files folders
- Installing and uninstalling drivers & applications
- Installing ActiveX controls
- Changing settings to the Windows Firewall
- Changing UAC settings
- Configuring Windows Update
- Adding or removing user accounts
- Changing a user’s account type
- Configuring Parental Controls or Family Safety
- Running Task Scheduler
- Restoring backed-up system files
- Viewing or changing another user’s folders and files
- Changing the system date and time
What is Digital Signed Software?
Software that is downloaded from the Internet to users’ computers can contain programs such as viruses and Trojan horses that are designed to cause malicious damage or provide clandestine network access to intruders. As networks become more interconnected, malicious software and viruses also become a threat to intranets. To help counter this growing threat, you can digitally sign the software that you distribute on your intranets or the Internet to ensure its integrity and to assure others that the software can be trusted. The signed software ensures that users can verify the origin of the software, as well as verifies that no one has tampered with it.
How does Digital Signing and User Account Controls Work with Video Insight?
At this time, UAC is currently not supported to be used in conjunction with Video Insight.
Digital Signing is also currently not supported to be used in conjunction with Video Insight.
Choices for the physical NVR/server platform
Video Insight can be delivered preloaded on a server or as a software platform. When delivered pre-loaded, our hardware is the Dell Poweredge series of servers. Camera count, resolution, and storage requirements determine which physical boxes are options. When delivered as software, any standard COTS server can be used. Video Insight supports all virtual platforms, including VMware, Hyper-V and XenServer, and is compatible with all 32- and 64-bit Windows OS including Server 2012. The Server can support a wide range of storage options, including local, direct attached, NAS and SAN storage.