3.Basic settings
 |
|
| ||||
|
Learning images |
|
Detector |
|
Detection area |
|
 |
3.1Set the Detector
 |
|
 |
・ Select [Detector number]. - Select from 1 to 3. - [(Used)] is displayed for the number where a Detector is already used. - A number that is not in use will be marked [(Unused)]. ・ Set [Detector Name]. - Set the name of the detector selected in [Detector number]. Up to 20 half-width or full-width characters can be set. ・ Press [Set]. |
| ||||
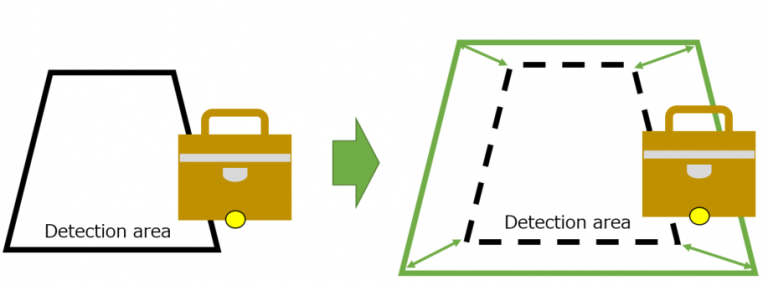
3.2Set the detection area
 |
|
1. Draw the detection area in the live image on the iCT individual setting screen. - The detection area can be set as a rectangle of any shape. - The color changes for each detection area to facilitate identification when the detection area is crowded. Colors are automatically assigned and set in different colors until area 8. Areas 9 to 16 will be the same color as areas 1 to 8. |
 |
2. Select the detection area number to be set. - Select 1:(Detection area name) ~ 16:(Detection area name) from [All]. - Select [All] to set each detection area individually, or to set all detection areas collectively. |
| ||||
3. Set the [Detection area group name] - You can set up to 20 characters of both half-width and full-width characters. |
4. Select [Detection time] - Select the time from when an error is detected to when an alarm is sent. - Select [2s], [3s], [5s], [10s], [20s], [30s], [40s], [50s], [1min], [5min], [10min], [15min], [30min], or [1h]. |
| ||||
5. Select [State inversion] - When [On] is selected, the alarm will be activated in the same way as when learning. When [Off] is selected, the alarm will be activated in a way that is different from the one learned. |
6. Select [Abandonment detection] ● Select [On] for detecting obsolete objects (suspicious objects, etc.). |
| ||||
| |||||
7. Press [Set]. |
| ||||
3.3Save images to be learned
 |
|
| ||||
3.3.1Manually save camera image
1. Select [Save images to be learned] - Select [Manually save camera image]. |
2. Press [Snapshot] - One shot image (still image) is capture. |
3.3.2Auto save camera image
 |
1. Select [Save images to be learned] - Select [Auto save camera image]. |
2. Set the [Save interval] - Select from [1min], [5min], [10min], [15min], [30min], or [60min]. |
3. Select [Number of save images] - Select from [10], [20],..., [90], [100], [150], or [200]. |
4. Press the [Start] - To stop auto save, press [Stop]. - During auto save, progress is displayed beside the Stop button. |
3.4Perform learning
 |
|
 |
1. Select the images (Training images) to be used for learning. - Select the checkbox in the lower left corner of thumbnail of the target image as shown in the figure. - Learning requires at least two images. Up to 200 images can also be learned. |
2. Press [Start Learning] |
3.5Confirm the learning results
 |
|
|
1. Adjust the [Image change threshold] - Set scene change thresholds. The smaller the value, the easier it is to detect the change. The larger the value, the more difficult it is to detect the change. The area where the change is detected is displayed in red on the demo screen. 2. Adjust the [Area change threshold] - Set the area of the scene change. The alarm is activated when the set detection time has elapsed while the scene change Area change ratio in the detection area exceeds this threshold. The Area change ratio is displayed on the demo screen. |