Joystick WV-CU980 Registration
Last update: December, 2025
Milestone XProtect supports the WV-CU980 joystick by installing the plugin.
Support for the WV-CU980 plugin ended with the XProtect 2025 R3.
Starting from 2025 R3, the plugin no longer functions.
If you are using the WV-CU980, please continue with XProtect 2025 R2 or an earlier version.
For details, please refer to the following page.
Configure the XProtect Input Unit Plug-in - Third-party integrations | Milestone Documentation 2024 R1 (milestonesys.com)
1. Install the plugin for WV-CU980
2. WV-CU980 setting
3. Camera settings
4. XProtect Smart Client
4.1 Overview
4.2 Action Mapping
4.3 Procedure to enable the WV-CU980 buttons
4.3.1 MON (Monitor Switching)
4.3.2 CAM (Camera Switching)
4.3.3 AUX1ON、AUX2ON
4.3.4 PRESET
1. Install the plugin for WV-CU980
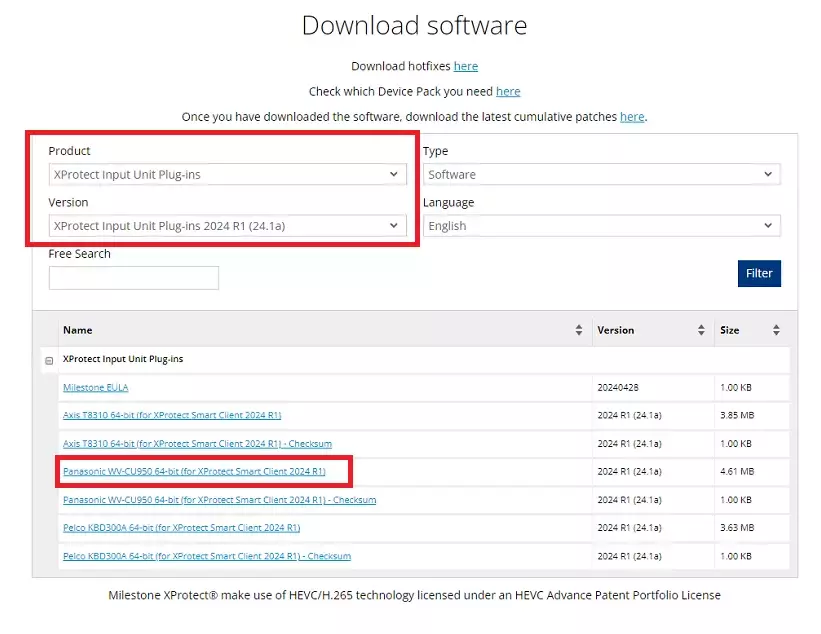
1. Obtain the WV-CU950 plug-in from the Milestone Software Downloads page on their website and install it on the XProtect Smart Client PC.
https://www.milestonesys.com/downloads/
2. Select "XProtect Input Unit Plug-ins" in the "Product" field and the version you are using in the "Version" field.
Download "Panasonic WV-CU950 64-bit(for XProtect Smart Client XXXXXX")
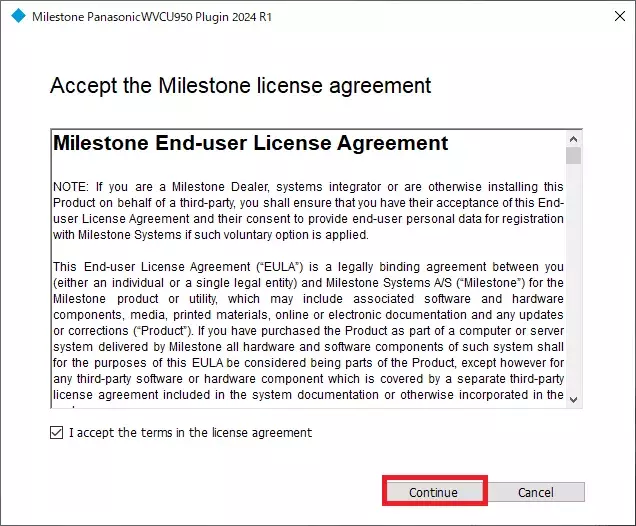
3. Double-click "Milestone PanasonicWVCU950 Plugin 2024 R1 Installer.exe" to start the installation.
To install the XProtect Input Unit Plug-in, accept the terms of the license agreement and then click "Continue".
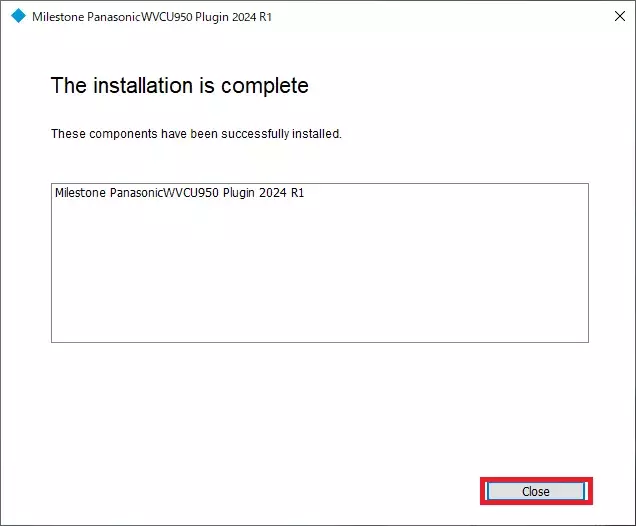
4. When the installation is complete, click "Close".
2. WV-CU980 setting
1. Set in advance so that it can connect to VMS.(*Connect with 10/100 BASE-T.)
Push the "CAM(SET)" button and enter ID and Password(default ID/Password 12345678/12345678) .
Push the "||>" button and shit the Network Setup and push "CAM(SET)" button.
Set the following field in [MENU] - [Nerwork Setup].
| IP address | Ex:192.168.0.210 |
| Subnet Mask | Ex:255.255.0.0 |
| Gateway | Ex:192.168.0.1 |
| Keyboard ID | Ex:1 |
| Server IP address(XProtect Smart Client PC) | Ex:192.168.0.123 |
| Communication Mode | Set "CU950 Compatible" |
For details on the setting procedure, refer to the WV-CU980 Operating Instructions.
https://i-pro.com/products_and_solutions/en/surveillance/products/wv-cu980
3. Camera settings
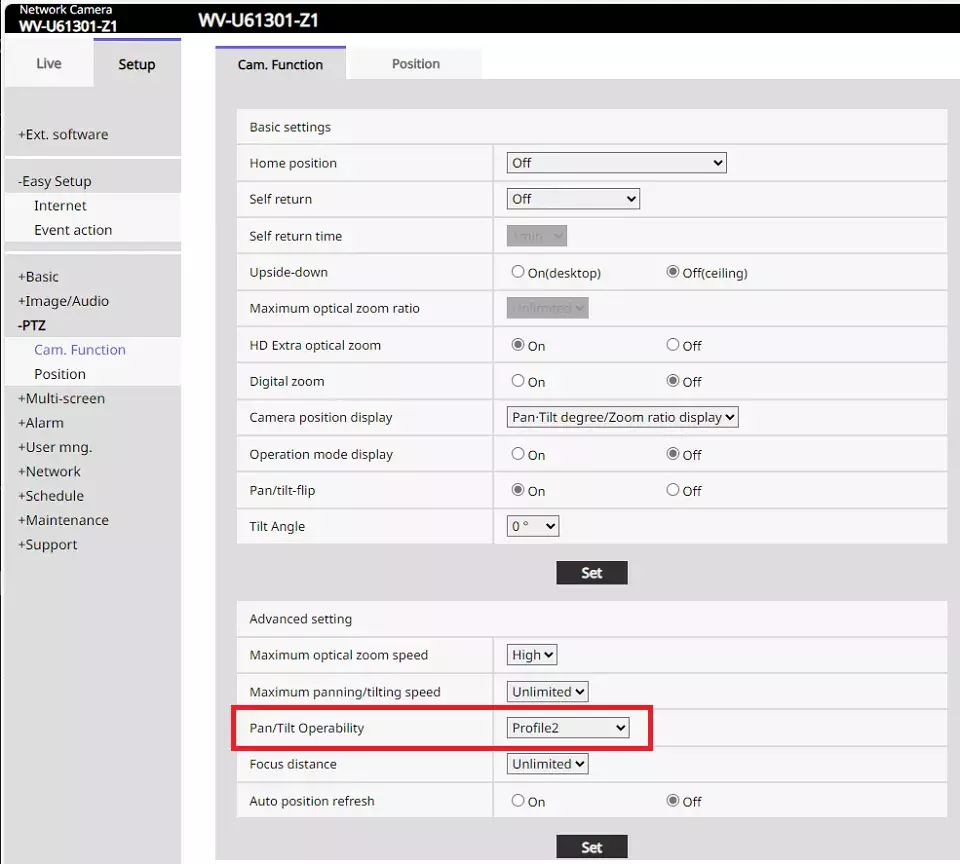
1. Launch the camera browser and change the Language to English.
Select [Setup] - [Image/Audio] - [Cam.Function].
Select Profile2 in "Pan/Tilt Operability" field.
* It works with Profile1 (Normal), but just in case, select Profile2 (profile adjusting PTZ speeds for Milestone).
* If you cannot see the "Pan/Tilt Operability" field, select [Basic] - "Menu language" and change it to "English".
2. Register the PTZ camera with Milestone Xprotect.
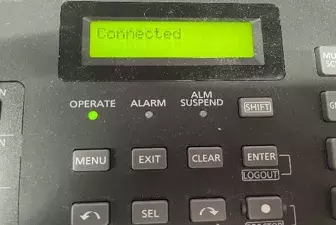
When you log in XProtect Smart Client, you will hear the electronic sound "Pi! Pi! Pi!" from WV-CU980.
Display will show "Connected" and the WV-CU980 will be ready for use.
4. XProtect Smart Client
4.1 Overview
As optional settings, Action Mapping and Pan/Tilt/Zoom speed adjustments are available.
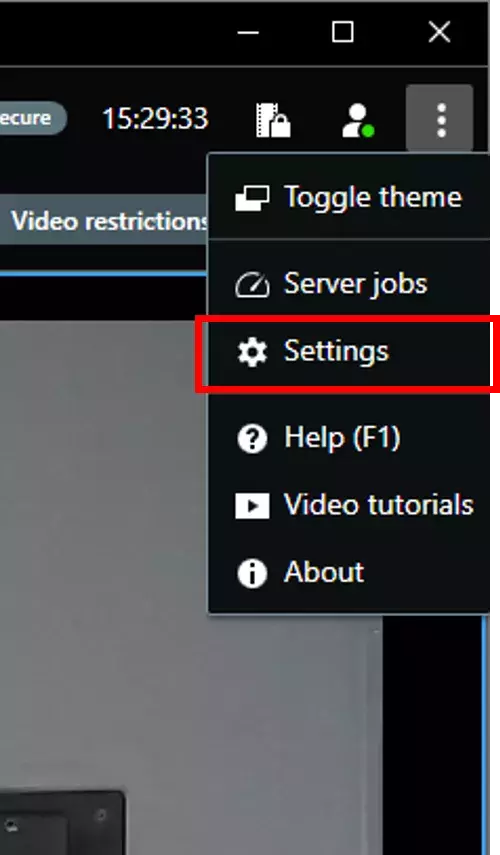
1. Select Settings from the menu at the top right of XProtect Smart Client.
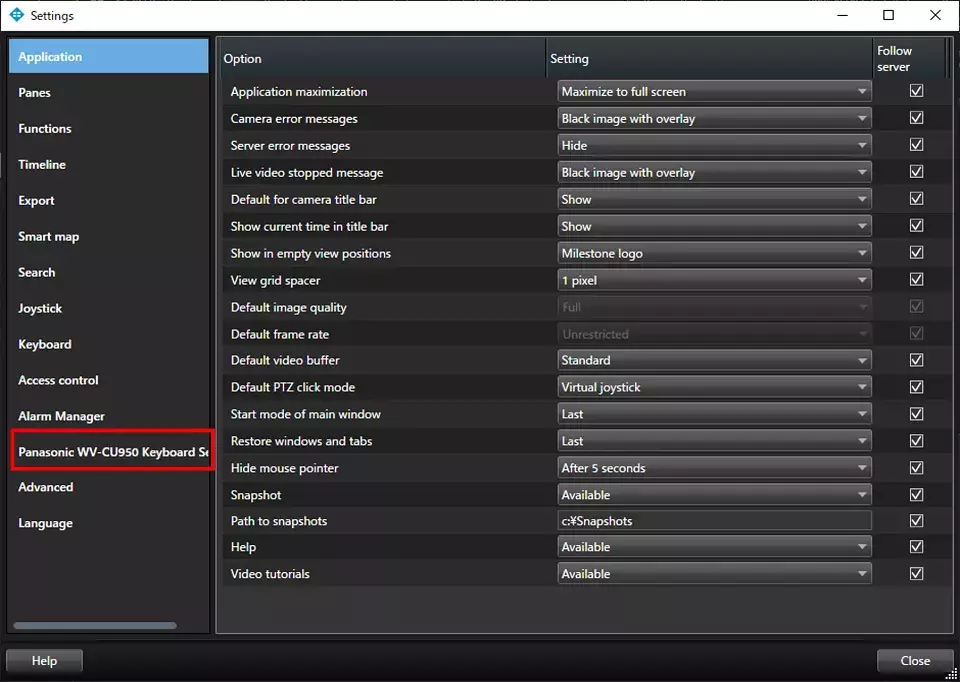
2. Select [Panasonic WV-CU950 Keyboard Setup] .
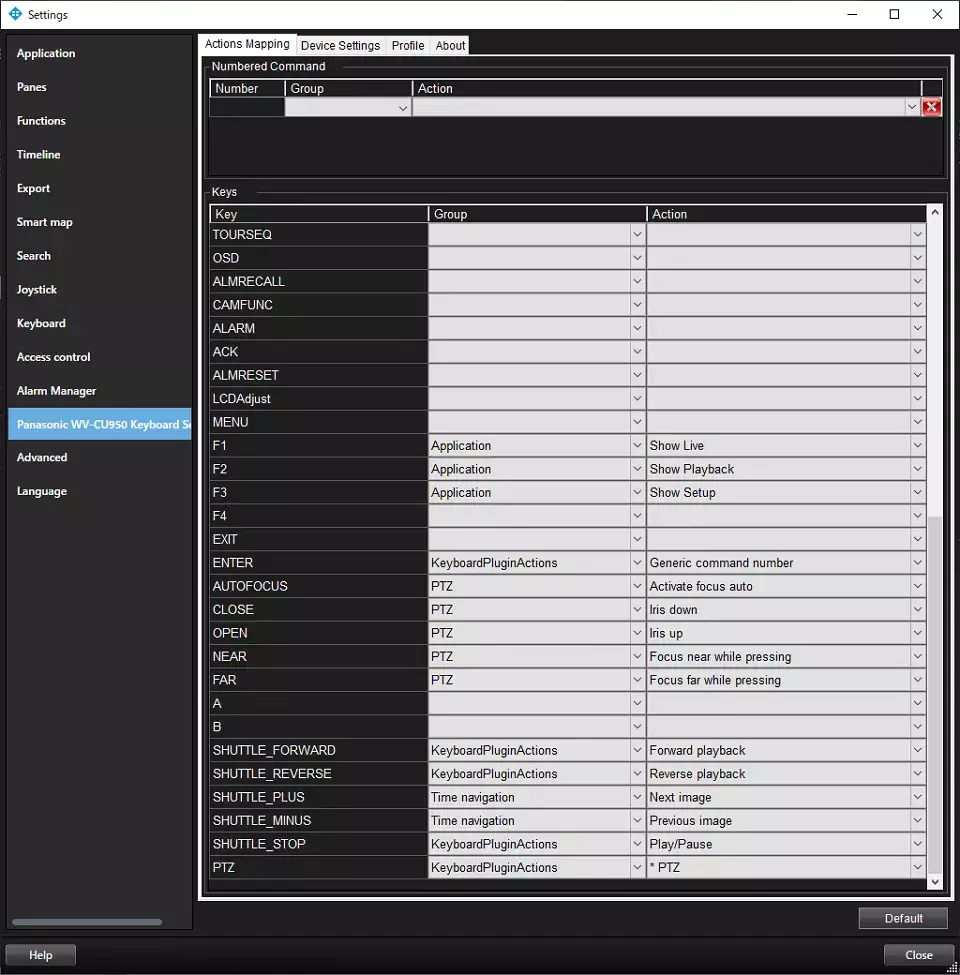
3. Select [Actions Mapping] .
You can customize the association between Actions and Keys.
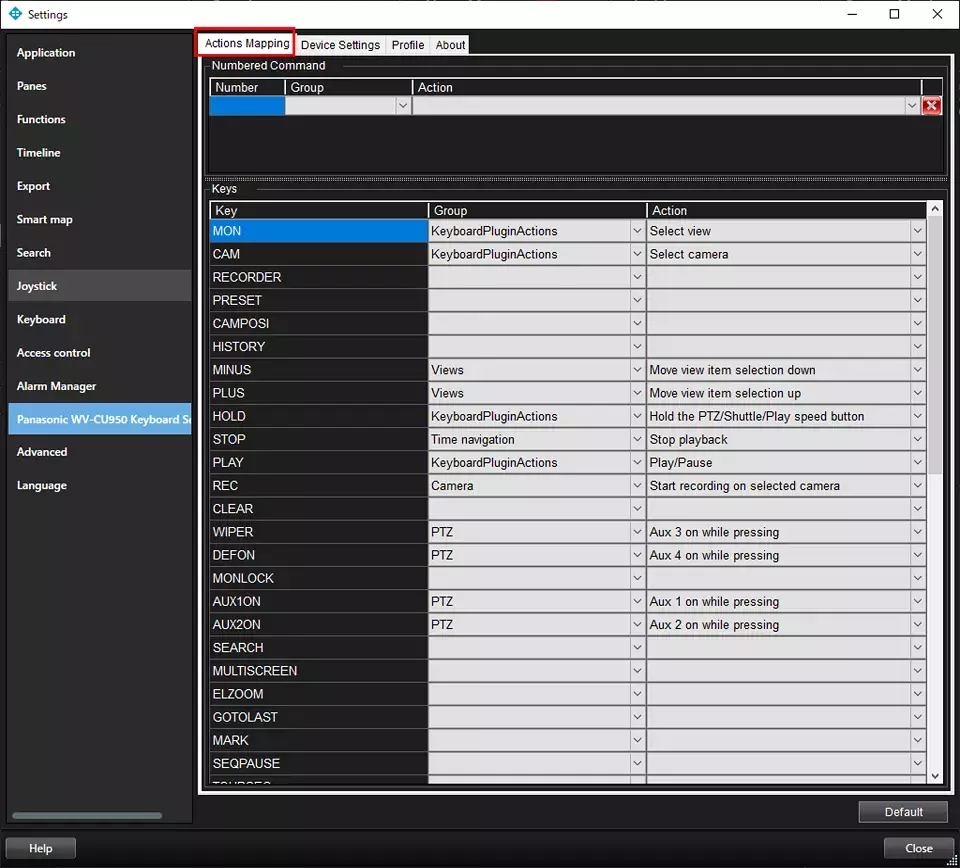
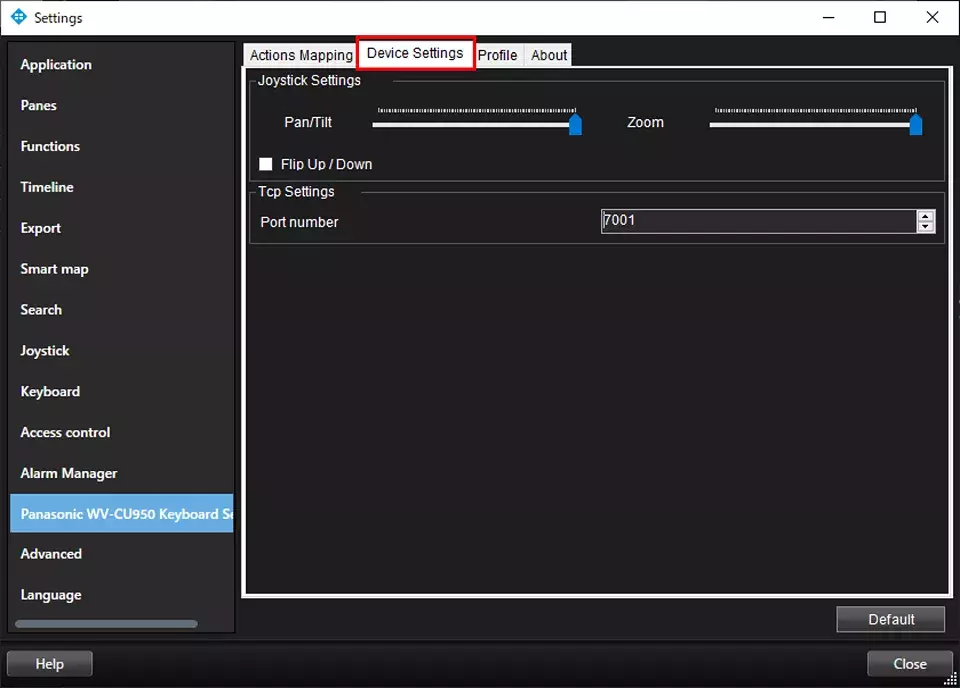
4. Select [Device Settings] .
You can customize the Pan/Tilt and Zoom speeds.
4.2 Action Mapping
Action Mapping is a configuration that defines “which button (key) operation on the WV-CU980 is assigned to which function (action) in the Smart Client.”
| Key *1 Does not work because the CU980 has no corresponding button | WV-CU980 buttons | Group | Action | Indicates whether the default action works. —: No default action is assigned | Indicates whether it works when a non-default action is assigned. | |
|---|---|---|---|---|---|---|
| 1 | MON | MON (ESC) | KeyboardPluginActions | Select view | Y *2 | Y |
| 2 | CAM | CAM (SET) | KeyboardPluginActions | Select camera | Y *3 | Y |
| 3 | RECORDER | GROUP | ー | Y | ||
| 4 | PRESET | PRESET | ー | Y *5 | ||
| 5 | CAMPOIS *1 | |||||
| 6 | HISTORY *1 | |||||
| 7 | MINUS | ー | Views | Move view item selection down | Y | Y |
| 8 | PLUS | + | Views | Move view item selection up | Y | Y |
| 9 | HOLD | SEL | KeyboardPluginActions | Hold the PTZ/Shuttle/Play speed | Y *4 | Y |
| 10 | STOP | STOP | Time navigation | Stop playback | Y | Y |
| 11 | PLAY | PLAY | KeyboardPluginActions | Play/Pause | Y | Y |
| 12 | REC | REC | Camera | Start recording on selected camera | Y | Y |
| 13 | CLEAR | CLEAR | ー | Y | ||
| 14 | WIPER | WIPER | PTZ | Aux 3 on while pressing | N | Y *6 |
| 15 | DEFON *1 | PTZ | Aux 4 on while pressing | |||
| 16 | MONLOCK *1 | |||||
| 17 | AUX1ON | AUX 1 | PTZ | Aux 1 on while pressing | N | Y *7 |
| 18 | AUX2ON | AUX 2 | PTZ | Aux 2 on while pressing | N | Y *8 |
| 19 | SEARCH *1 | |||||
| 20 | MULTISCREEN | MULTI SCREEN | ー | Y | ||
| 21 | ELZOOM *1 | |||||
| 22 | GOTOLAST | GO TO LAST | ー | Y | ||
| 23 | MARK *1 | |||||
| 24 | SEQPAUSE *1 | |||||
| 25 | TOURSEQ | SEQ | ー | Y | ||
| 26 | OSD *1 | |||||
| 27 | ALMRECALL *1 | |||||
| 28 | CAMFUNC *1 | |||||
| 29 | ALARM | ALM LIVE | ー | Y | ||
| 30 | ACK | ALM PLAY | ー | Y | ||
| 31 | ALMRESET | ALM RESET | ー | Y | ||
| 32 | LCDAdjust *1 | |||||
| 33 | MENU | MENU | ー | N | ||
| 34 | F1 | 1-SCREEN | Application | Show Live | Y | Y |
| 35 | F2 | 4-SCREEN | Application | Show Playback | Y | Y |
| 36 | F3 | 9-SCREEN | Application | Show Setup | Y | Y |
| 37 | F4 | 16-SCREEN | ー | Y | ||
| 38 | EXIT | EXIT | ー | Y | ||
| 39 | ENTER | ENTER | KeyboardPluginActions | ・Generic command number | N | Y |
| 40 | AUTOFOCUS | Top button | PTZ | Activate focus auto | N | Y |
| 41 | CLOSE | IRIS CLOSE | PTZ | Iris down | N | Y |
| 42 | OPEN | IRIS OPEN | PTZ | Iris up | N | Y |
| 43 | NEAR | FOCUS NEAR | PTZ | Focus near while pressing | N | Y |
| 44 | FAR | FOCUS FAR | PTZ | Focus far while pressing | N | Y |
| 45 | A | A | ー | Y | ||
| 46 | B | B | ー | Y | ||
| 47 | SHUTTLE_FORWARD | FF | KeyboardPluginActions | ・Playback forward | Y | N |
| 48 | SHUTTLE_REVERSE | REW | KeyboardPluginActions | ・Playback reverse | Y | N |
| 49 | SHUTTLE_PLUS | NEXT IMAGE | Time navigation | Next image | Y | Y |
| 50 | SHUTTLE_MINUS | PREV IMAGE | Time navigation | Previous image | Y | Y |
| 51 | SHUTTLE_STOP | PAUSE | KeyboardPluginActions | ・Play/Pause | Y | N |
| 52 | PTZ | Joystick | KeyboardPluginActions | ・PTZ | Y | Y |
| < Items for which a CU980 button exists but no corresponding key is indicated. > | ||||||
| 53 | SHIFT | SHIFT+ENTER:Logout | ||||
| 54 | REV SKIP / PREV RECORD | Move view item selection down | ||||
| 55 | SKIP / NEXT RECORD | Move view item selection up | ||||
| 56 | 0 to 9 (numeric) | Used in combination with other buttons | ||||
*2 Refer to 4.3.1 MON (Monitor Switching) for the procedure to enable the MON buttons.
*3 Refer to 4.3.2 CAM (Camera Switching) for the procedure to enable the CAM buttons.
*4 Pressing a button during PTZ operation will hold the PTZ.
*5 Refer to 4.3.4 PRESET for the PRESET configuration procedure.
*6 Setting Aux7on (Wiper On) will activate the wiper.
*7 Refer to 4.3.3 AUX1ON、AUX2ON for the procedure to enable the AUX1ON button.
*8 Refer to 4.3.3 AUX1ON、AUX2ON for the procedure to enable the AUX2ON button.
4.3 Procedure to enable the WV-CU980 buttons
4.3.1 MON (Monitor Switching)
To use this feature, you need to assign a Shortcut number to the View you want to use.
1. Each view in Smart Client can be assigned a [Shortcut] number under [Setup] > [Default View Group].
2. After assigning the numbers, launch the Smart Client.
3. Pressing [Number] + [MON] on the WV-CU980 allows you to switch views.
Example: Pressing [1] + [MON] will display the view assigned to Shortcut 1.
Note: Camera selection is only effective if the view is focused (highlighted with a blue frame).
4.3.2 CAM (Camera Switching)
To use this feature, you need to assign a Shortcut number to the Camera you want to use.
1. Open the [Camera] > [Client] tab in Management Client to assign [Shortcut] numbers.
2. Assign numbers to each camera.
3. After assigning the numbers, launch the Smart Client.
4. Pressing [Number] + [CAM] on the WV-CU980 allows you to switch cameras.
Example: Pressing [1] + [CAM] will display the camera assigned to Shortcut 1.
Note: Camera selection is only effective if the view is focused (highlighted with a blue frame).
4.3.3 AUX1ON、AUX2ON
This explains how to control the Aero PTZ (WV-X67700-Z3L, etc.)’s unique functions from the WV-CU980.
1. Click the [Settings and more] button at the top right of Milestone Smart Client, then click [Settings] to open the [Settings] window.
2. Click [Panasonic WV-CU950 Keyboard Settings] to enable selection of [Key], [Group], and [Action].
3. Select the Key assigned to the WV-CU980 button (e.g., AUX1ON or AUX2ON), set [Group] and [Action], and then close the [Settings] window.
The Aero PTZ unique functions that can be set are shown in the table below.
| Group | Action | Function |
|---|---|---|
| PTZ | Aux 5 On | White LED On |
| PTZ | Aux 5 Off | White LED Off |
| PTZ | Aux 6 On | Glass Heater On |
| PTZ | Aux 6 Off | Glass Heater Off |
| PTZ | Aux 7 On | Wiper On |
| PTZ | Aux 7 Off | Wiper Off |
| PTZ | Aux 8 On | Wiper+Washer On * |
* When using the Washer function, perform the following settings in the camera browser:
Select [Washer control] under [Setup] > [Basic] > [Relay output].
4. After the WV-CU980 emits a “PiPiPi” sound, pressing the WV-CU980 button with the assigned Key will execute the configured function.
Note: Button operations are only effective if the view is focused (highlighted with a blue frame).
4.3.4 PRESET
Note: Before starting, configure the preset positions on the camera itself.
1. In the Management Client, go to [Properties] > [Presets], check [Use presets from device], and click the [Get] button.
2. Launch the Smart Client.
3. Click the [Settings and more] button at the top right of Milestone Smart Client, then click [Settings] to open the [Settings] window.
4. Click [Panasonic WV-CU950 Keyboard Settings] to enable selection of [Key], [Group], and [Action].
5. Select [PRESET] for [Key], [PTZ.Presets] for [Group], and the desired value for [Action].
6. Close the [Settings] window.
7. After the WV-CU980 emits a “PiPiPi” sound, pressing the PRESET button on the WV-CU980 will move the PTZ camera to the selected preset position.
Note: Button operations are only effective if the view is focused (highlighted with a blue frame).
Milestone XProtect Management Client 2025 R2 /DP 13.8a