VMD for Milestone XProtect
Last update: Aug, 2024
VMD(Video Motion Detection) setting to Milestone XProtect.
<Setup using "i-PRO Settings Plug-in for Milestone">
The following step will configure the VMD using "i-PRO Settings Plug-in for Milestone".
Please refer to the following page to install the plug-in.
i-PRO Settings Plug-in
1. The initial startup procedure for the "i-PRO Settings Plug-in for Milestone" is the same as steps 1 to 6 in the AI-VMD setup guide. Please refer to that for guidance.
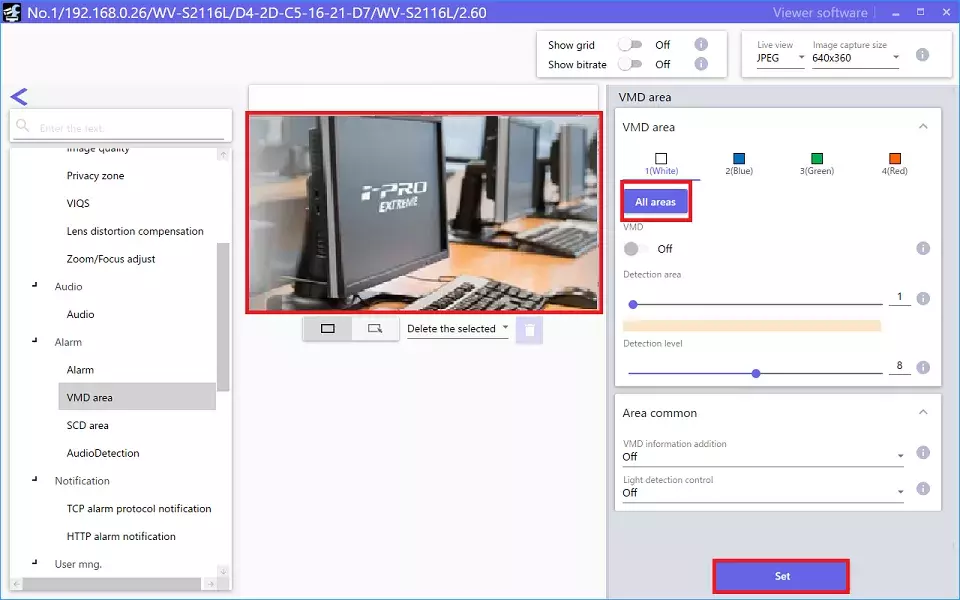
2. Select [Alarm] - [VMD Area].
Select "All Areas" or specify particular areas.
Click "Set".
<Alarm setup in Xprotect Management Client>
1. Select the target camera device in [Servers] - [Recording Servers] and click [Events].
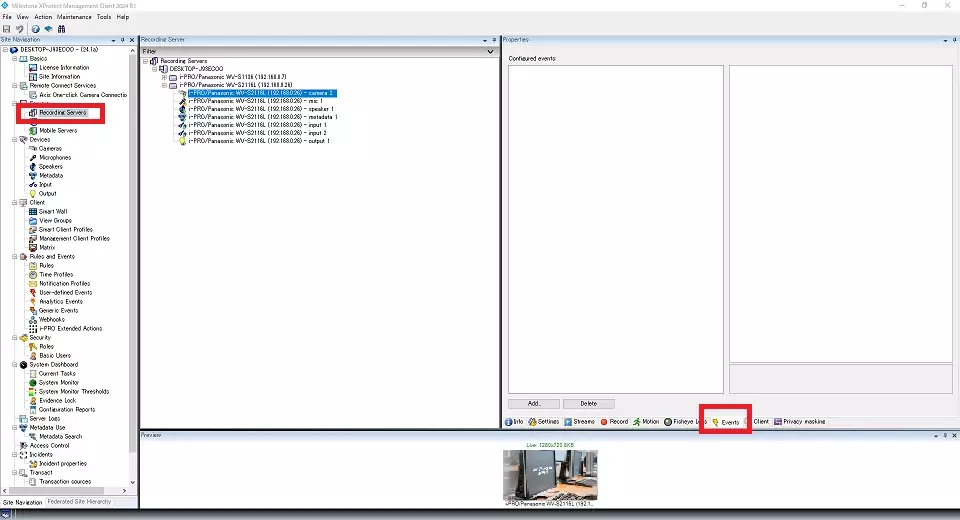
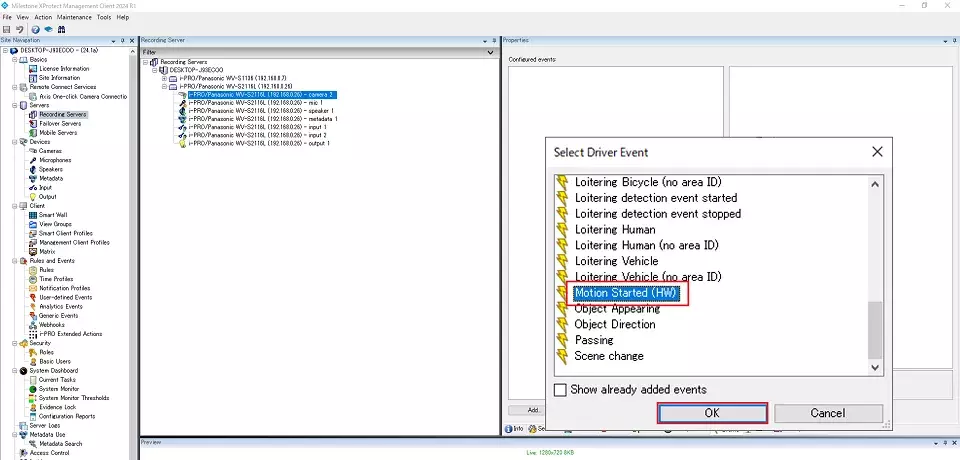
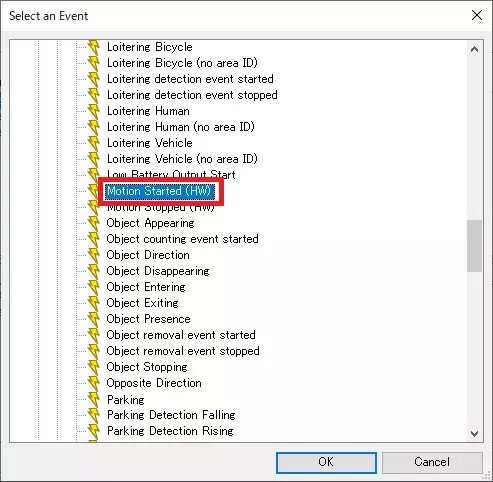
2. Move to the "Events" tab and click the "Add" button to pop up "Select Driver Event".
Select "Start Motion (Hardware)" and click "OK" to add the content to the right window.
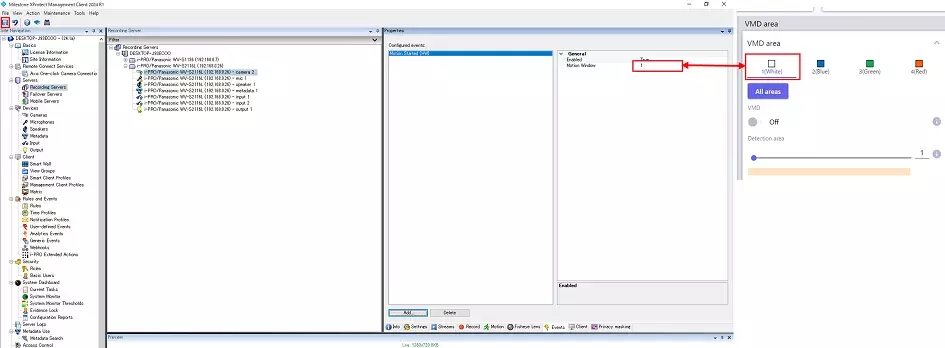
Motion window (motion area) can be selected up to 1-4. If you want to register multiple windows (areas), add windows 2-4 using the same procedure.
Click "Save" in the upper left of the screen after adding the event.
3. Setup [Rules and Events].
This step is the same as a step in the AI-VMD process. Please refer to the AI-VMD page from steps 4 to 13.
In this step, select "Device" - "Motion Started (H/W)" as the Event.
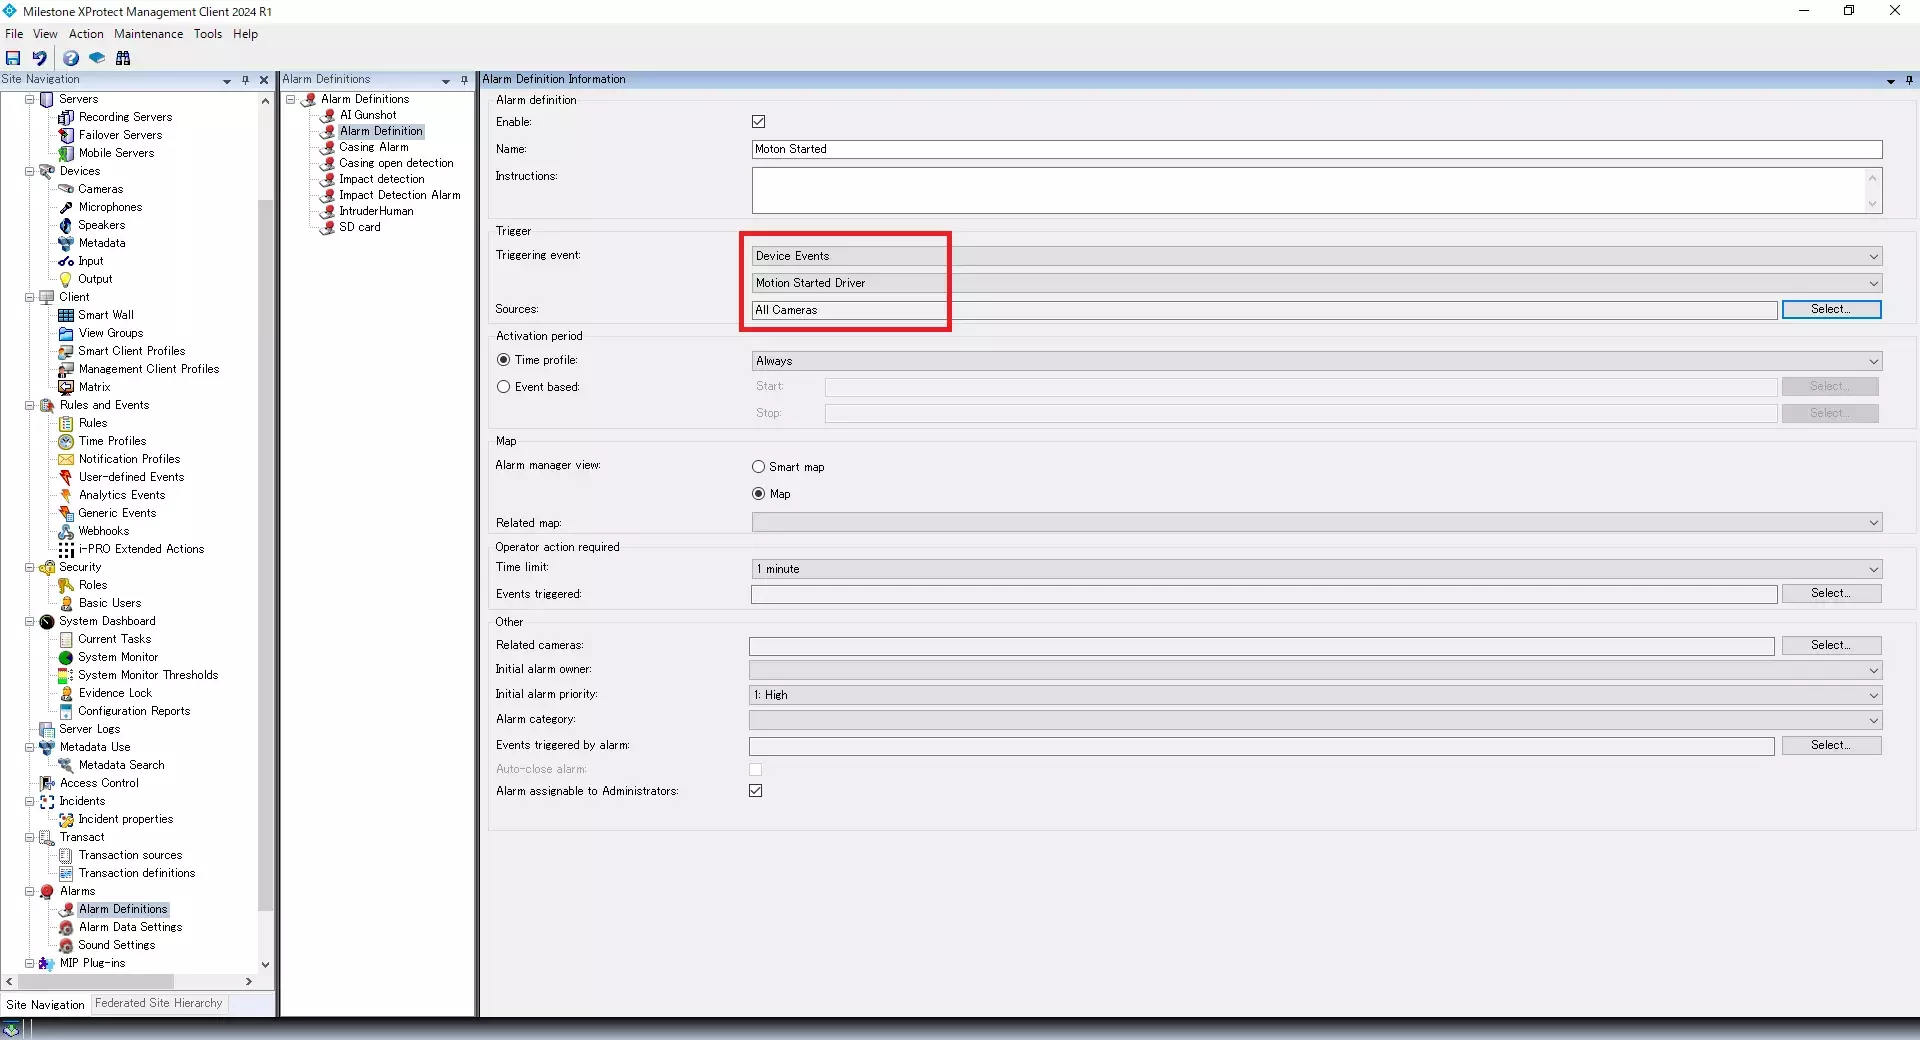
4. Setup [Alarm Definitions].
This step is the same as a step in the AI-VMD process. Please refer to the AI-VMD page from steps 14 to 15.
In this step, select "Device Events" and "Motion Started (H/W)" as the event.
<Confirmation on the Xprotect Smart Client>
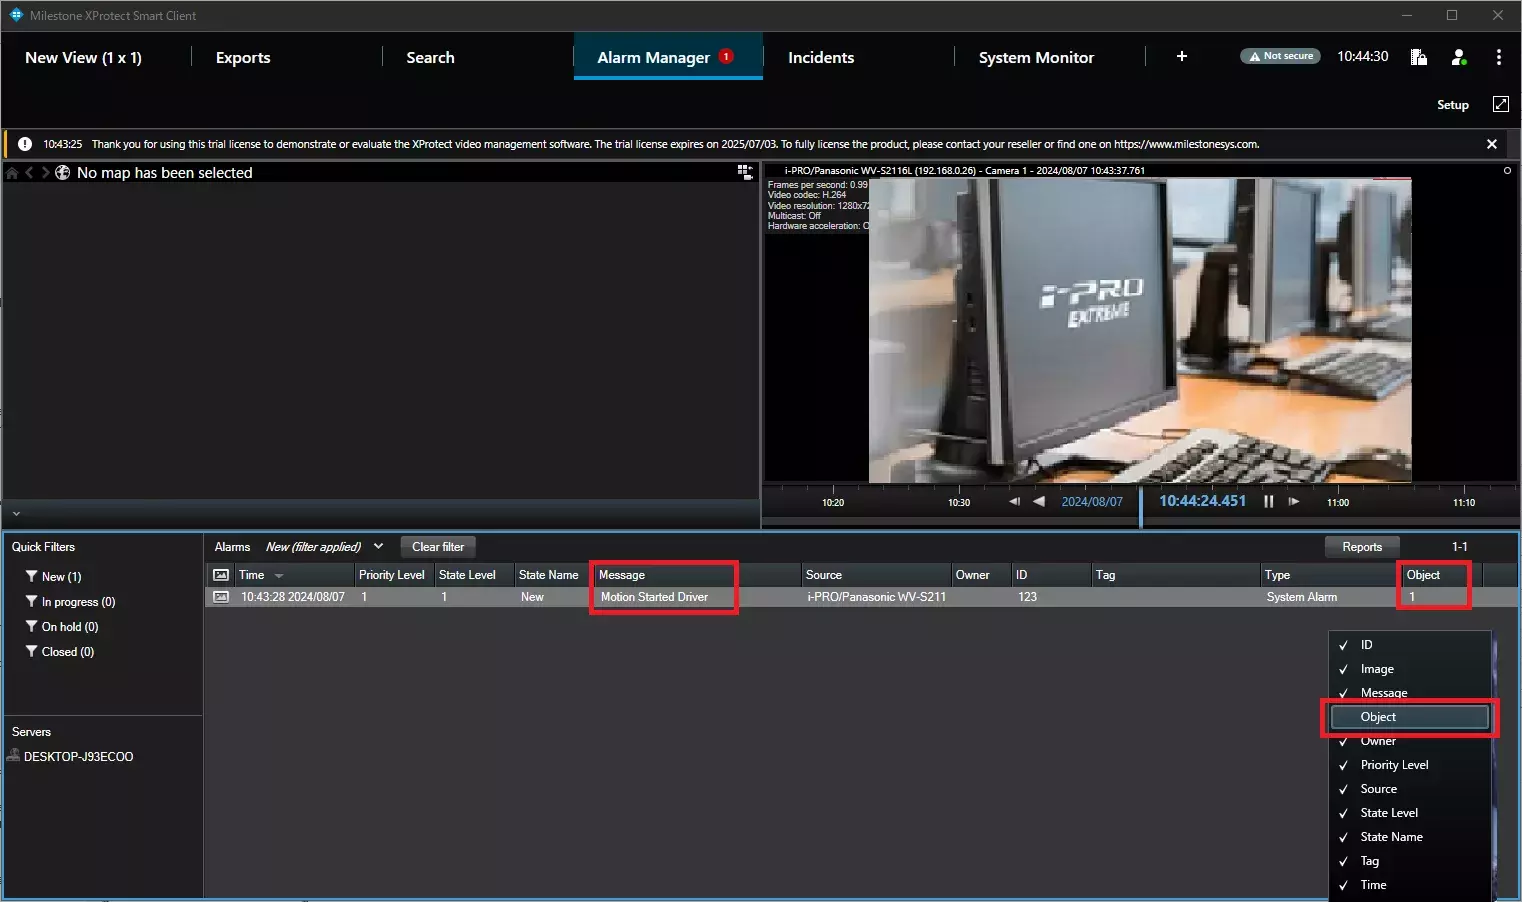
1. Restart the Smart Client.
Click the [Alarm Manager] tab. The alarm history will be displayed.
The motion detection area number will be shown in the "Object" column.
The trigger event name will be shown in the "Message" column.
Milestone XProtect Management Client 2024 R1 /DP 13.2a