Custom Event with Alarm integration
Last update: July, 2024
i-PRO Maximizer's Alarm integration expands the selection of i-PRO AI features available in XProtect.
i-PRO Maximizer supports custom events. By setting custom events, XProtect can receive additional alarms.
・SD card Alarm
Please see the following page for an overview of i-PRO Maximizer.
The installer and installation manual can be downloaded from [HOW TO INSTALL] on the following page.
i-PRO Maximizer (milestonesys.com)
1. Camera Setting
2. Setup in XProtect Management Client
3. Confirmation of alarm reception in XProtect Smart Client
<Camera Setting>
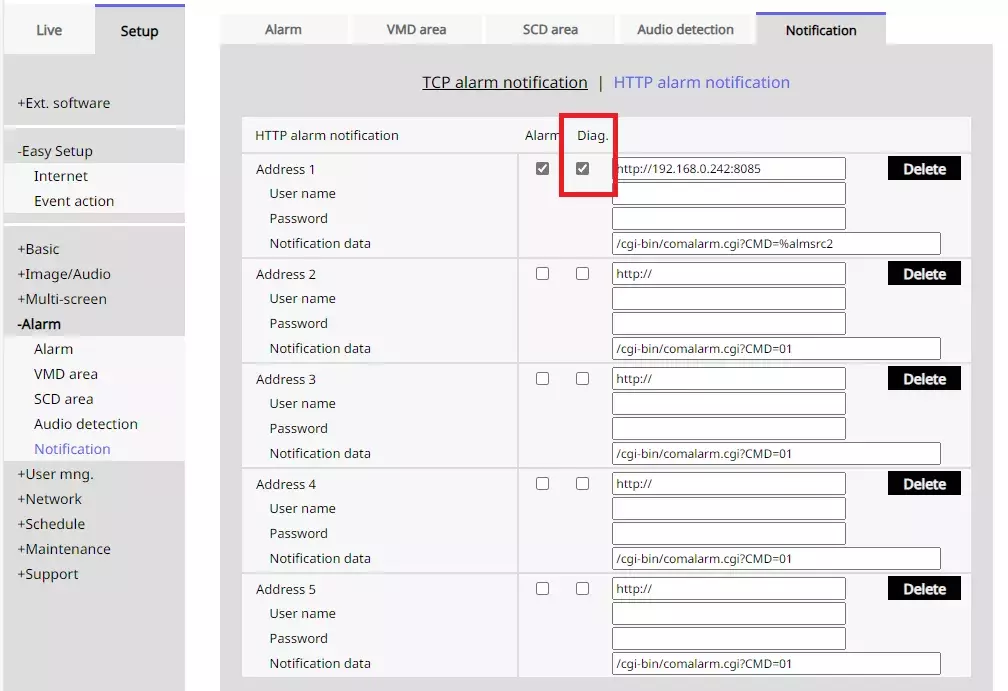
1. HTTP Alarm Notification
Open [Setup] - [Alarm] - [Notification] - [HTTP alarm notification] screen in the camera browser.
Check [Diag]. (Camera V2.60 or later)
<Setup in XProtect Management Client>
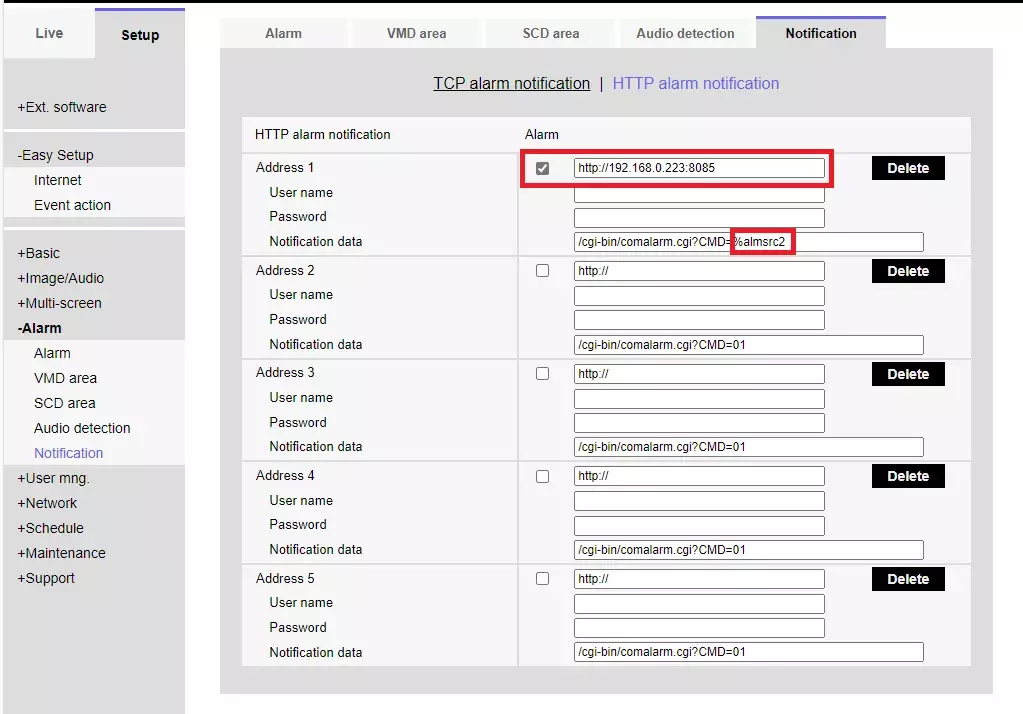
1. Send HTTP alarm notification settings to the camera.
[Rules and Event] - [i-PRO Extended Actions]
Click the [Update alarm sending on all cameras] button. By doing this, HTTP alarm notification will be automatically set for the connected i-PRO camera.
A pop-up will appear with the updated information for all cameras, so click "OK".

The IP address and HTTP alarm port of Milestone are added to [Address 1] of the camera's HTTP alarm notification, and the parameter "%alarmsrc2" is added to the notification data.
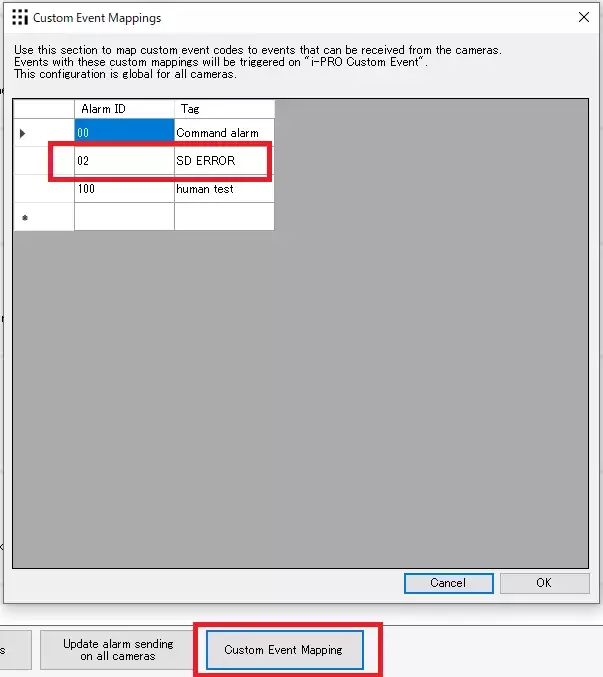
2. Custom Event.
Click the [Cusmom Event Mapping].
Set the [ID] and [Tag] for event mapping. Any name is OK for Tag.(ex, SD card not detected, SD card removal,….)
| SD card Event | ID |
|---|---|
| SD card full | 01 |
| SD card not detected | 02 |
| SD card Capacity ** % | 03 |
| SD card write error | A5 or 04 |
| SD card read error | A6 |
| SD card delete error | A6 |
| SD card filesystem error | A7 |
| SD card other error | A8 |
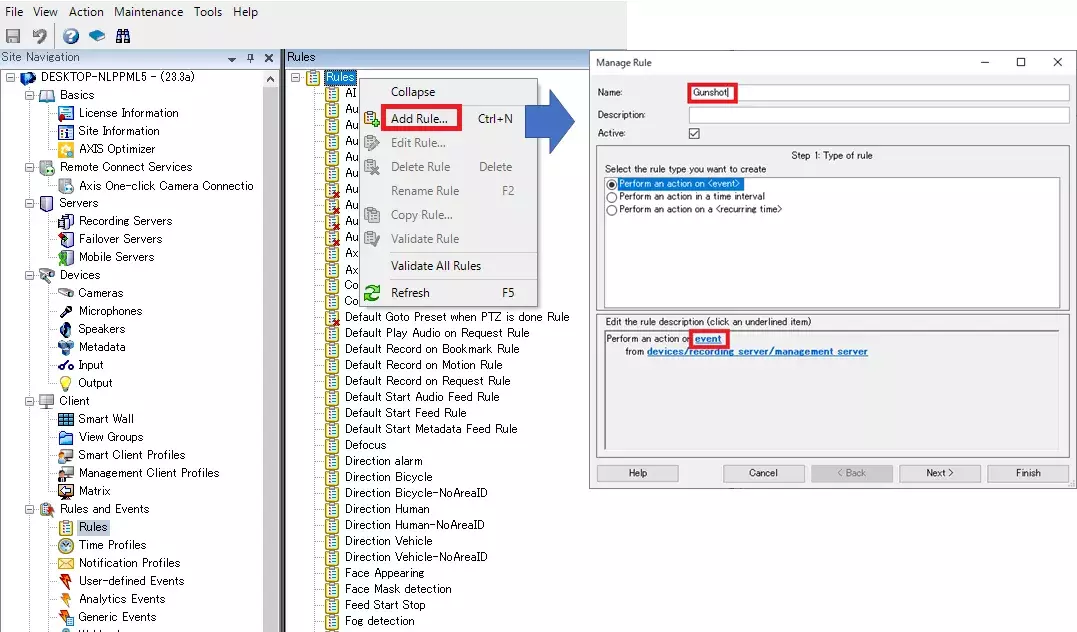
3. Create a rule.
[Rules and Events] - [Rules]
Right-click Rules and click "Add Rule"
The [Manage Rule] screen will appear. Enter a [Name:] and select [Perform an action on <event>] in "Select the rule type you want to create".
Click [event] in [Edit the rule description].
The subsequent rule creation procedure is the same as AI-VMD. Please refer to Step 7 and later of AI-VMD <Alarm setup in Xprotect Management Client>.
4. Click on [i-PRO Maximizer] and click on [i-PRO Maximizer Events].
Select the i-PRO Custom Event(i-PRO Maximizer Event)

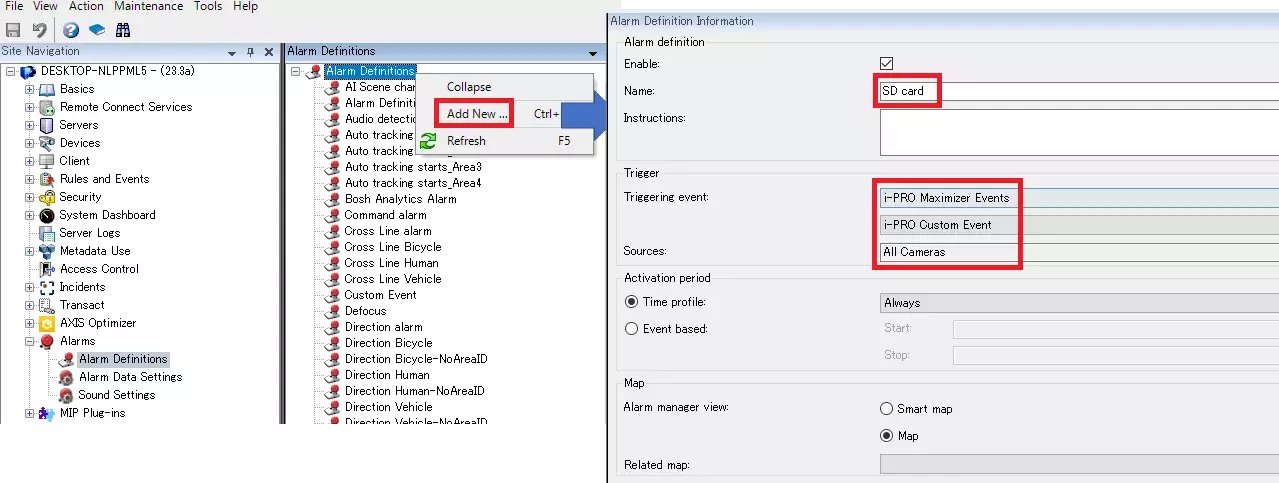
5. Create an alarm definition.
Alarms - Alarm Definitions
Right-click "Alarm Definitions" and click "Add New"After configuring the settings, save them with [Save] at the top left of the screen.
Enable:Check the checkbox
Triggering event:(1st row):"i-PRO Maximizer Events"
Triggering event:(2nd row):Select the i-PRO Custom Event.
Sources:"All Cameras" or "Select target camera"
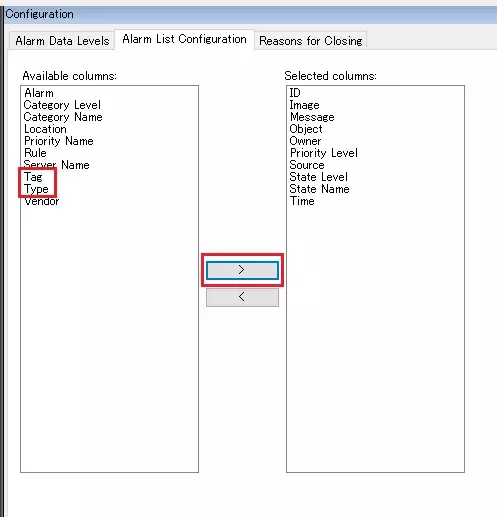
6. Add Tag and Type to the Alarm Manager alarm list.
[Alarms] - [Alarm Data settings] - [Alarm List Configuration]
Add "Tag" and "Type".
<Confirmation of alarm reception in XProtect Smart Client>
1. Start the SmartClient.
The status of received alarms can be checked in the [Alarm Manager] tab. If the "Tag" and "Type" added in step 5 are not displayed, they need to be added. Right-click on the title bar of the alarm list and add "Tag" and "Type".
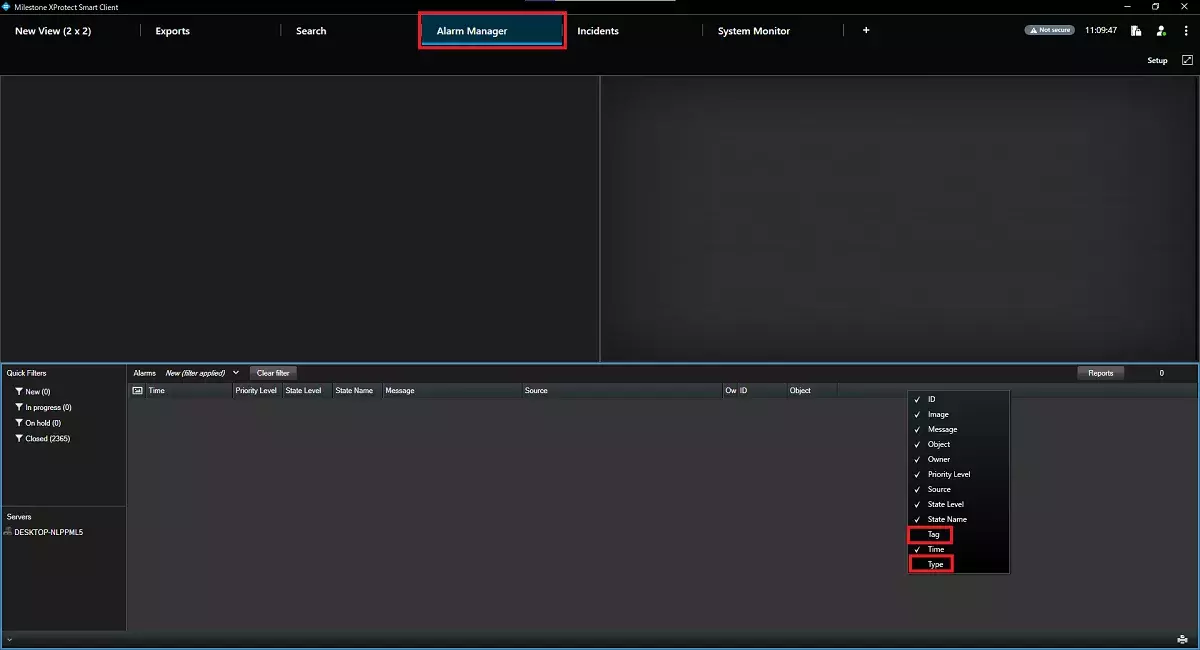
2. When an alarm is received, the type of alarm is displayed in Tag and i-PRO Maxmizer is displayed in Type.

Milestone XProtect Management Client 2023 R3 /DP 13.0a
i-PRO Maximizer 1.0.1