AI Scene Change Detection
Last update: Oct, 2024
Configuration of AI Scene Change Detection alarms on Genetec Security Center
*When setting up AI Scene Change Detection, please ensure that an SD card is inserted into the camera for saving learning images.
<Camera settings>
1. Install the AI Scene Change Detection software by opening to [Setup] - [Ext. Software] - [Software Management].
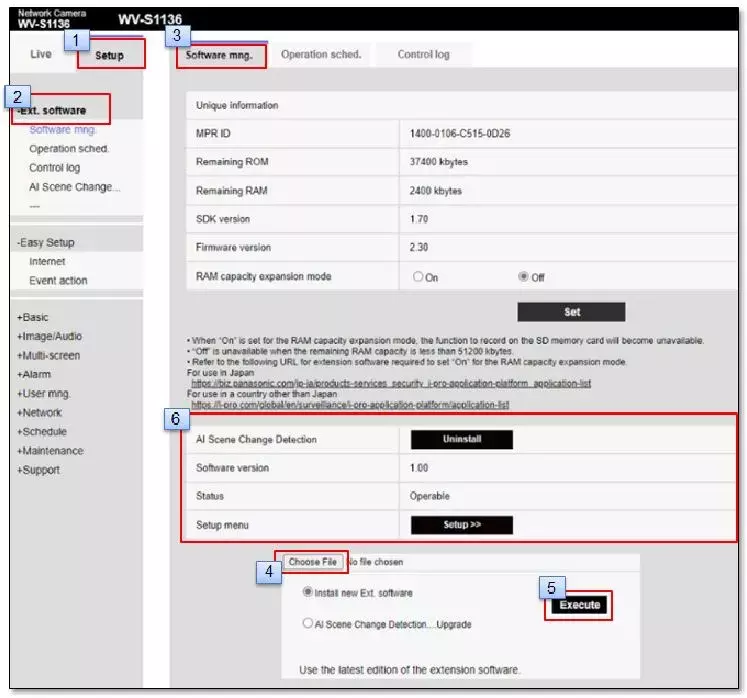
4: Click "choose File" to select the target software and proceed with the installation.
6: After the installation is complete, version information and other details will be displayed.
<Setting from i-PRO Configuration Tool (iCT)>
*Please make sure to use the latest version of "iCT for Genetec".
Note: "iCT for Genetec" V3.6.0.2 is currently unavailable due to known issues (April 2023).
1. Register the camera to the Security Center.
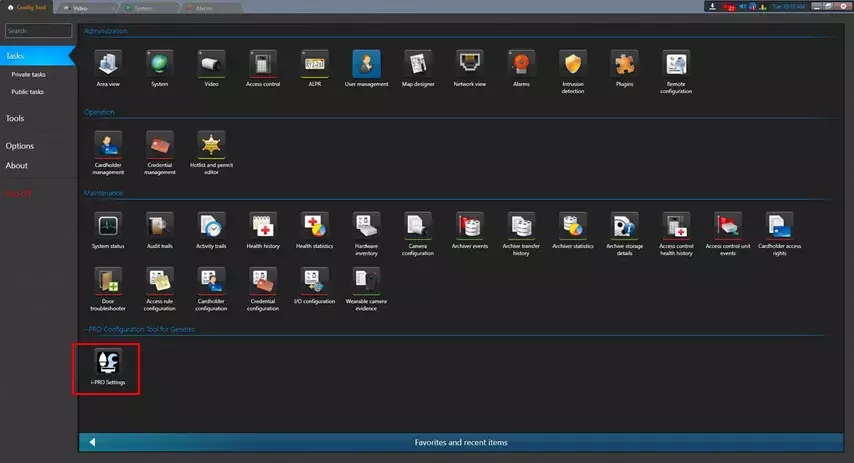
2. Open [i-PRO Configuration Tool for Genetec] and configure the alarms.
Go to [Config Tool] - [Task] - [i-PRO Configuration Tool for Genetec] - [i-PRO Settings].
*The i-PRO Configuration Tool Plugin for Genetec must be installed beforehand.
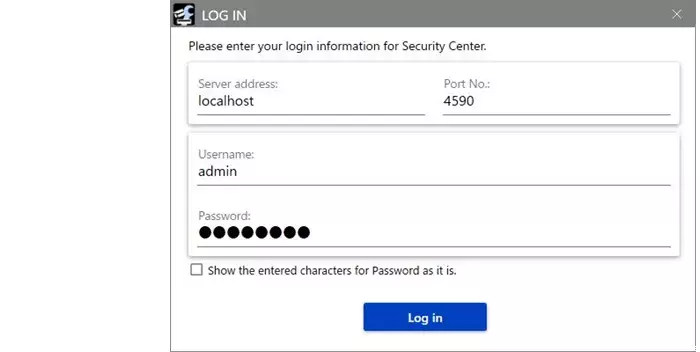
3. Login using the [Username] / [Password] you used when logging into the Security Center.
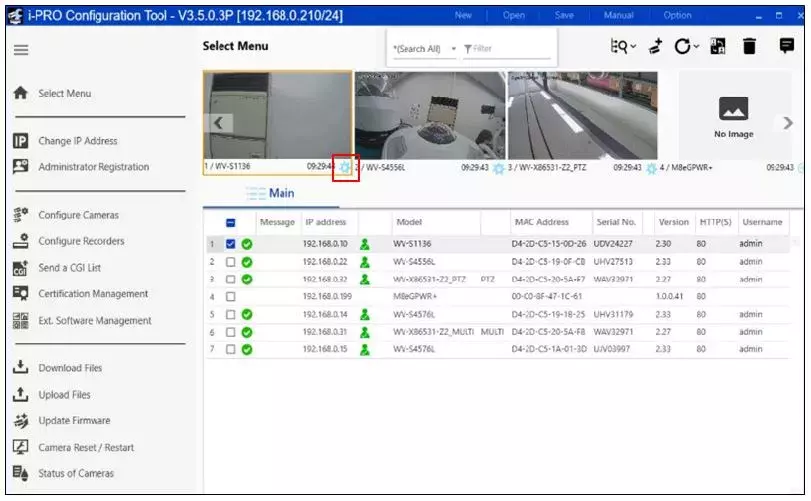
4. AI Scene change detection setting
4-1. Open the settings screen for the target camera.
4-2. Select [Ext. Software] - [Operation Sched.] - [Operation Sched.].
Select "AI Scene change detection" in the [Extension software] .
Enable the timetable by selecting "On" and click the [Set] button. (*Please configure the necessary schedule settings.)
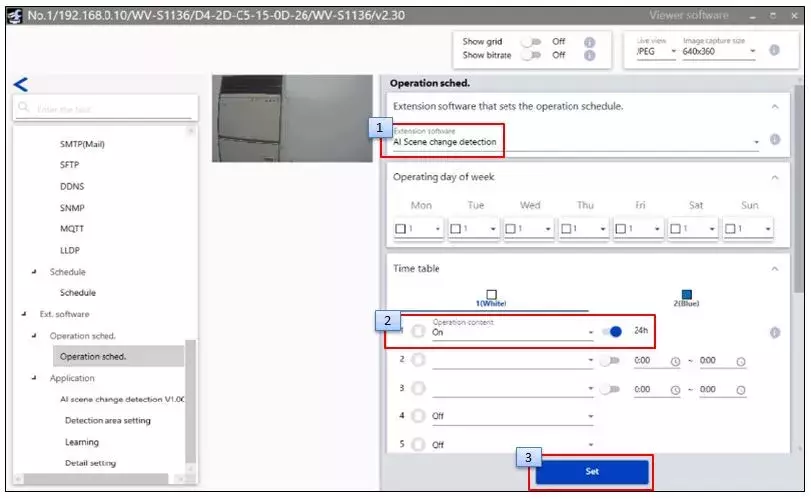
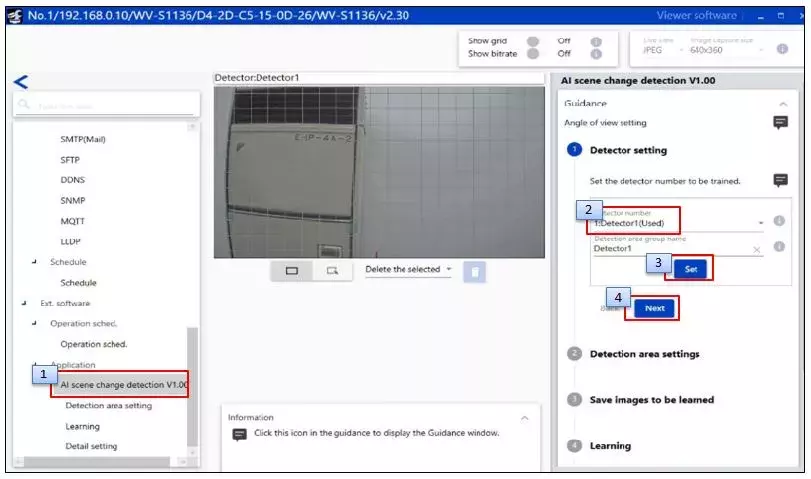
4-3. Select to [Application] - [AI scene change detection] and adjust the settings as guided.
4-3-1. Detector setting
4-3-2. Detection area settings
Create a detection area and select the corresponding detection area number.
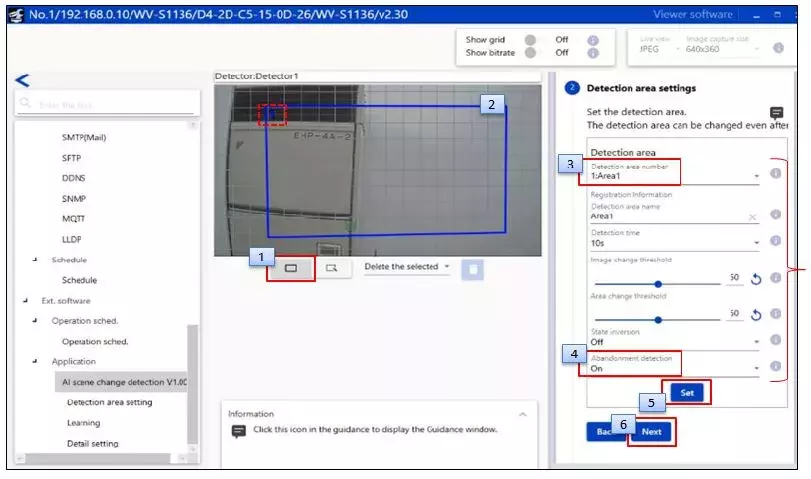
Detection area:
Select the detection area number. If "All" is selected, the settings will apply to all configured detection areas. If "All" is chosen, only the items selected by the checkbox on the left of each item will be applied.
Detection time:
Set the duration for detecting changes in the detection area. It indicates when a continuous state change exceeds the detection time.
State inversion:
On: Triggers an alarm when the state matches the learning state.
Off: Triggers an alarm when the state differs from the learning state.
Abandonment detection:
Turn it "On" when using it to detect abandoned items (suspicious objects, etc.).
-When abandonment detection is turned on, objects of a certain size are detected regardless of the area change threshold setting. (Guideline: approximately 5% to 50% of the screen's width)
-When abandonment detection is set to "On" and multiple detection areas are enabled, the image change threshold and detection time will be based on the values of the detection area with the lowest number.
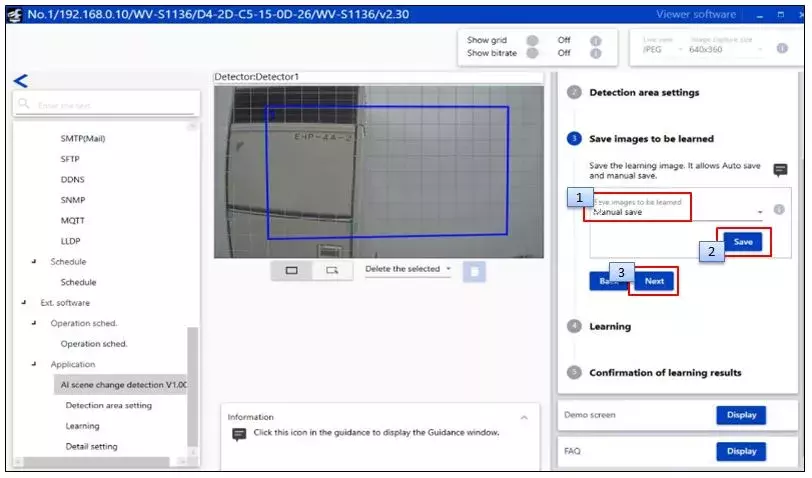
4-3-3. Save images to be learned
Example: Set the "Save Images to be learned" option to "Manual Save" and click the [Save] button.
(*Since learning requires two or more images, click the [Save] button twice.)
Click the [Next] button.
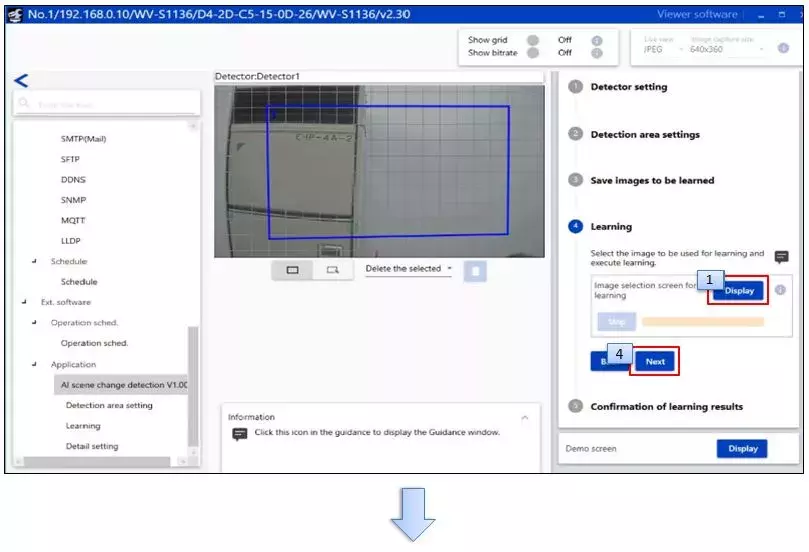
4-3-4. Learning
Click the [Display] button on the image selection screen for learning.
The saved images will be displayed, select the desired image, and click the [Start] button.
Click the [Next] button.
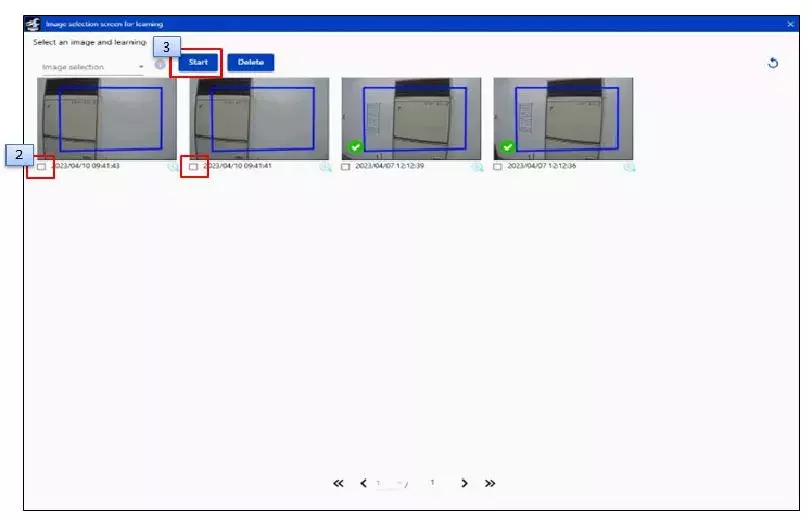
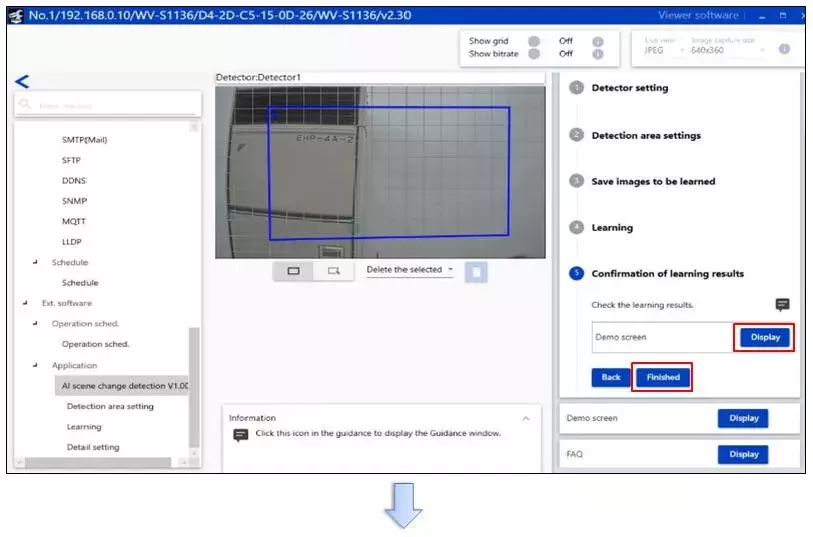
4-3-5. Confirmation of learning results
After confirming the learning results, click the [Finished] button.
*If you open the demo screen, remember to press the [Finished] button before proceeding.
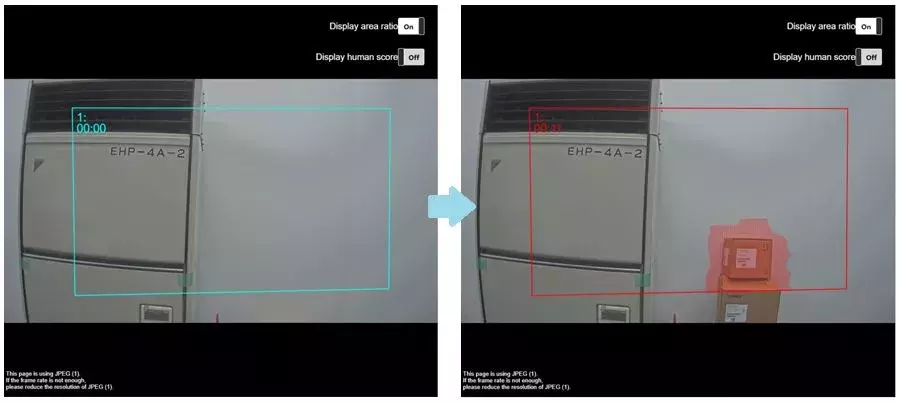
Demo screen
*If a detection occurs, the frame color will change from blue to red.
<Genetec settings>
1. To activate an alarm, create an alarm by going to [Config Tool] - [Tasks] - [Alarm] and associate it with the target camera.
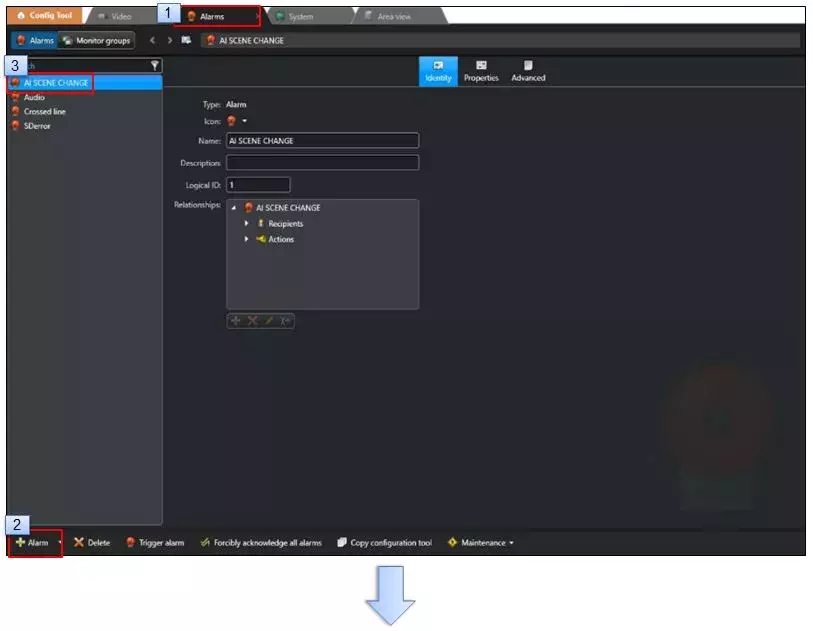
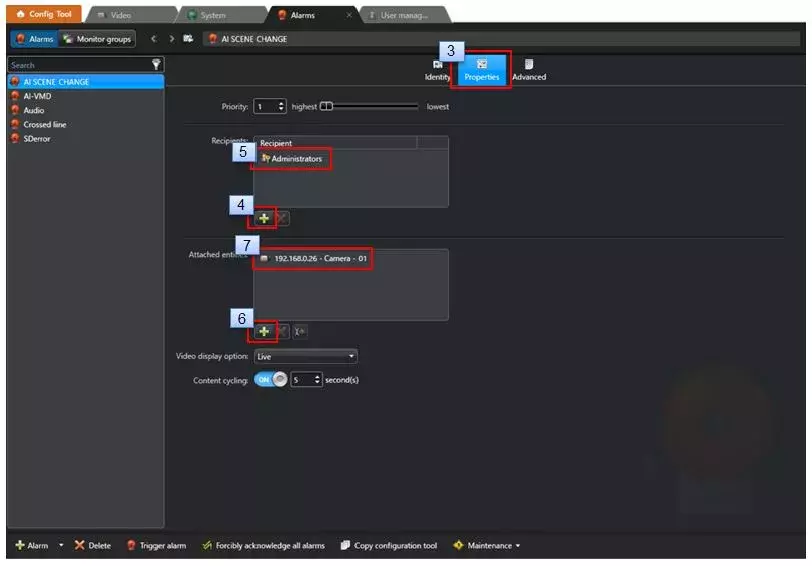
2. Add items through [Config Tool] - [Tasks] - [System] - [Actions].
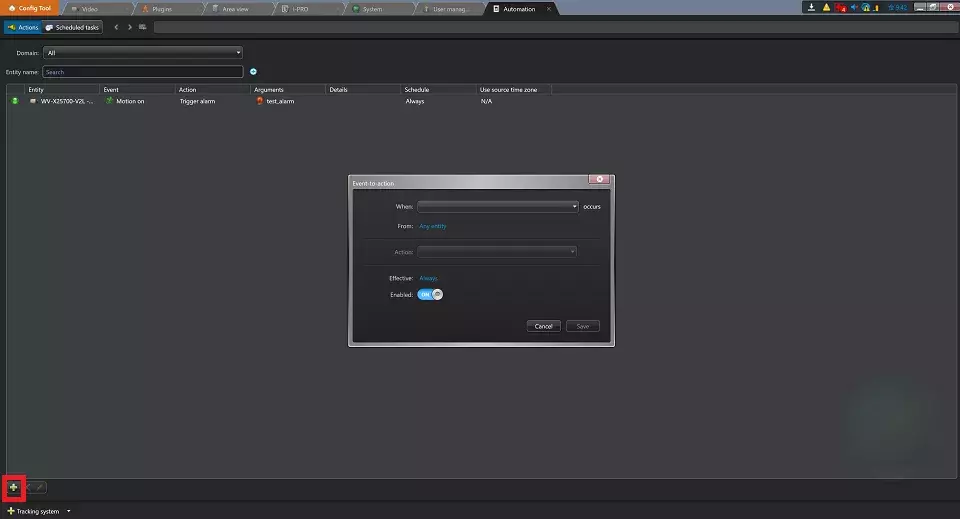
3. On the [Event-to-action] screen, configure the settings.
(Example: To set the action as "Alarm activation," an alarm needs to be created as mentioned in step 1.)
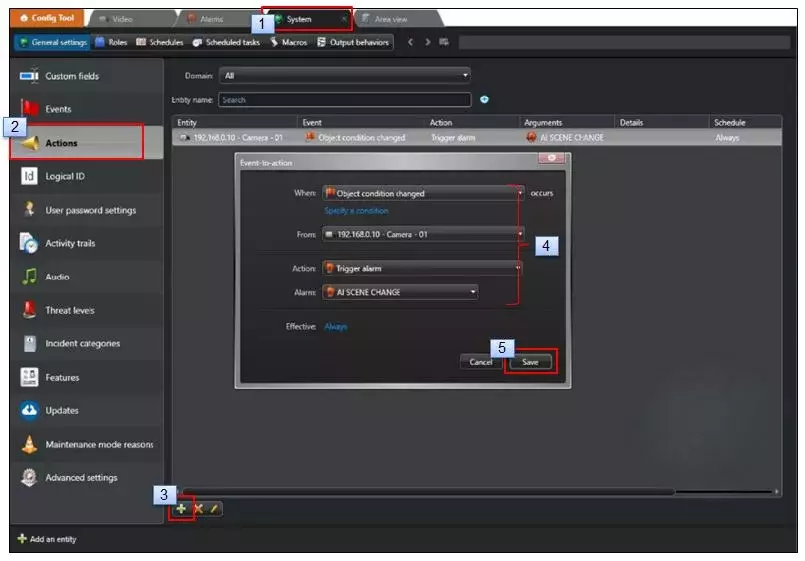
You should select the following option for "When" to receive the AI scene change detection alarm.
When: Object condition changed
From: Target camera
Action: Optional(Example: Trigger alarm)
Alarm: Optional(Example: AI SCENE CHANGE)
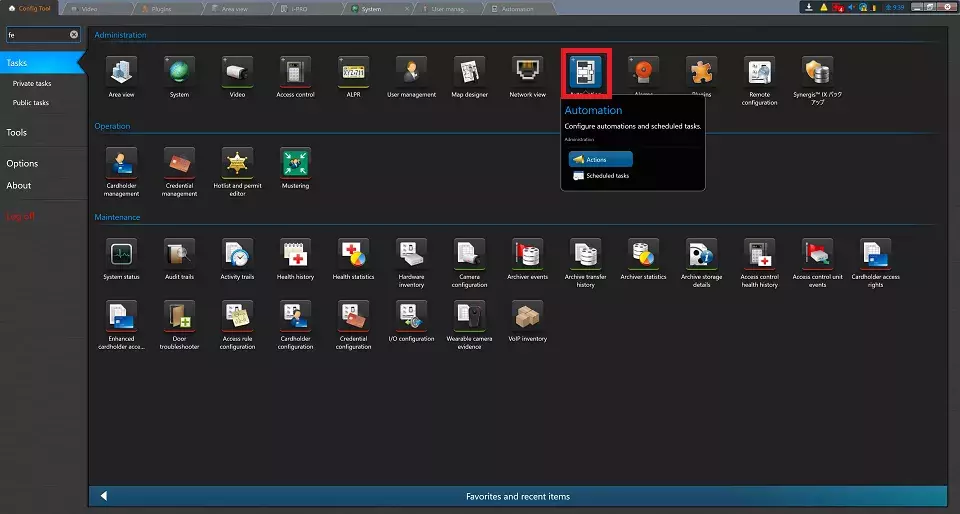
In Security Center 5.12.1.0 or later, click [Config Tool] - [Tasks] - [Automation], then click the "+" button at the bottom left to add an action.
4. Click "Monitoring Active" on the [Security Desk] - [Tasks] - [Monitoring] screen to open the "Event monitoring" settings, and click the [+] (Add) button.
When the target camera is added, "AI SCENE CHANGE ALARM (AREA1)" will be displayed in the event history when an AI scene change detection alarm is received.
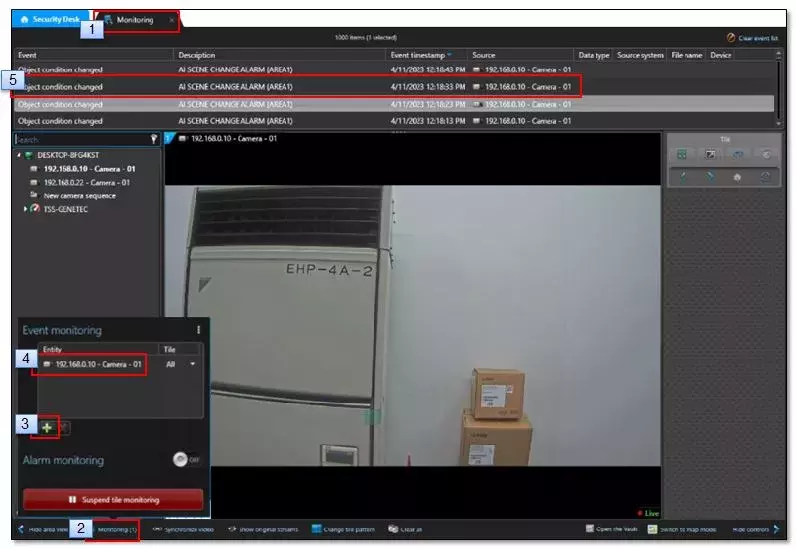
5:AI scene change detection alarms received from the camera will be displayed in the history.
・You can also view them as events (Analytics) in [Security Desk] - [Tasks] - [Camera Events].
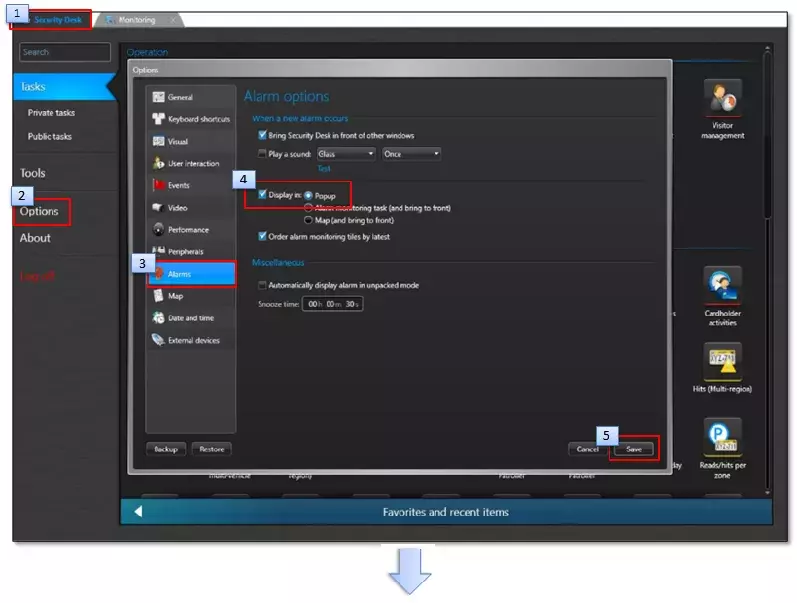
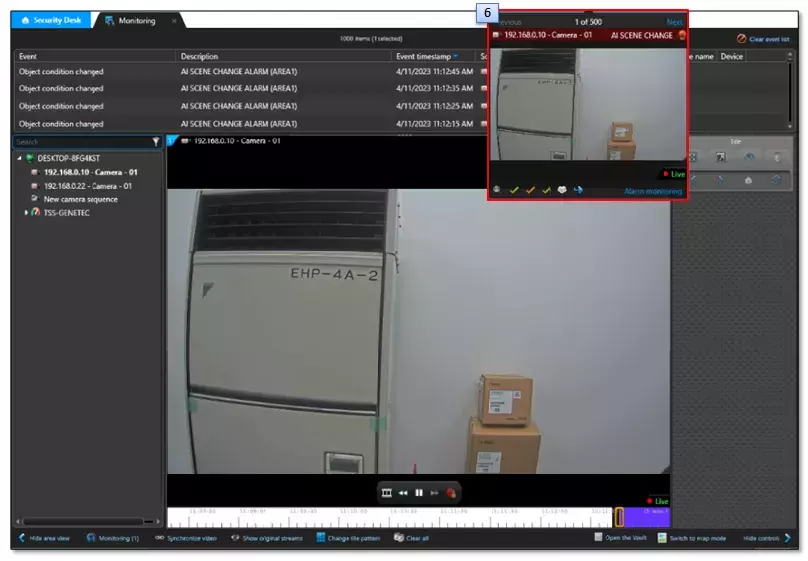
*To display a pop-up image of the target camera in the upper-right corner of the [Security Desk] - [Monitoring] screen when an alarm is received.
Select "Popup" under [When a New Alarm Occurs] - [Display In] in [Security Desk] - [Options] - [Alarms].
Genetec Security Center 5.11 / Driver Pack 11.3