AI People detection and AI Vehicle detection
Last update: April, 2024
This page explains how to integrate AI people detection and AI vehicle detection into the Network Optix NxWitness VMS.
There are mainly two features for this integration.
1. Viewing detected people or vehicle in the Notification Panel
2. Advanced object search
<Camera settings>
Please install the AI people detection or AI vehicle detection on the camera.
Verify the application's schedule configuration.
If detailed settings, such as mask areas, are required, please refer to the application’s manual.
(AI Face Detection etc. Operating Instructions (English)).
<VMS settings>
Detected people or vehicles will appear once you configure the camera settings properly.
1. Viewing detected people or vehicle in the Notification Panel
1-1. Detected objects will be displayed in the Notification Panel under the OBJECTS tab.
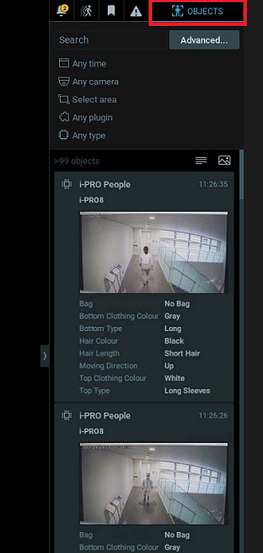
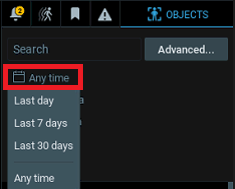
1-2. You can filter by specific time duration and specific camera.

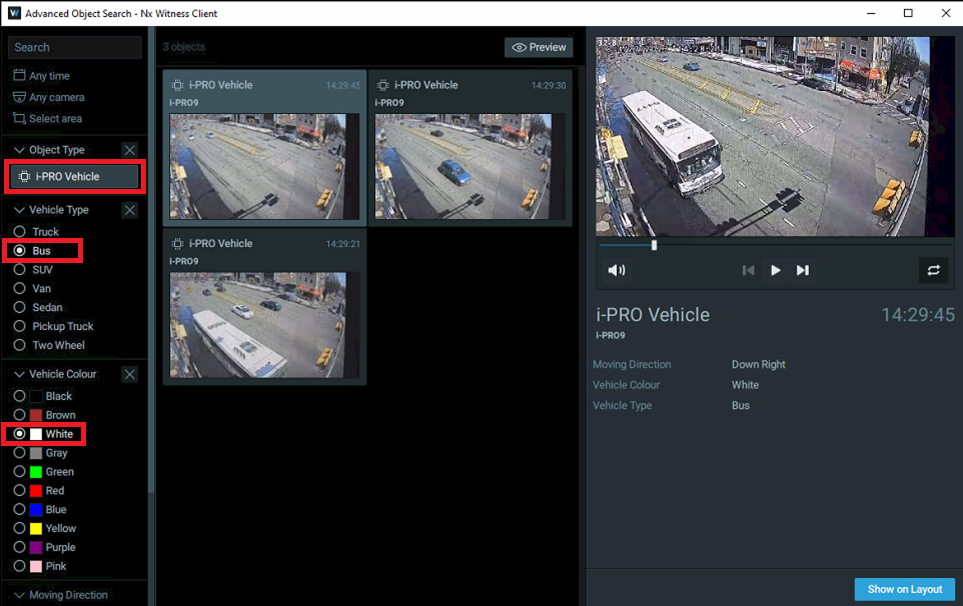
2. Advanced object search
Advanced object search allows you to search by specific attributes.
2-1. Click on the [Advanced...] button.
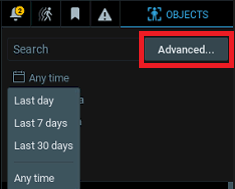
The Advanced Object Search screen opens and shows the search results.
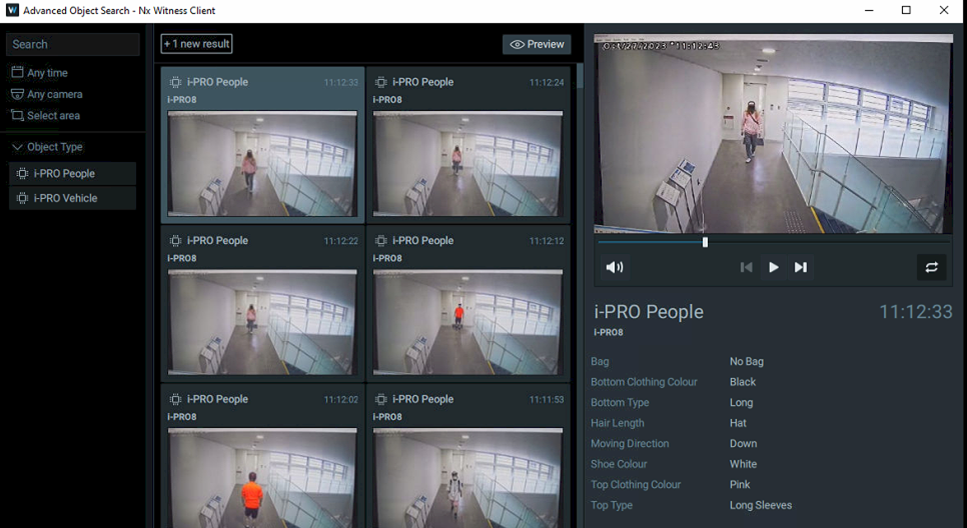
2-2. You can filter using detailed attributes of people from [i-PRO People].
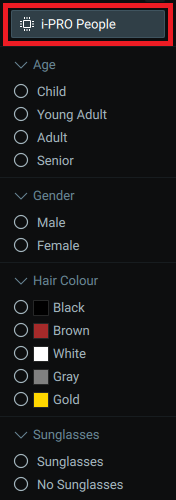
2-3. This is an example where [Adult] is selected for [Age], [Male] for [Gender], and [Black] for [Hair Colour].

At the same time, you can also use filters for time and source camera on this screen.
2-4. From [i-PRO Vehicle], vehicle attributes can be utilized.
(Supplement) Event Rule configuration
The following 1-5 steps are showing how to configure event rule for AI people detection and AI vehicle detection.
These steps are not necessary if you don’t use event and rule management.
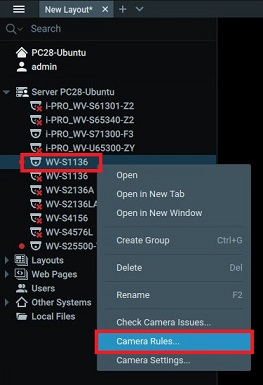
A-1. In the Resource Tree, right-click on the camera you have registered, and select [Camera Rules...] to open the Event Rules screen.
A-2. Click the [+ Add] button to create the default [Event] and [Action] sections.
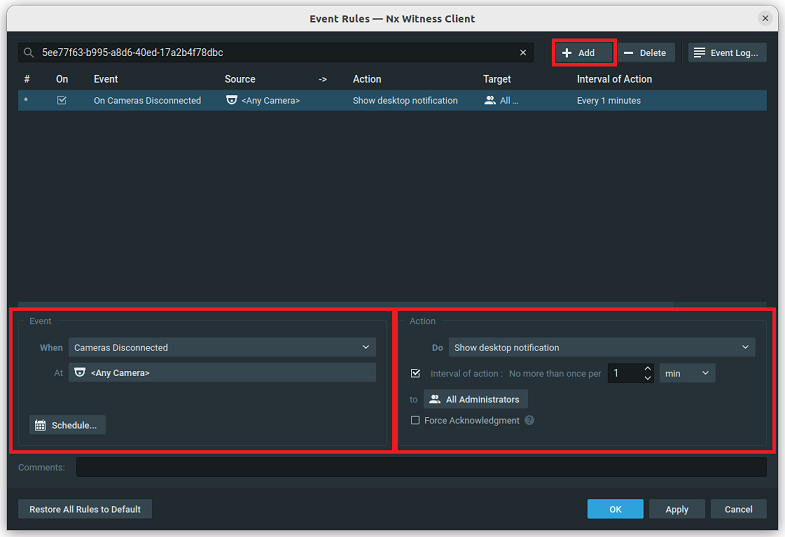
A-3. In the [Event] section, click the [When] dropdown and select "Analysis Object Detected".
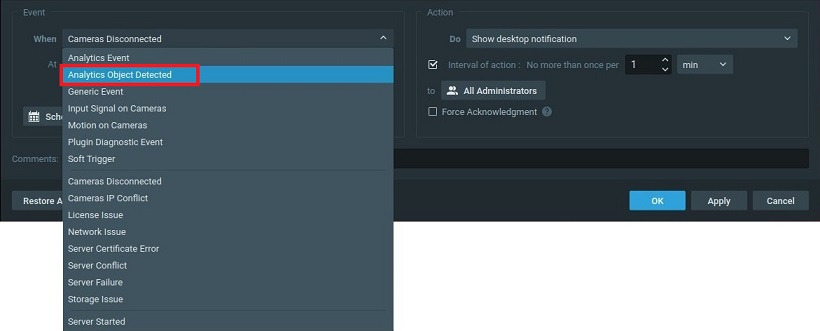
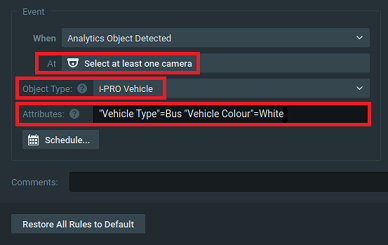
A-4. [Event] section setting
At(Mandatory):
You need to select at least one camera.
Opject Type(Mandatory):
"i-PRO Vehicle" or "i-PRO People".
Attributes(Optional):
Using this field, you can create rules for specific attribute objects, such as a white bus.
Format is <attribute>=<value> and multiple attributes can be set by separating them with spaces.
<Attributes> and <Value> must match those shown in the Advanced Object search window.
If attributes or values themselves include spaces, like "Vehicle Type," <attribute> should be "Vehicle Type" using double quotation marks.
A-5. Select how to receive notifications for specific events from the [Do] dropdown in the [Event] section.
In this example, "Show desktop notification" is selected as the [Action] - [Do] setting, and "All Users" is selected as the [Action] - [to] setting.
Click [Apply] to apply this event rule.

Nx Witness Client version 5.0.0.35745
i-PRO Advanced Object Search plug-in Version 1.0.5