AI-VMD
Last update: June, 2023
AI-VMD alarm configuration on Genetec Security Center
<Camera Settings>
1. Register the camera to VMS.
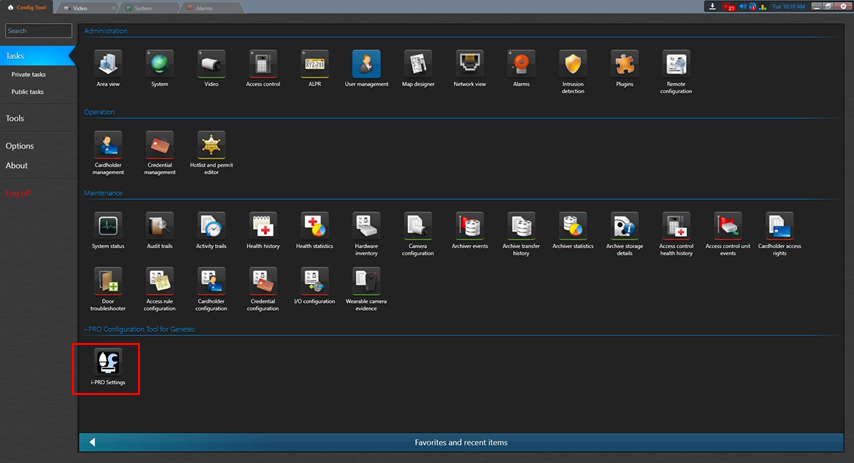
2. Open Genetec's i-PRO Configuration Tool.
Select [Config Tool] - [Task] - [i-PRO Configuration Tool for Genetec] - [ i-PRO Settings]
*i-PRO Configuration Tool Plugin for Genetec must be installed in advance.
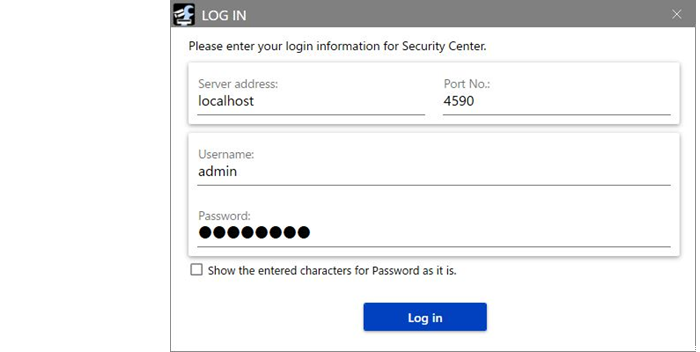
3. Click the [Log in] button.
*Log in with the Username/Password you used when you logged in to the Security Center.
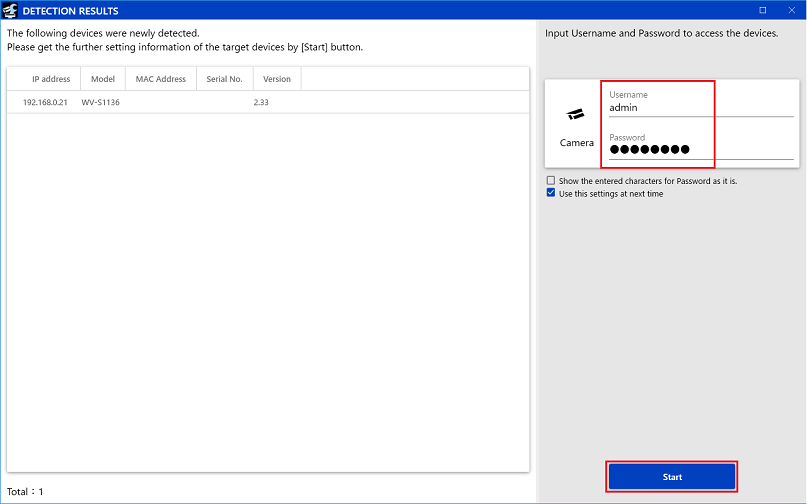
4. Select the target device and enter the [Username] and [Password] to access the device.
5. Click the [Start] button.
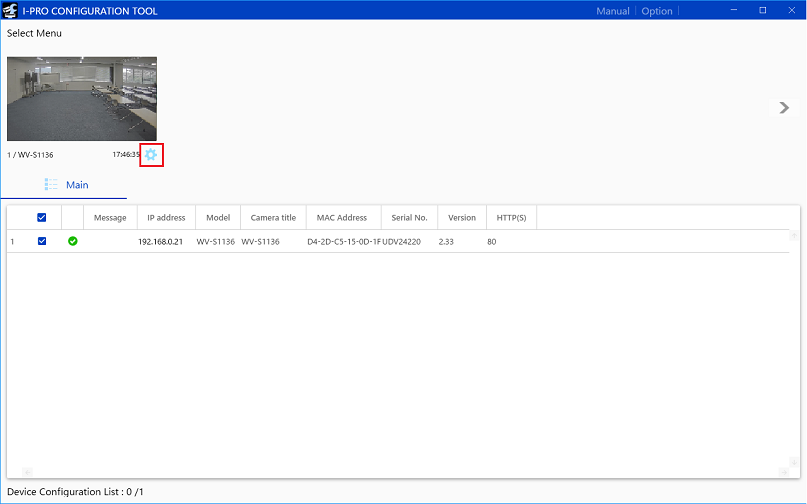
6. Click gear icon to open camera setup.
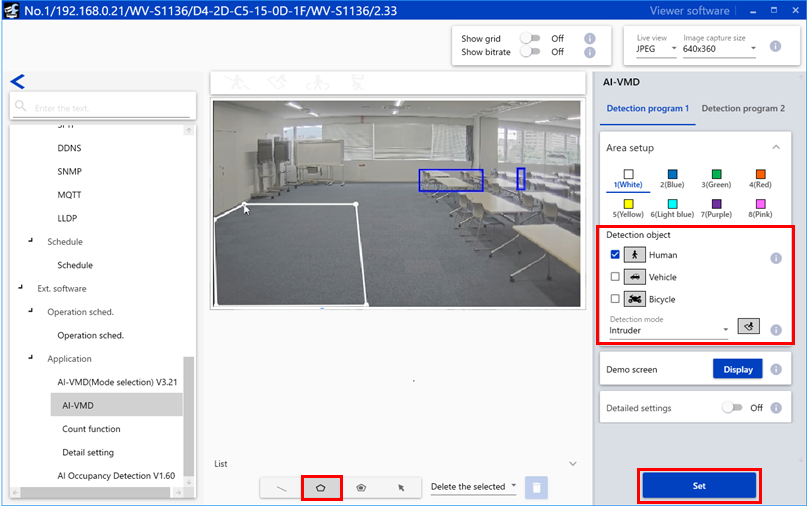
7. Detection area setting
Select [Ext. software] - [Application] - [AI-VMD].
Specify the area, set the [Detection object] / [Detection mode], and click the [Set] button.
Each detection area is assigned an area ID based on the color of the [Area Setup].
8. Detailed setting
Select [Detail setting] and configure the necessary settings.
*If you want to display the details (object type) when receiving alarm notifications on the VMS side, set [Additional information(Detection object)] to "With information of the detected object(Alarm frame)".
Click the [Set] button after completing the settings.

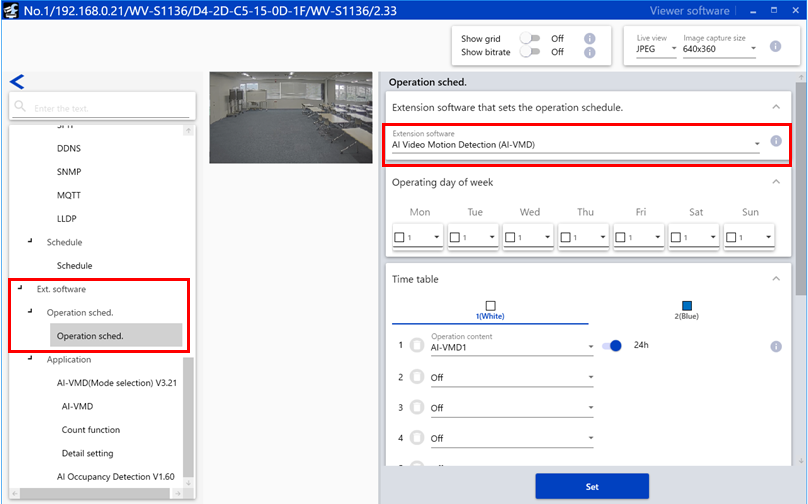
9. Schedule settings
Select [Ext. software] - [Operation sched.].
Select "AI Video Motion Detection (AI-VMD)" in the [Extension software] and set the schedule to enable detection.
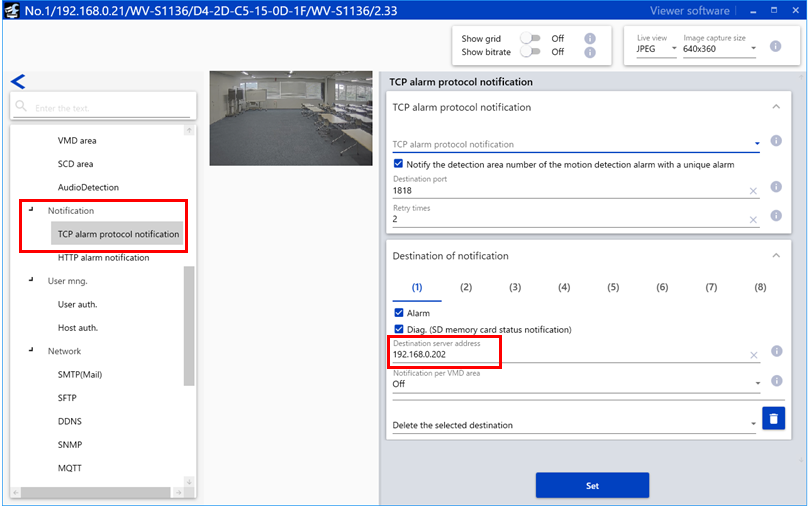
10. Alarm notification settings
Select [Notification] - [TCP alarm protocol notification].
Confirm that [TCP alarm protocol notification] is "On", [Notify the detection area number of the motion detection alarm with a unique alarm] is checked, and [Destination server address] of [Destination of notification] is set.
*This setting is automatically set When the camera is registered with VMS.
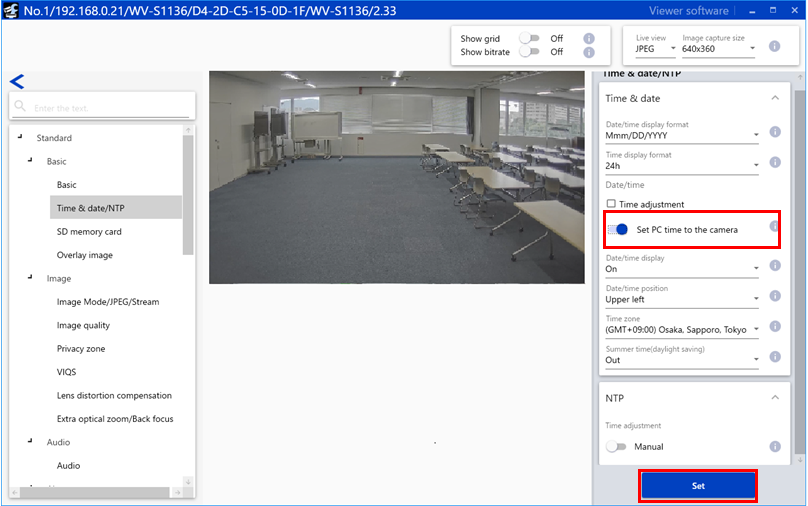
11. Time synchronization
Ensure that the time is synchronized between the camera and Genetec.
Select [Standard] - [Basic] - [Time & data/NTP].
Turn on the "Set the specified time to the camera" radio button to enable "Set PC time to the camera", and click the [Set] button.
<VMS settings>
Alarm(Event)History
To view the received alarm (event) history, go to [Security desk] - [Tasks] - [Monitoring]. Click [Add] in [Monitoring] at the bottom left of the screen to add the target camera, and the received alarm (event) history will be displayed.
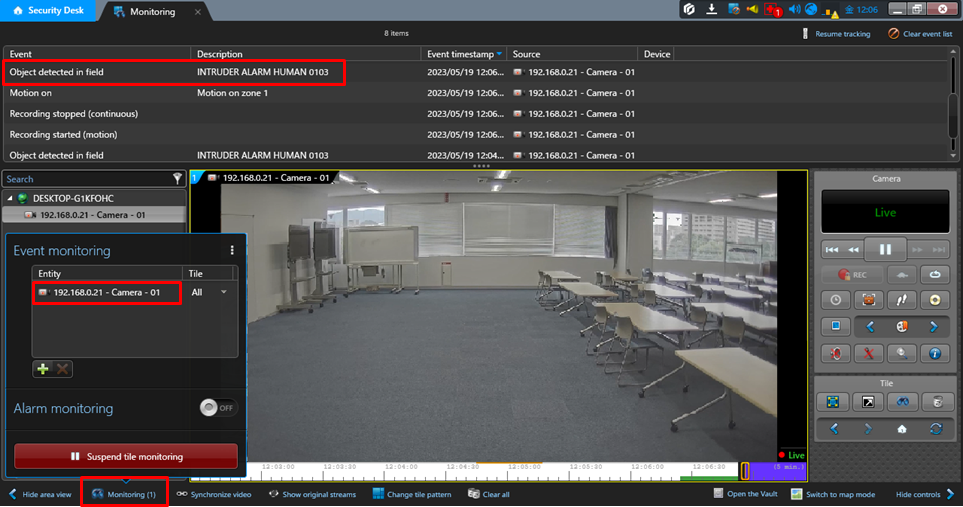
The message format of the received AI-VMD Alarm area information displayed in the Description can be changed from Bit representation to ASCII representation.

To change it to ASCII representation, send a CGI command to the camera.

Example: http://192.168.0.10/cgi-bin/setdata?alarm_area_format=ascii
*Ensure that ”ALARM_AREA_FORMAT, "ascii"” is displayed in "cgi-bin/getdata?"
【Support models】
・AI cameras(Dome Network Camera with AI engine, Box Network Camera with AI engine, AI fisheye ,AI-PTZ, AI-Multi directional, High Resolution with AI engine, i-PRO mini)
:Supported starting from February 2023 VUP Ver2.30
The following are the two pattern setting procedures described:
・A. Event recording during continuous recording.
・B. Event recording only.
A. Event recording during continuous recording.
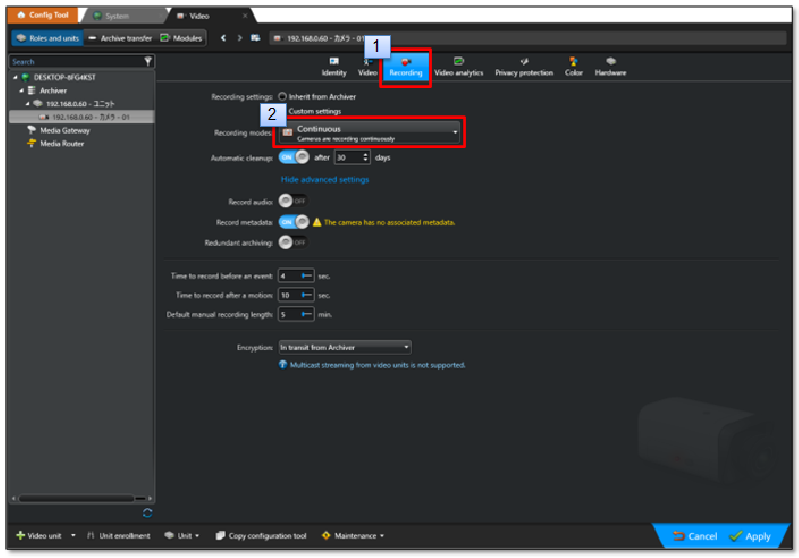
A-1. Go to [Config Tool] - [Video] - [Camera] - [Recording] - [Custom settings] - [Recording modes] and select "Continuous".
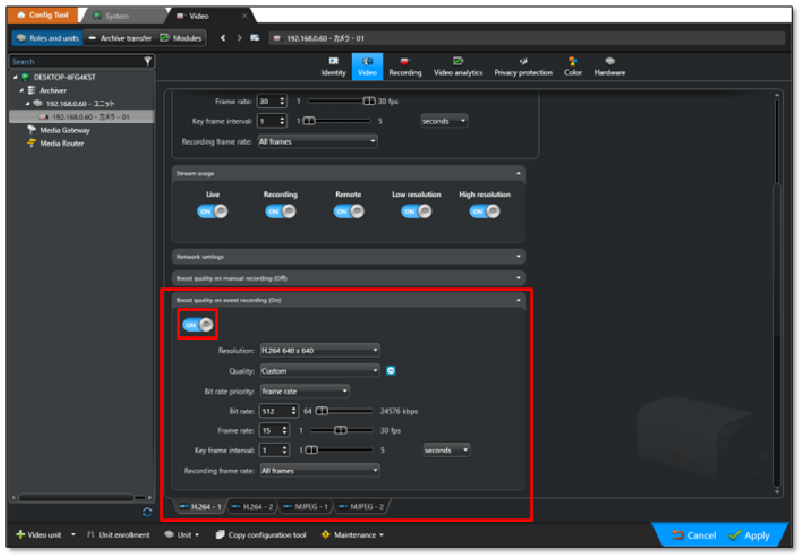
A-2. Set [Video] - [Stream usage] - [Recording] to "ON".
The recording stream will reflect the [Video quality] setting where [Recording] is set to "ON" in [Video] - [Use Stream].

If "Boost quality on event recording (On): ON" is set, but event recording is not reflected, then the event recording is performed with the video quality recording setting.
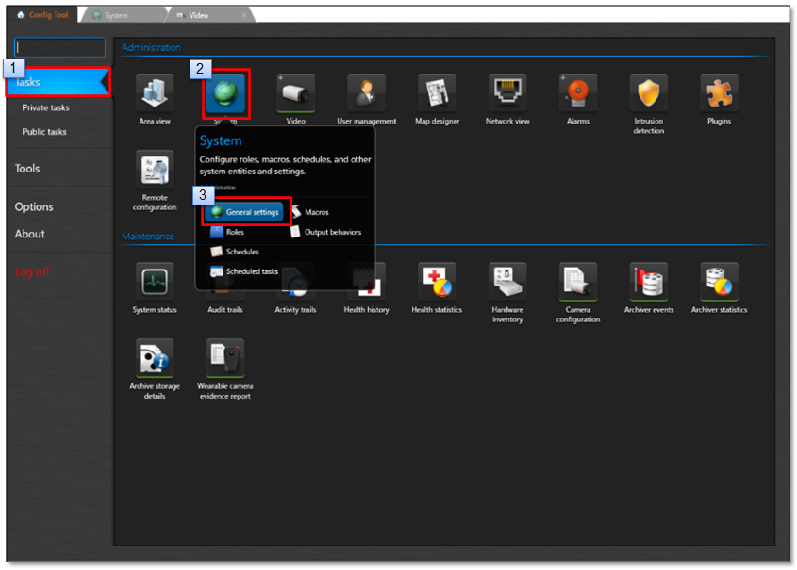
A-3. Click the [Add an item] button in [Config Tool] - [Tasks] - [System] - [General settings] - [Actions Screen] and configure the [Event-to-action] settings.

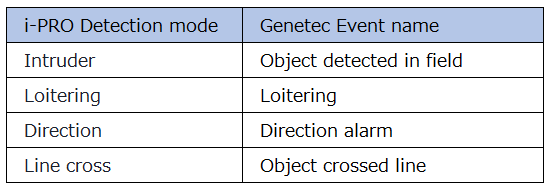
Event-to-action settings: (Example: Intruder detection)
When:Object detected in field
From:Target Camera
Action:Start recording
Camera:Target Camera
B. Event recording only.
B-1. Open [Config Tool] - [Tasks] - [System] - [General settings].
B-2. Select an [actions] and click [Add an item] to open the [Event to Action] screen.
Configure the event action of AI-VMD in [Event-to-action]. Select and set from the list box for each item.
The settings for "Loitering" are shown in the figure below.
*AI-VMD detection area number information cannot be determined from VMS (Security Desk 5.10.1.0 DP 10.6).

B-3. Select the target camera, and go to [Video] - [Recording].
For the recording mode, select ”On motion / Manual”.
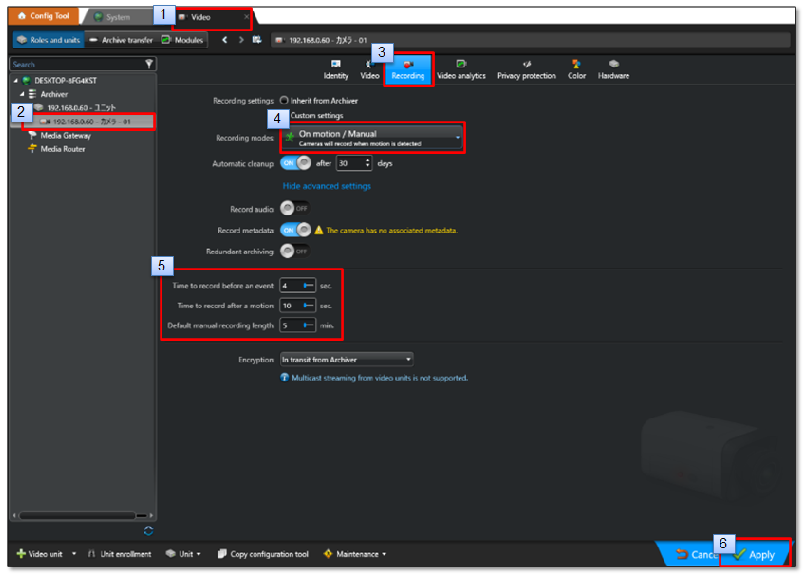
5. Configure as necessary.
・Time to record before an event:Pre recording time.(0 to 300 sec.)
・Default manual recording length:Post recording time.(1 to 1440 min.)
*The setting for "Time to record after a motion" is not necessary as it is not reflected in this operation.
B-4. The stream used for recording will reflect the [Video quality] setting when [Video] - [Stream Usage] - [Recording] is set to "ON".
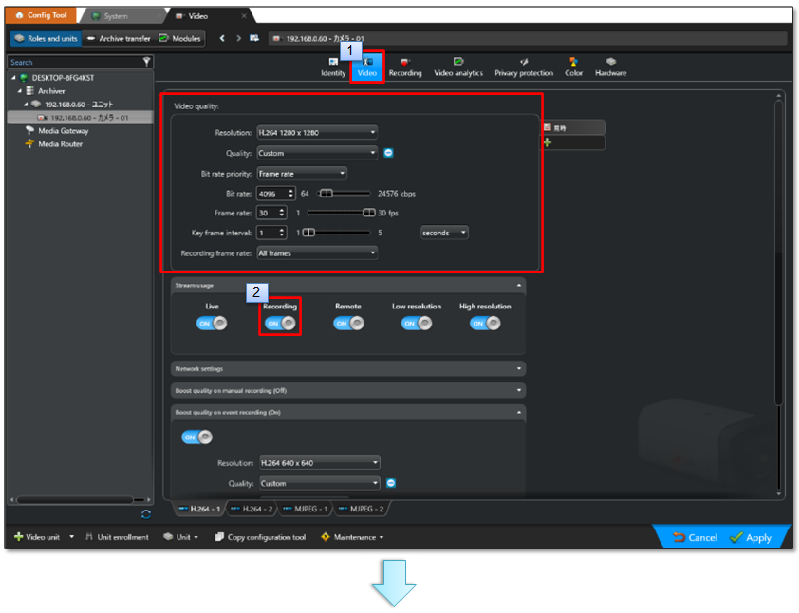
*If "Boost quality on event recording (On): ON" is set, the settings will be reflected.

Genetec Security Center 5.11 / Driver Pack 11.3