Registering cameras and enabling the plug-in
Last update: April, 2024
Please install the plug-in into the VMS according to the plug-in manual, install the camera's app, and verify the app's schedule configuration in advance.
If detailed settings, such as the detection area, are needed, follow the app's manual.
If you need the app manual, please download it from the link below.
(AI-VMD (WV-XAE200W) Operating Instructions (English)).
(AI Face Detection etc. Operating Instructions (English)).
<Initial setup for the camera (camera registration)>
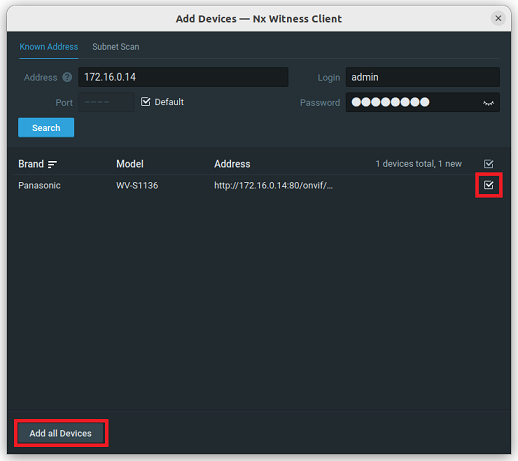
1. Right-click on the server name in the Resource Tree and select [Add Device...].

2. Enter your settings in the [Address], [Port], [Login], and [Password] fields, and click the [Search] button.

3. Check the camera and click [Add all Devices].
<Initial setup for the camera (recording settings)>
1. In the Resource Tree, right-click on the camera you want to connect to, and then select [Camera Settings...].

2. On the top menu, click on [Recording] Tab.
3. Turn the [Recording] switch on to make it green, select the day and time for scheduled recording, and then set the "Recording Schedule".
To ensure detected objects and events are correctly recorded and displayed, verify that the camera's video stream is actively being recorded.
4. Click the [Apply] button.

<Enabling the plug-in>
1. On the top menu, click on [Plugins] Tab.
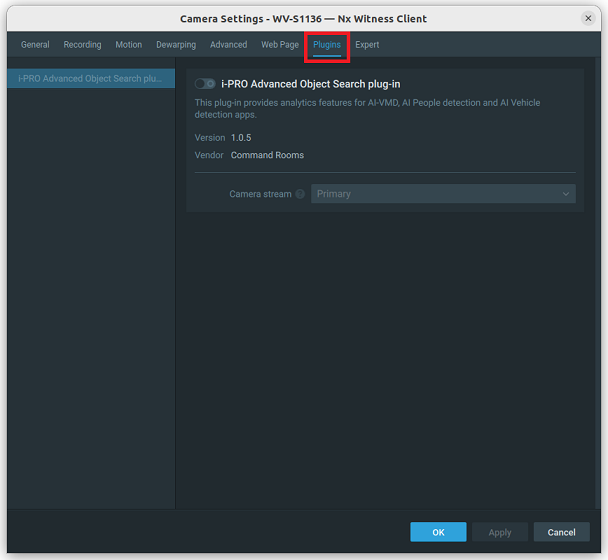
2. On the [Plugins] screen, while other plugins may be listed on the left, select the "i-PRO Advanced Object Search plug-in".
Then, activate the [i-PRO Advanced Object Search plug-in] and click the [Apply] button.
Verify that the installed AI applications are marked as installed.
In this scenario, "AI-VMD" and "AI People Detection" are installed, however "AI Vehicle Detection" is not.

Nx Witness Client version 5.0.0.35745
i-PRO Advanced Object Search plug-in Version 1.0.5