Simple manual for Image adjust
Super Dynamic(SD)
- When there is wide variation between the illumination of light and dark areas of the location being monitored, the camera adjusts the lens iris in accordance with the brighter areas. This causes loss of detail in darker areas. Conversely, adjusting the lens brightness for the darker areas causes the brighter areas to become washed out. Super Dynamic digitally combines an image that is set up for a clear view of the brighter areas with an image that is set up for a clear view of the darker areas, creating a final image that preserves overall detail.
Wide dynamic range (WDR)
- WDR compensates brightness so that it produces clearer images even if objects have various illumination intensities.When the wide dynamic range function is activated, noise may be increased in the dark area of the object.
Back light compensation(BLC)
- Select "Off" for "Super Dynamic(SD)". The back light compensation function can compensate back light by setting mask areas on brighter parts of images brighter.
|
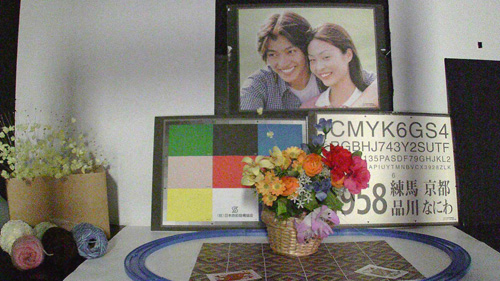
Super Dynamic(SD) "ON" 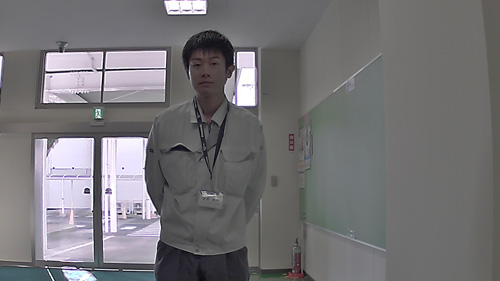 |
Back light compensation(BLC) "ON" 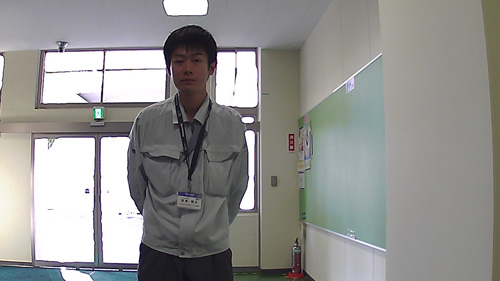 |
|
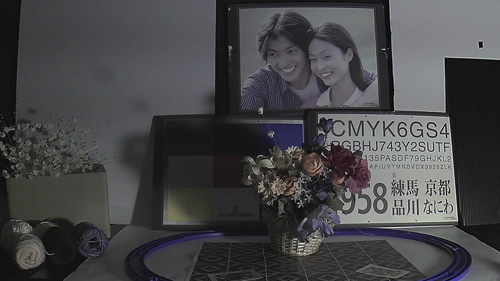
Super Dynamic(SD) "OFF", Back light compensation(BLC) "OFF" 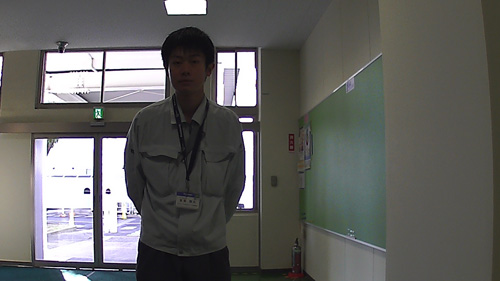 |
|
Face SD
- With the "Face SD" setting, if a person's face is dark and difficult to see, by combining the face detection and Super Dynamic functions, the area with the face in the image can be corrected to become brighter and easier to see.
Mask area
- When "Off" is selected for "Super Dynamic(SD)" and "Back light compensation (BLC)", it is possible to compensate for backlight by masking brighter areas.
Adaptive black stretch
- Select ""On"" or ""Off"" to determine whether or not to activate the darkness compensation function. The darkness compensation function can make darker parts of images brighter by digital image processing.
[IMPORTANT]
When ""On"" is selected for ""Adaptive black stretch"", noise in the darker parts may be increased, and parts around borders between the darker parts and the brighter parts may become darker/brighter than the other darker/brighter parts.
|
Adaptive black stretch "ON"  |
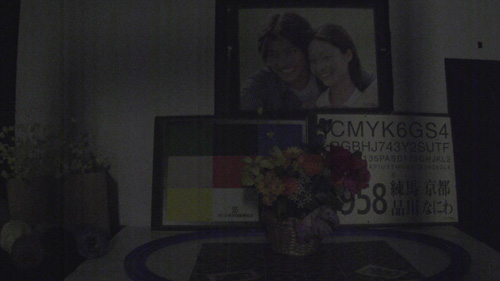
Adaptive black stretch "OFF" 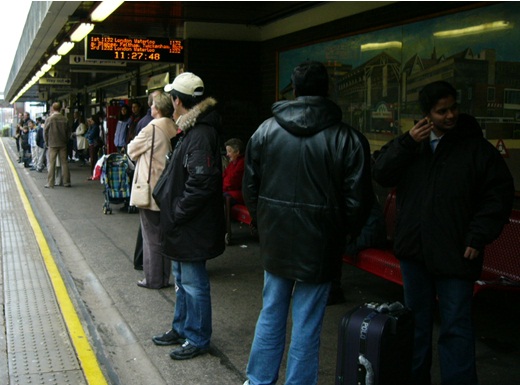 |
Light control mode
- Depending on the brightness level (illuminance), the iris will automatically be controlled together with the shutter speed adjustment to control light.
- Outdoor scene: When shooting a bright subject such as outdoor, etc., select this parameter.
- Indoor scene (50 Hz) / Indoor scene (60 Hz): The shutter speed will automatically be adjusted to prevent flicker caused by fluorescent light. Select 50 Hz or 60 Hz corresponding to the location where the camera is in use.
- ELC : When using Fixed aperture lens or Manual aperture lens, select this parameter.
- Fix shutter
(1/30 Fix, 3/100 Fix, 3/120 Fix, 2/100 Fix, 2/120 Fix, 1/100 Fix, 1/120 Fix)
: It is possible to prevent flicker caused by fluorescent light.
(1/250 Fix, 1/500 Fix, 1/1000 Fix, 1/2000 Fix, 1/4000 Fix, 1/10000 Fix)
: When a faster shutter speed is selected (up to 1/10000), it is possible to capture a fast moving object with less blur.
AGC
- When the luminance of the subject becomes darker, gain will be automatically increased and screen will become brighter. "High", "Mid" and "Low" are indications of gain level.
|
AGC High : 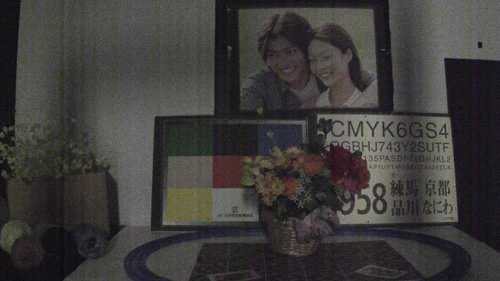 |
 |
It is used to suppress the bright light at night. AGC "Low", Auto slow shutter "1/30"
 |
|
Auto slow shutter
- The electronic sensitivity enhancement (sensitivity up) can be carried out by adjusting the storage time of the sensor.
When ""On"" is selected for ""Auto slow shutter"", frame rate may become lower. Noise or white dots (blemishes) may sometimes appear.
When ""On"" is selected for ""Auto slow shutter"", afterimage may increase.
Day and Night(IR)
- Select switching between the color mode and the black & white mode.*Off: The color mode is selected.
- On: The black & white mode is selected.
- Auto1(Normal): The camera automatically switches between the color mode and the black & white mode in accordance with picture brightness (luminance). The black & white mode will automatically be selected when the lighting condition becomes darker, while the color mode will automatically be selected when it becomes brighter.
- Auto2(IR Light): Suitable when using near-infrared light source at night.
- Auto3(Super Chrome Compensation(SCC)): Suitable to keep the color mode even under darker light condition.
Level
- Select the threshold illuminance level (brightness) to switch between the color mode and the black & white mode.
Dwell time
- Select a wait time for switching between the color mode and the black & white mode.
White balance
- Color will be adjusted under the illumination condition.
|
ATW1: Select ATW1 under the standard 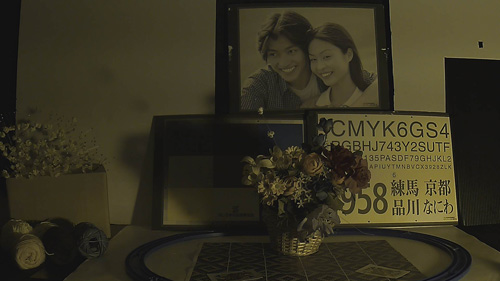 |
 |
DNR
- The digital noise reduction function reduces noise automatically under the condition of low illuminance.
|
High: High DNR, increases afterimage  |
Low: Low DNR, reduces afterimage 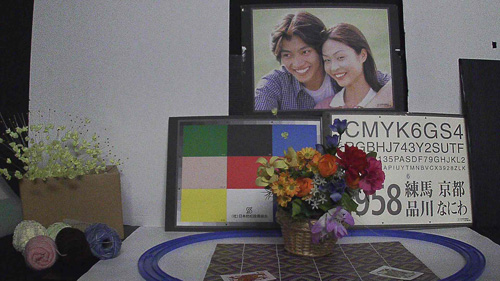 |
Stabilizer
- When ""On"" is selected for the image stabilizer, note the following:
- The view angle will become narrower and the resolution becomes lower.
- The image stabilizer function may not work for the photographic subjects.
- Select ""Off(1/30s)"" for ""Auto slow shutter"".
Chroma gain level
- Adjusts the chroma level (color density).
| When the cursor is moved in the [+] direction, the colors will become thicker.  |
When the cursor is moved in the [-] direction, the colors will be thinner. 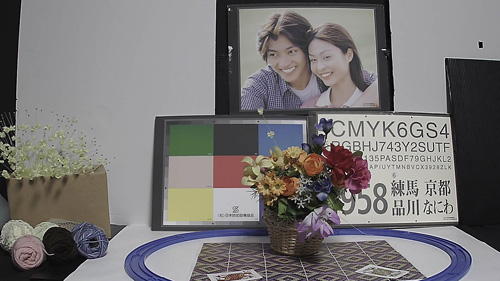 |
Aperture level
- Adjust the aperture level (outline compensation).
|
When the cursor is moved to the [+] direction, 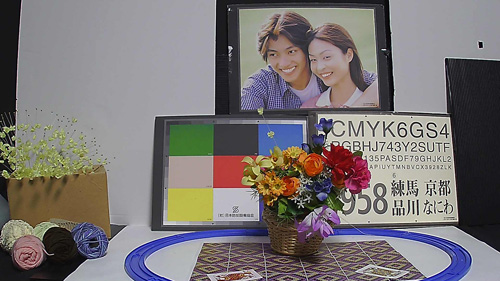 |
When the cursor is moved to the [-] direction,  |
Pedestal level
- Adjust the aperture level (outline compensation).
|
When the cursor is moved to the [+] direction,  |
When the cursor is moved to the [-] direction,  |