Camera registration
Last update: June, 2023
Camera registration to Milestone XProtect
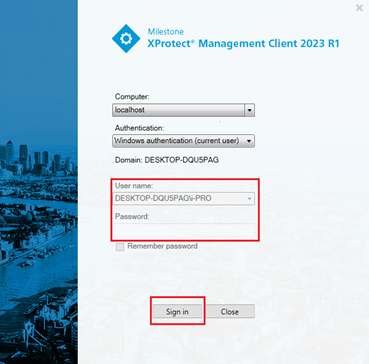
1. Start the XProtect Management Client.

2. Enter the username and password, then click the [Sign in] button.
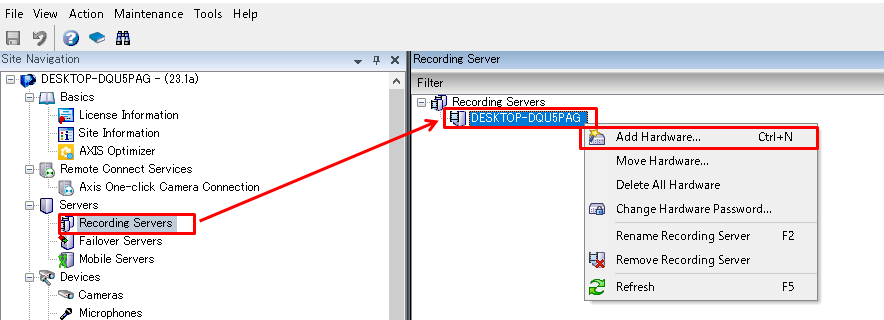
3. Left-click the [Recording Servers].
Right-click the [DESKTOP-********] and select "Add Hardware...".
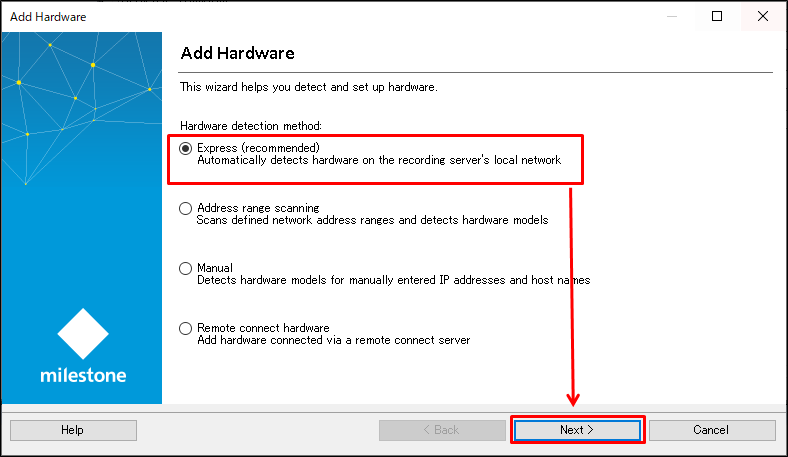
4. There are three methods for adding hardware:
A. Express (recommended)
B. Address range scanning
C. Manual
A. Express (recommended)
A-1. Check [Express (recommended)] on the hardware addition screen and click the [Next] button.
A-2. Select "HTTP (Unsecure)", enter the camera's "User name" and "Password", and click the [Next] button.
Camera detection may fail if started with the default HTTPS (secure) setting.

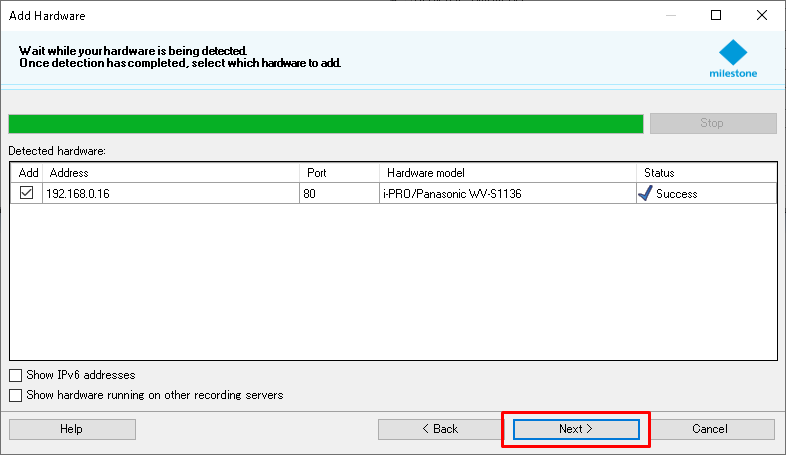
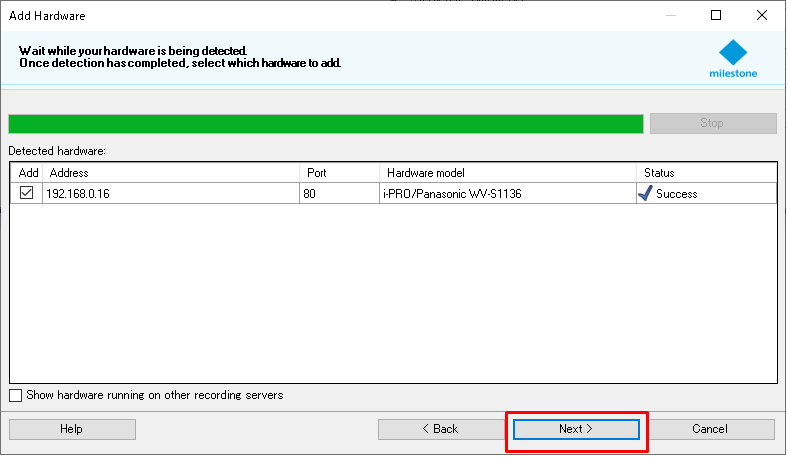
A-3. Start the detection, and when the status column displays "Success" click the [Next] button.
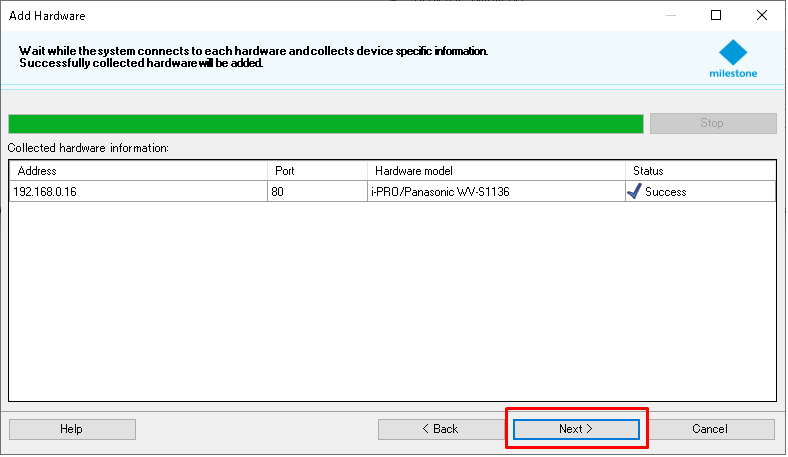
A-4. When information collection starts and "Success" is displayed in the status column, click the [Next] button.
B. Address range scanning
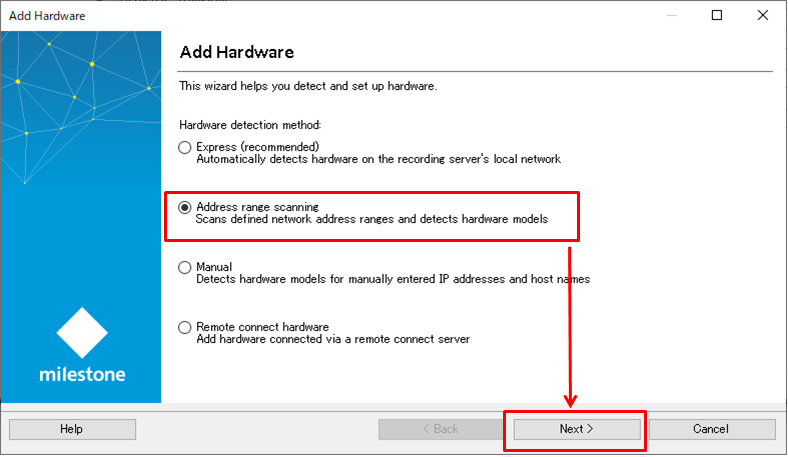
B-1. Check [Address range scanning] on the hardware addition screen and click the [Next] button.
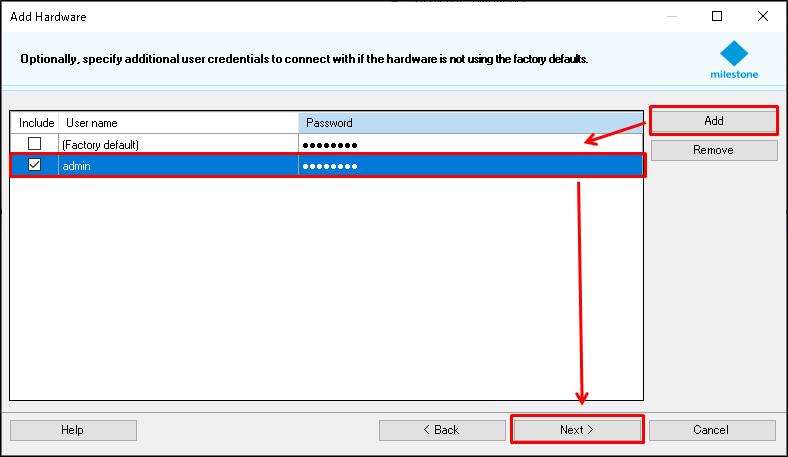
B-2. Enter the camera's "User name" and "Password", and click the [Next] button.

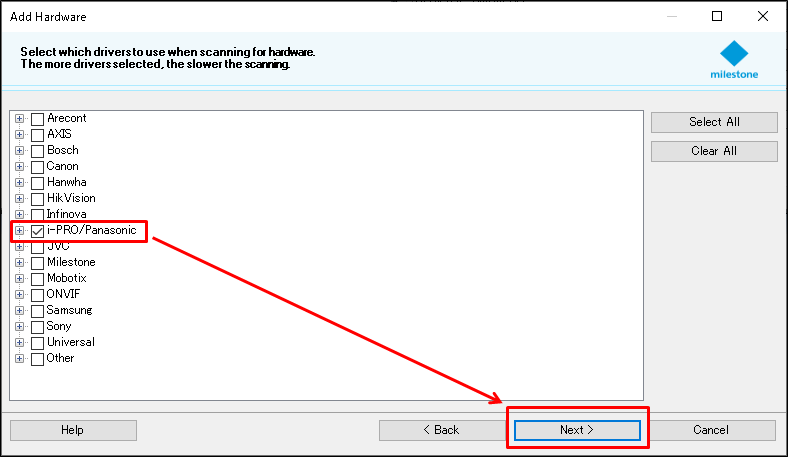
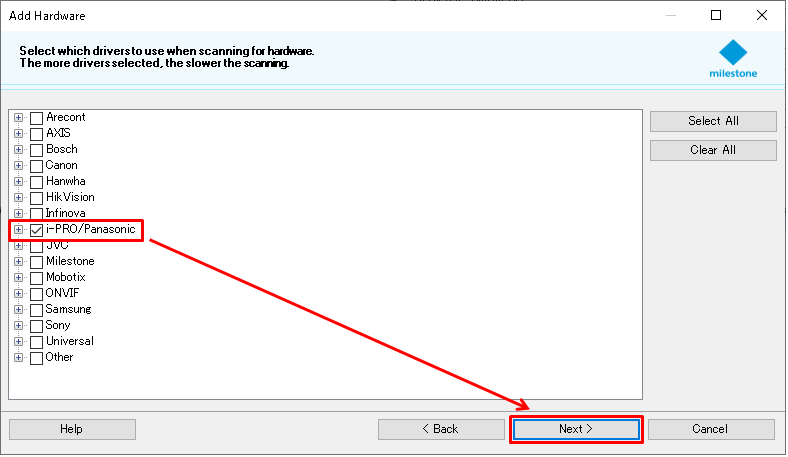
B-3. Check the [i-PRO/Panasonic] driver used for the hardware and click the [Next] button.
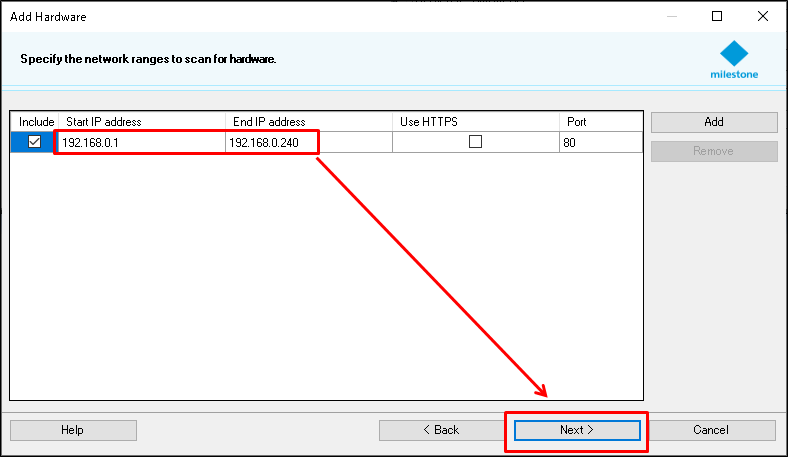
B-4. Specify the network range by entering the start and end IP addresses.
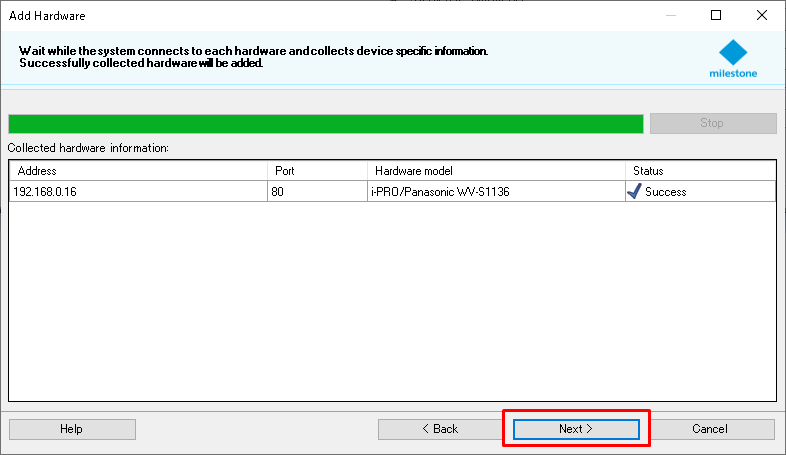
B-5. When the detection starts and "Success" is displayed in the status column, click the [Next] button.
B-6. When information collection starts and "Success" is displayed in the status column, click the [Next] button.
C. Manual
C-1. On the screen for adding hardware, check [Manual] and click the [Next] button.

C-2. Enter the camera's "User name" and "Password" in the added line for the new registration, and click the [Next] button.
C-3. Check the [i-PRO/Panasonic] driver to use for the hardware and click the [Next] button.
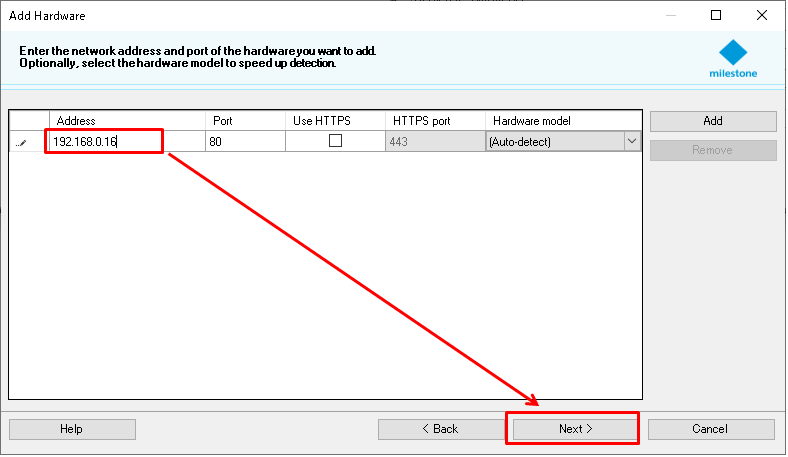
C-4. Enter the IP address of the camera to be registered and click the [Next] button.
Reference: When registering multiple cameras simultaneously,
clicking the [Add] button increases the address input line.
After entering the IP address of each registered camera, click the [Next] button.
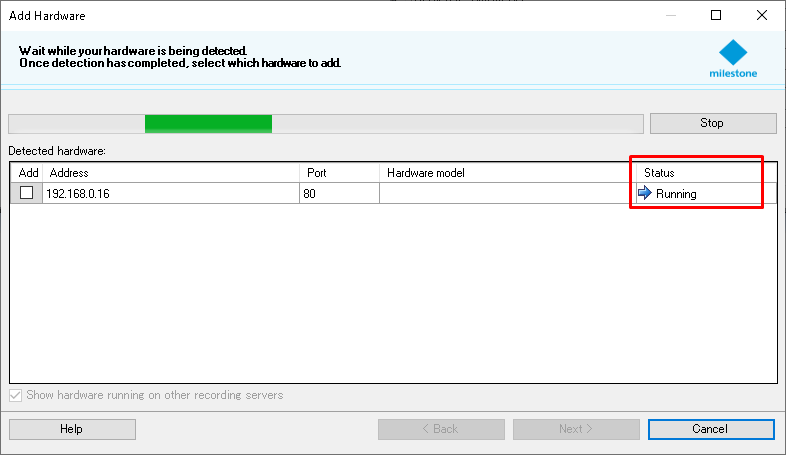
C-5. Camera detection will start, and the status will show as "Running".
C-6. Once detection is complete, when "Success" is displayed in the status column, click the [Next] button.

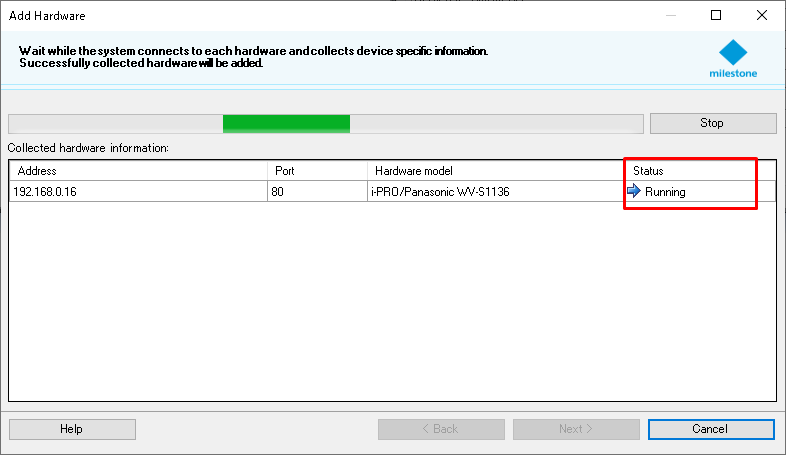
C-7. Information collection for the detected camera will start, and the status will show as "Running".
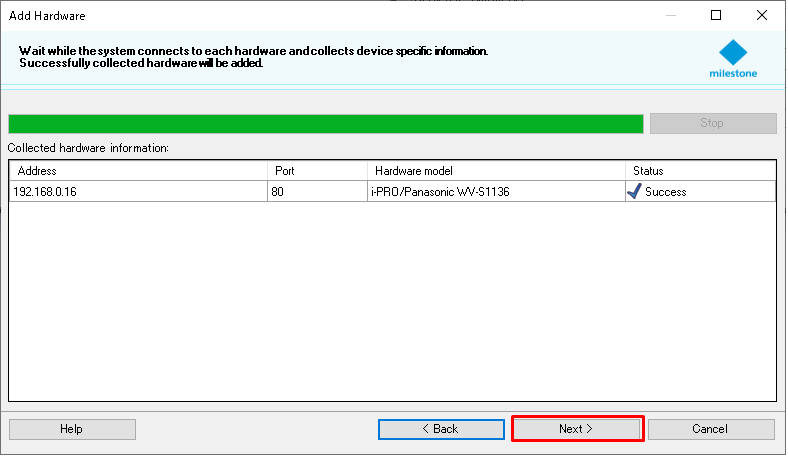
C-8. When information collection is completed and "Success" is displayed in the status column, click the [Next] button.
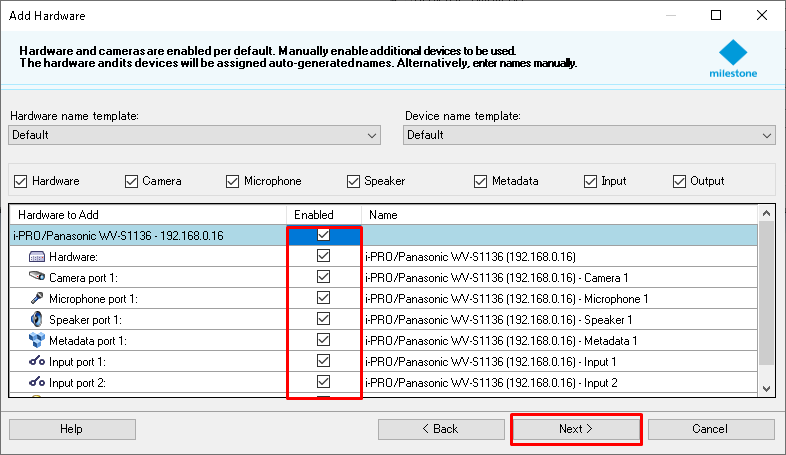
5. Enable the device. Check the necessary devices such as microphones
(checking the checkbox at the top will select all devices), and click the [Next] button.
6. Click the [Finish] button.

7. The registered camera is added to [DESKTOP-********] on the recording server and registration is complete.

Milestone XProtect Management Client 2023 R1 /DP 12.8a