AI On-site Learning
Last update: April, 2024
AI On-site Learning allows you to enhance AI analysis by adding objects based on customer needs and learning to improve accuracy.
For an overview, please refer to the AI On-site Learning page.
Preparation: AI-VMD must be version 3.41 or later
The procedures described here are for using i-PRO Maximizer.
For an overview or installer, please refer to the i-PRO Maximizer page.
<Setup using "i-PRO Configuration Tool for Milestone">
I will configure the AI On-site Learning settings using iCT for Milestone.
The initial startup procedure for iCT for Milestone is the same as steps 1 to 6 in the AI-VMD setup guide using the "Setup using i-PRO Configuration Tool for Milestone". Please refer to that for guidance.
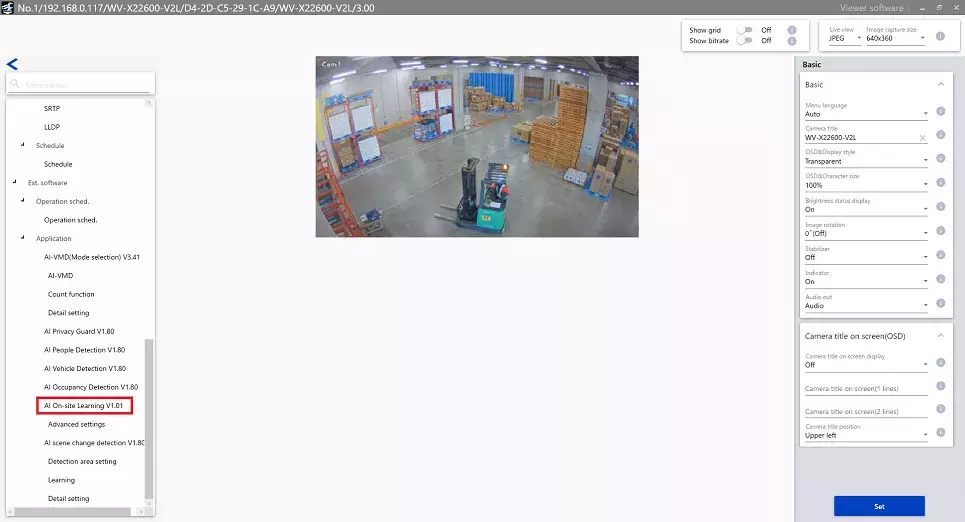
1. Select [Application] - [AI On-site Learning].
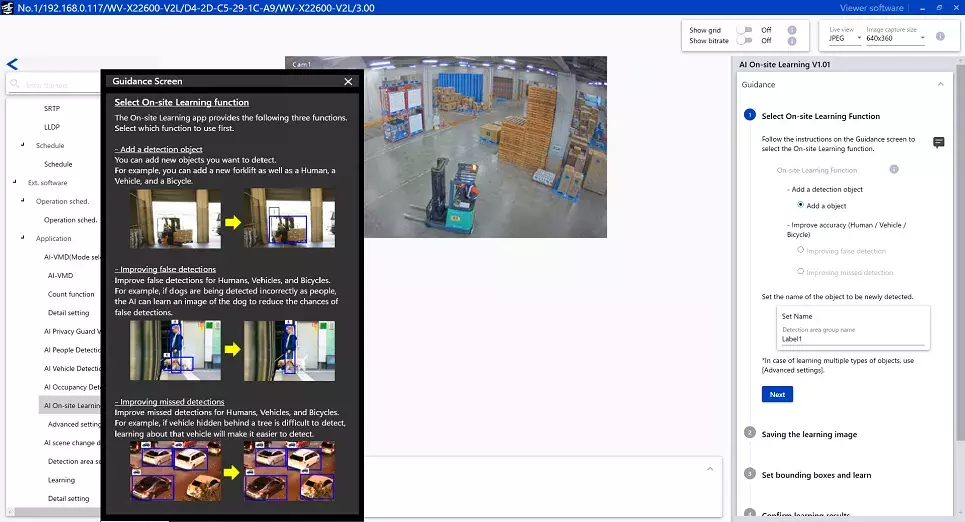
2. Please configure the settings following the guidance. This completes the On-site Learning setup for the camera.
Click here for details.
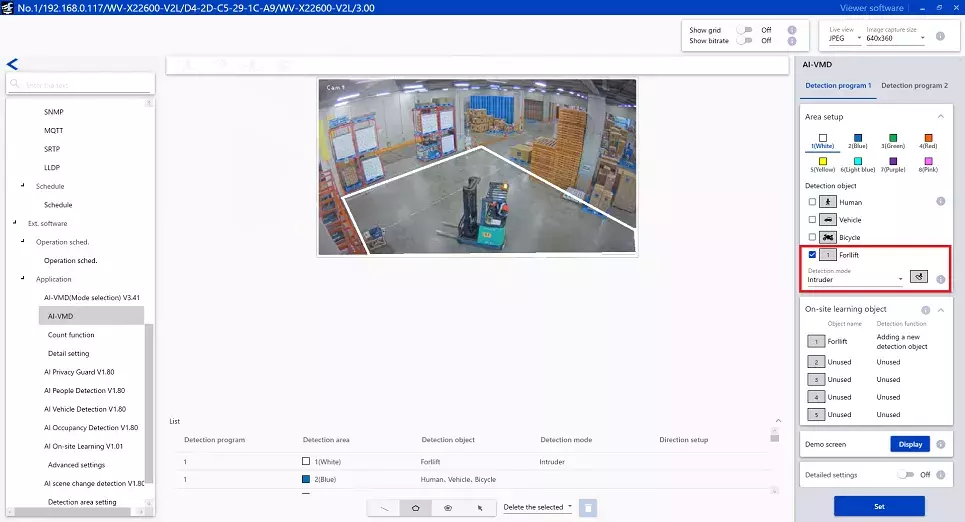
3. Select [Application] ‐ [AI-VMD].
Select the Detection name created in Step 2 for AI On-site Learning under Detection object.
Additionally, choose the Area setting and Detection mode "Intruder/Loitering/Direction".
<Setup in Xprotect Management Client>
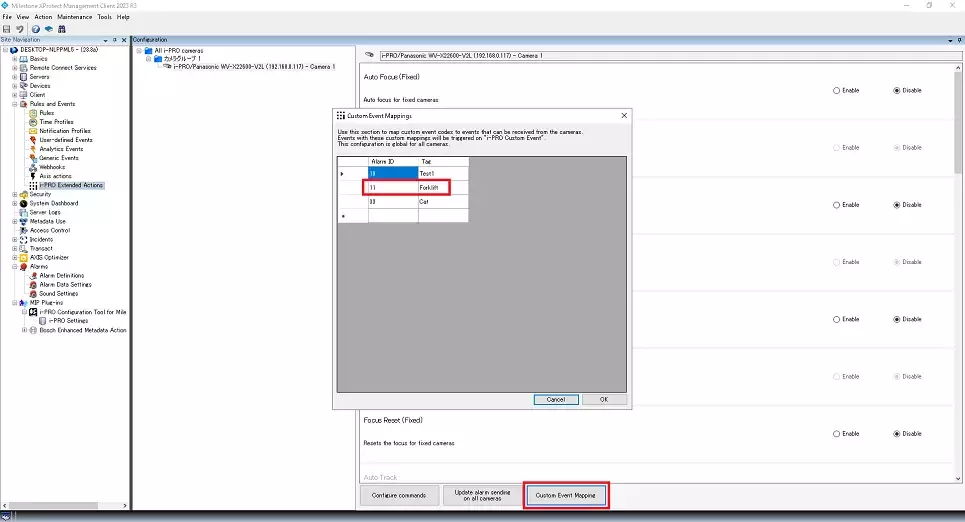
1. Perform the configuration for Custom Event Mapping.
[Rules and Event] ‐ [i-PRO Extended Actions]
Click on [Custom Event Mappings] and add the following details.
AlarmID: Input as appropriate by the user.
Tag: Specify the name or relevant information for the alarm target.
*This associates the alarm ID with the tag name.
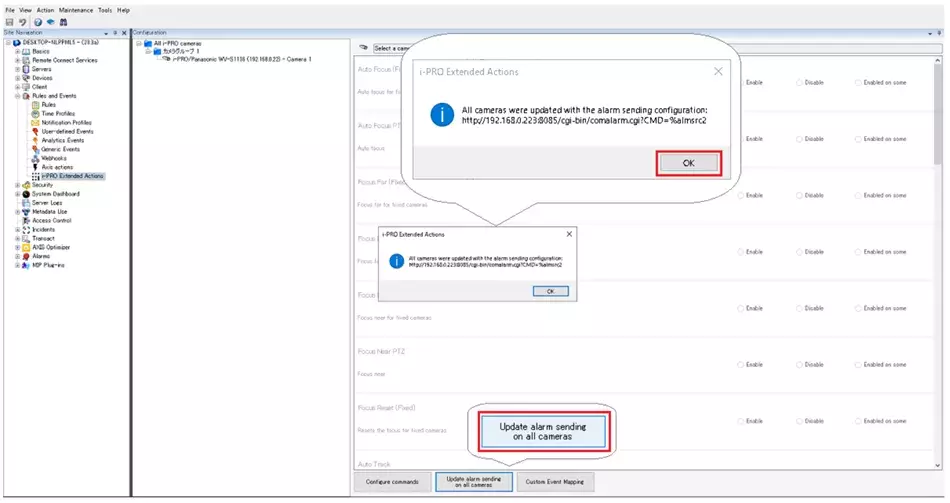
2. Send HTTP alarm notification settings to the camera.
[Rules and Event] ‐ [i-PRO Extended Actions]
Click the [Update alarm sending on all cameras] button. By doing this, HTTP alarm notification will be automatically set for the connected i-PRO camera.
A pop-up will appear with the updated information for all cameras, so click [OK].
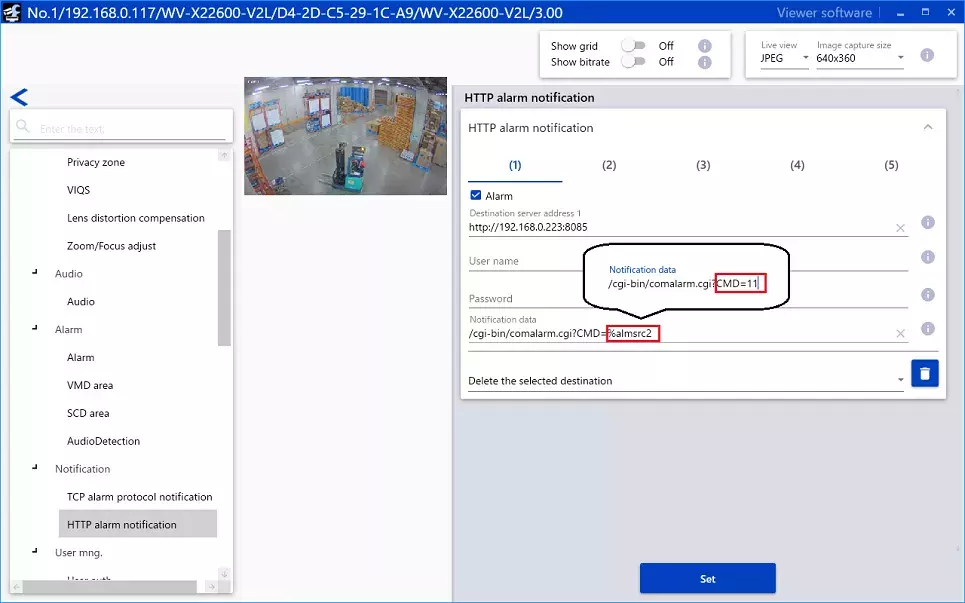
3. Select [Notification] ‐ [HTTP alarm notification]
Replace the "%almsrc2" in the notification data with the value of the Alarm ID set in Step 1.
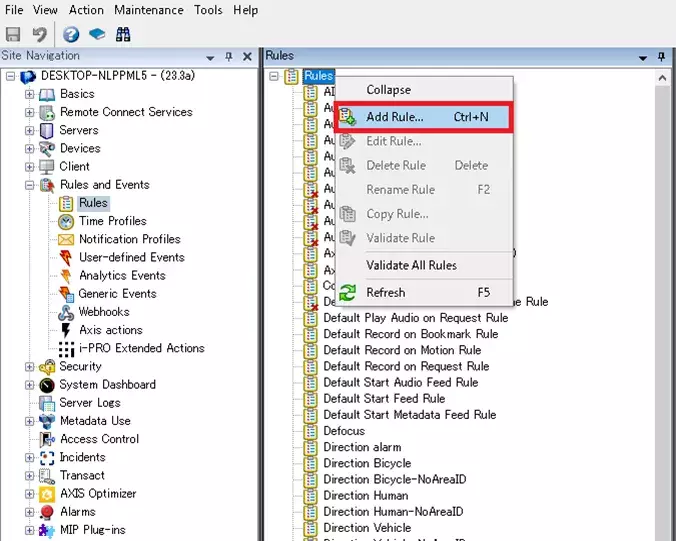
4. Return to Management Client settings.
Create a rule.
[Rules and Events] ‐ [Rules]
Click "Add Rule"
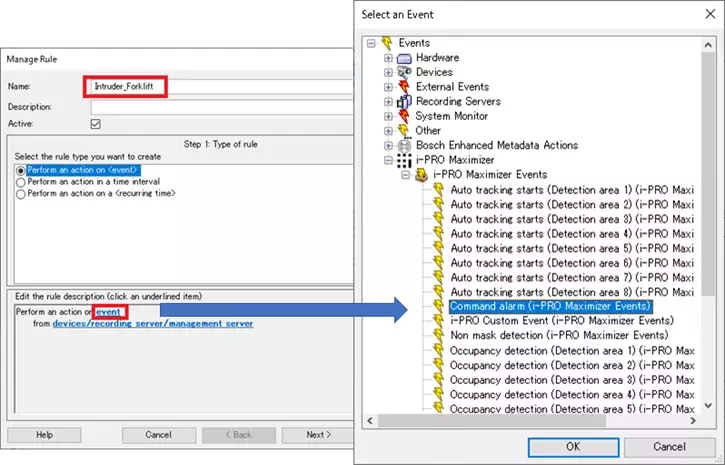
5. The [Select an Event] screen will appear.
Select [i-PRO Maximizer] - [i-PRO Maximizer Events] - [i-PRO Custom Event] and click the [OK] button.
The steps from here on are the same as from AI-VMD <Alarm setup in Xprotect Management Client> Step.7 to 13 onwards.
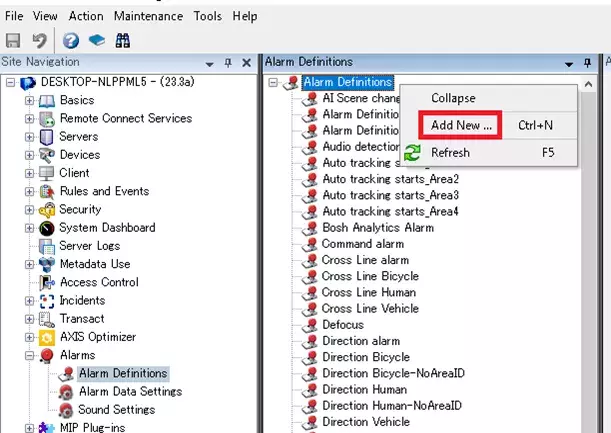
6. Select [Alarms] ‐ [Alarm Definitions]
Click on [Alarm] - [Alarm Definitions] in the [Site Navigation] area.
Then right click on [Alarm Definitions] in the [Alarm Definitions] area and select [Add New...].
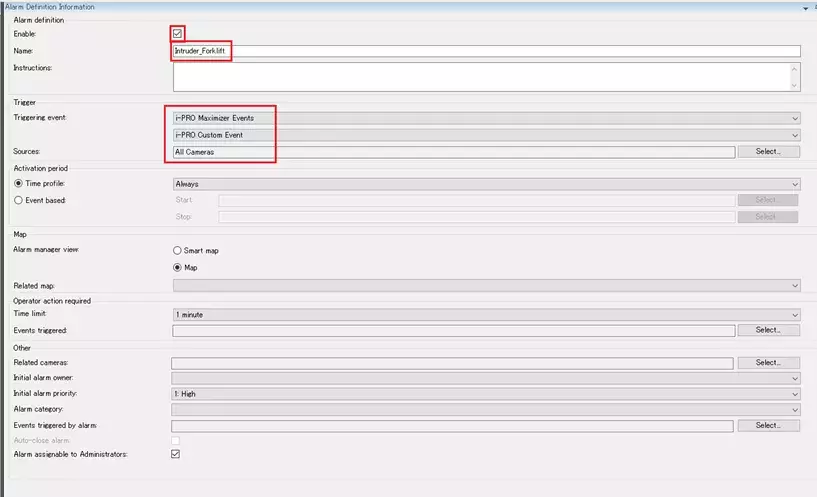
7. After configuring the settings, save them with [Save] at the top left of the screen.
Enable:Check the checkbox
Name:Enter the user defined name
Triggering event:(1st row):"i-PRO Maximizer Events"
Triggering event:(2nd row):"i-PRO Custom Event"
Sources:"All Cameras" or "Select target camera"
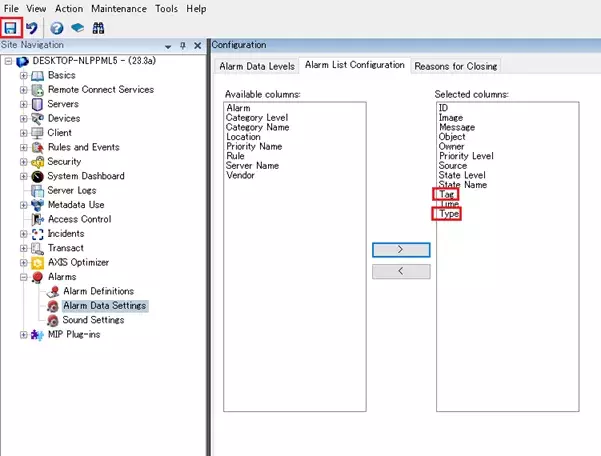
8. Select [Alarms] ‐ [Alarm Data Settings] - [Alarm List Configuration]
Move "Tag" and "Type" from Available columns to Selected columns, then save the settings by clicking the Save button at the top left.
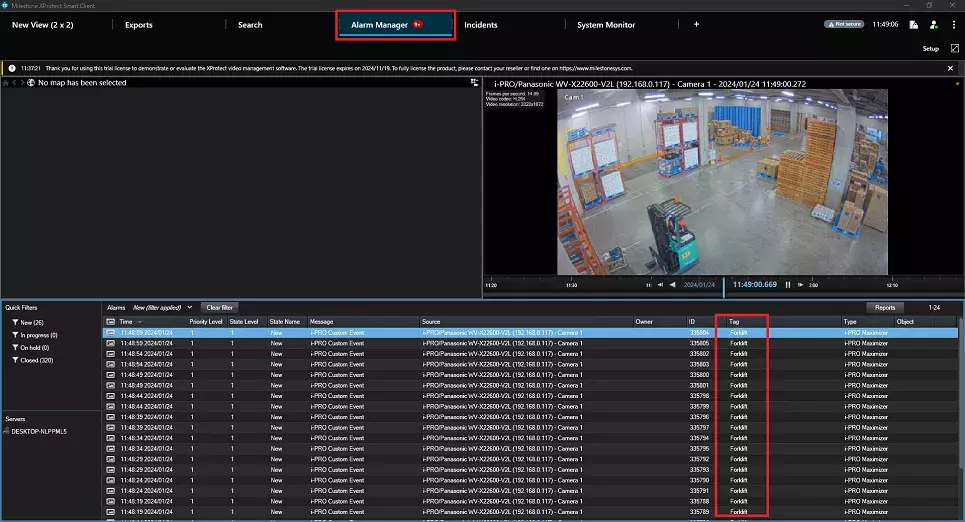
<Confirmation of AI-VMD alarm reception in XProtect Smart Client>
Click the [Alarm Manager] tab, and the alarm history will be displayed.
The triggering event name that is set in Step 15 of <Alarm setup in Xprotect Management Client> will be shown in the Tag column.
Milestone XProtect Management Client 2023 R3 /DP 13.1b